
Chrysanthemums, often referred to as “mums,” are vibrant, colorful flowers that bring life and joy to any garden. Among the many varieties, yellow chrysanthemums stand out for their bright, cheerful hue, making them a popular choice for gardeners looking to add a splash of color. Growing yellow chrysanthemums from cuttings is not only a cost-effective way to propagate these beautiful flowers, but it’s also an enjoyable gardening project that can yield stunning results. In this comprehensive guide, we will explore the process of growing yellow chrysanthemums from cuttings, including the necessary materials, step-by-step instructions, and helpful tips to ensure success.
Why Choose Yellow Chrysanthemums?
Yellow chrysanthemums are known for their sunny disposition and are often associated with positivity and happiness. They bloom in various shapes and sizes, offering versatility in floral arrangements and garden designs. Additionally, chrysanthemums are hardy perennials, meaning they can survive winter and return year after year, making them a great investment for any garden.
Benefits of Propagating from Cuttings
- Cost-Effective: Propagating from cuttings saves you money compared to purchasing new plants.
- Maintaining Varieties: By taking cuttings from your favorite plants, you can ensure the new plants will have the same characteristics and beauty as the parent plant.
- Easy Process: Growing chrysanthemums from cuttings is relatively simple and does not require advanced gardening skills.
- Faster Growth: Cuttings can root and grow quicker than seeds, allowing you to enjoy your beautiful blooms sooner.
Materials Needed
Before you begin, gather the following materials:
- Healthy Yellow Chrysanthemum Stems: Choose a robust parent plant from which to take cuttings.
- Sharp Scissors or Pruning Shears: For clean cuts.
- Pot or Seed Tray: To hold the cuttings while they root.
- Potting Soil: A quality potting mix that provides good drainage and nutrients.
- Plastic Bag or Plastic Wrap: To create a humid environment for the cuttings.
- Water: For misting and soaking the cuttings.
- Rooting Hormone (optional): This can help promote faster root development.
Step-by-Step Instructions
Step 1: Choose the Right Time
The best time to take cuttings from your yellow chrysanthemums is in the spring or early summer when the plants are actively growing. Avoid taking cuttings during extreme heat or cold to ensure better success rates.
Step 2: Take Cuttings
- Select a Healthy Stem: Look for a strong, healthy stem that is free from flowers. Choose a stem that is 4-6 inches long, preferably from the top portion of the plant.
- Make the Cut: Using sharp scissors or pruning shears, cut the stem just below a leaf node (the point where leaves attach to the stem). This area has a higher concentration of growth hormones, increasing the likelihood of successful rooting.
Step 3: Prepare the Cuttings
- Remove Lower Leaves: Strip away the lower leaves on the stem, leaving only two or three leaves at the top. This helps reduce moisture loss and directs energy towards root development.
- Optional – Apply Rooting Hormone: Dip the cut end of the stem into rooting hormone. This step is optional but can speed up the rooting process and improve success rates.
Step 4: Plant the Cuttings
- Fill the Pot: Fill your pot or seed tray with a quality potting mix. Ensure the soil is loose and well-draining to prevent root rot.
- Make Holes for the Cuttings: Use your finger or a pencil to create small holes in the soil, spaced a few inches apart, depending on how many cuttings you have.
- Insert the Cuttings: Place each cutting into the holes, ensuring that the cut end is buried about 2 inches deep. Gently firm the soil around the base of each cutting to provide stability.
Step 5: Create a Humid Environment
- Cover the Pot: Lightly mist the soil with water to moisten it. Then, cover the pot with a plastic bag or plastic wrap to create a greenhouse effect, which helps maintain humidity around the cuttings.
- Ensure Airflow: Make a few small holes in the plastic to allow for some airflow, preventing mold and mildew from developing.
Step 6: Watering and Care
- Mist Regularly: Keep the soil moist by lightly misting it regularly. Avoid overwatering, as soggy soil can lead to rot.
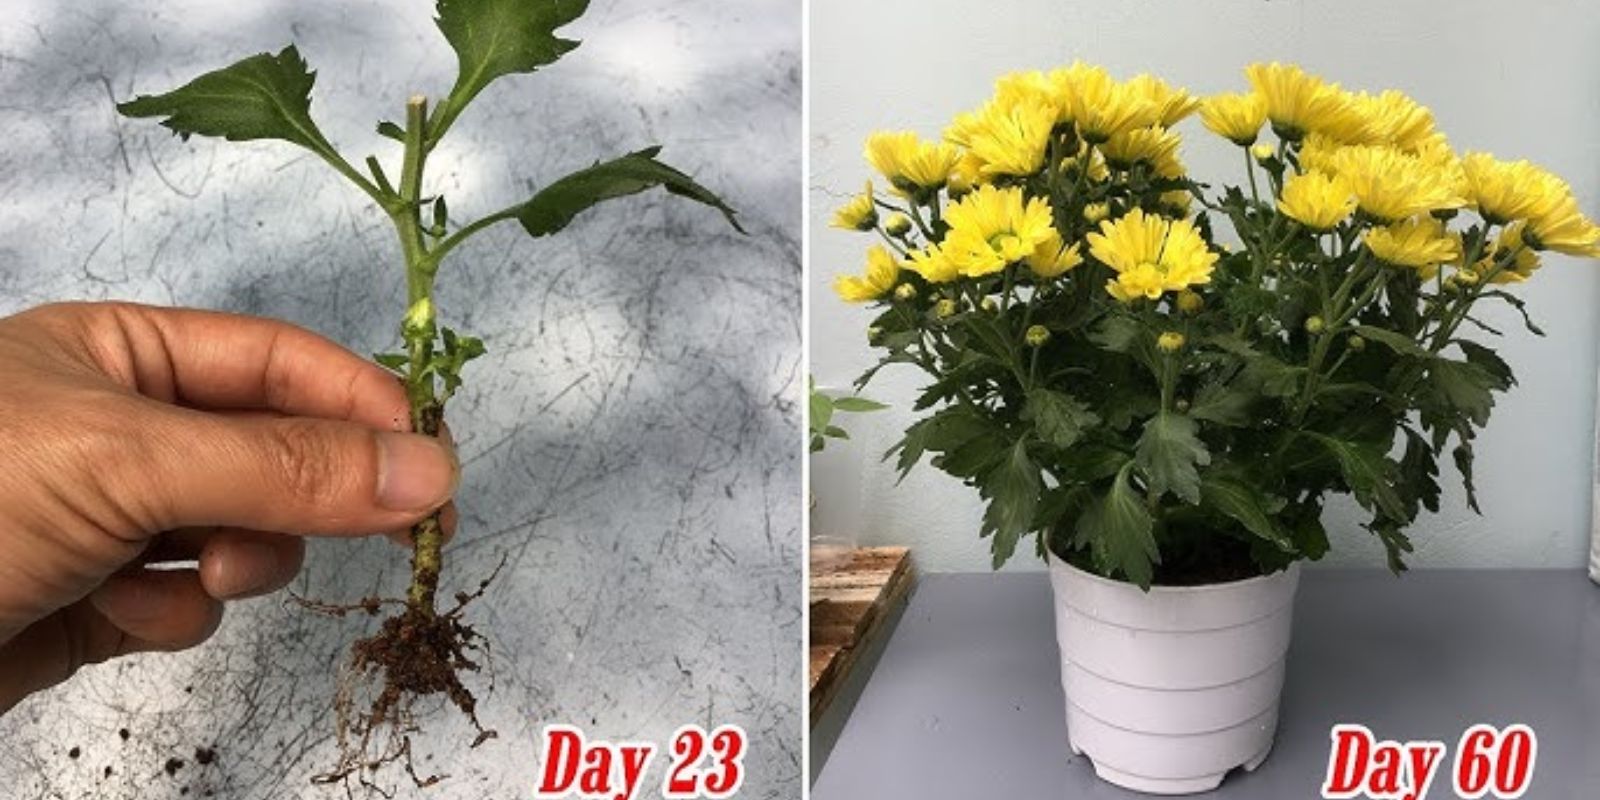
- Check for Roots: After about 2-4 weeks, gently tug on the cuttings. If you feel resistance, the roots are forming. If not, give them more time to root.
- Provide Indirect Light: Place the pot in a bright area with indirect sunlight. Direct sunlight can be too intense for young cuttings.
Step 7: Transplanting
- Prepare for Transplanting: Once the cuttings have developed strong roots (usually after 4-6 weeks), it’s time to transplant them into larger pots or directly into the garden.
- Choose the Right Location: If planting outdoors, select a location that receives at least 6 hours of sunlight per day and has well-draining soil.
- Transplant Carefully: Gently remove the rooted cuttings from the pot and transplant them into their new location, ensuring not to damage the roots. Water thoroughly after transplanting to help settle the soil.
Tips for Success
- Be Patient: Rooting can take time, so be patient and give your cuttings the necessary care.
- Monitor for Pests: Keep an eye out for pests or diseases. Early intervention is key to protecting your plants.
- Fertilize Appropriately: Once the plants are established, you can begin fertilizing them with a balanced fertilizer every few weeks to promote healthy growth.
- Prune Regularly: As your chrysanthemums grow, regular pruning will encourage bushier growth and more blooms.
- Enjoy the Blooms: Once your yellow chrysanthemums are thriving, take the time to enjoy their beauty and share them with friends and family!
Conclusion
Growing yellow chrysanthemums from cuttings is a gratifying and straightforward process that allows you to multiply your favorite flowers while enhancing your garden’s beauty. With the right materials and a little patience, you can successfully propagate these vibrant blooms and enjoy their cheerful presence in your garden for years to come. Remember to take your time, follow the steps outlined above, and soon enough, you’ll have a stunning display of yellow chrysanthemums to admire. Happy gardening!
Call to Action
Now that you have the knowledge to grow yellow chrysanthemums from cuttings, it’s time to get started! Gather your materials, take your cuttings, and watch your garden flourish. Share your progress and any tips you discover along the way in the comments below! 🌼