
Turmeric, often referred to as the “Golden Spice,” is renowned for its vibrant color, rich flavor, and numerous health benefits. Traditionally grown in tropical climates like India and Southeast Asia, turmeric is a plant that many believe can only thrive in warm, humid conditions. However, with a little planning and the right techniques, you can successfully grow turmeric at home, even if you live in a colder climate.
In this comprehensive guide, we’ll walk you through everything you need to know about how to grow turmeric, no matter where you live. From preparing the soil to harvesting your spice, this guide will cover it all!
Why Grow Turmeric at Home?
Turmeric has gained popularity as both a medicinal herb and a culinary spice. Known for its anti-inflammatory and antioxidant properties, it has been used for centuries in traditional medicine. Growing your own turmeric at home allows you to ensure that you are getting the freshest, organic product, and it’s also a rewarding gardening project.
Not only will you enjoy the benefits of using your home-grown turmeric in teas, smoothies, curries, and more, but you’ll also add a beautiful, tropical plant to your garden or indoor space.
Step-by-Step Guide to Growing Turmeric
Step 1: Understanding the Basics of Turmeric Growth
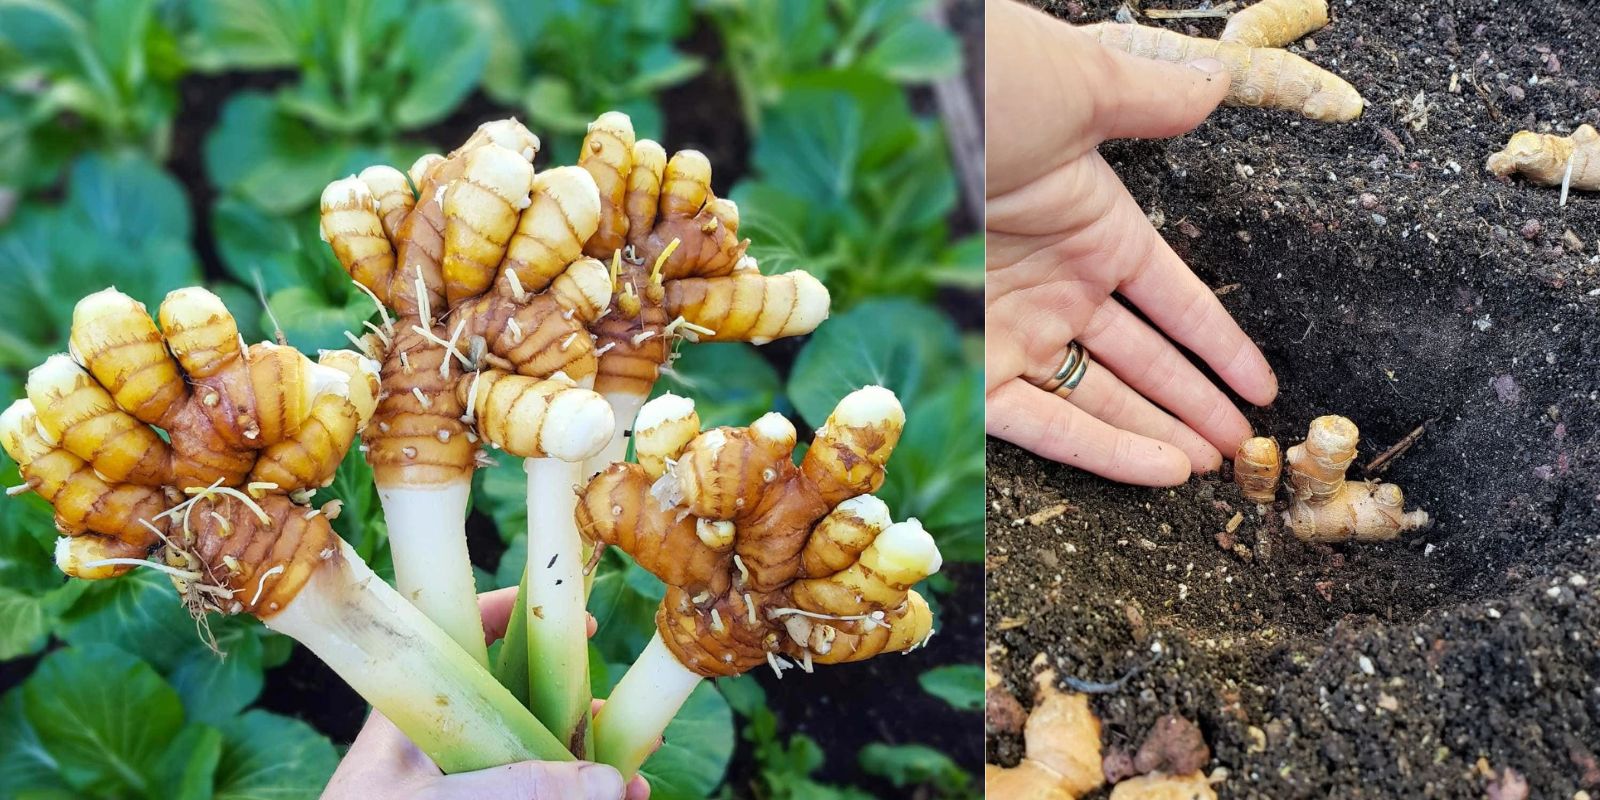
Turmeric (Curcuma longa) is a perennial herb in the ginger family that grows from rhizomes, which are underground stems. These rhizomes are the part of the plant that we harvest and use. While turmeric thrives in warm, tropical conditions, it can also be grown in temperate climates with a bit of extra care.
Turmeric prefers temperatures between 70°F (21°C) and 90°F (32°C). It is sensitive to frost, so if you live in an area with cold winters, you’ll want to grow your turmeric indoors or in containers that can be moved inside during the colder months.
Step 2: Obtaining Turmeric Rhizomes
The first step in growing turmeric is to obtain fresh rhizomes. You can buy these at your local nursery or even at a grocery store that sells organic turmeric. When choosing rhizomes, look for firm, plump pieces with visible buds or “eyes.” These buds are where new shoots will emerge.
If you can’t find rhizomes with buds, don’t worry! Store them in a warm, dark place for a few days, and they will begin to sprout.
Step 3: Preparing the Soil
Turmeric thrives in loose, well-drained, and nutrient-rich soil. It prefers loamy or sandy soil with plenty of organic matter. Before planting, mix compost or well-rotted manure into your garden bed or potting mix. Turmeric is a heavy feeder, so rich soil will help it grow strong and healthy.
If you’re planting turmeric in containers, choose pots that are at least 12 inches deep and have drainage holes to prevent waterlogging.
Step 4: Planting Turmeric Rhizomes
Once you have your rhizomes and prepared soil, it’s time to plant!
- Break the Rhizomes: Cut your rhizomes into 2-inch pieces, making sure each piece has at least one bud.
- Planting Depth: Plant each piece 2-3 inches deep in the soil with the buds facing upwards.
- Spacing: If planting in a garden bed, space the rhizomes 12-16 inches apart to give them room to grow.
Turmeric grows best when planted in spring or early summer, giving it enough time to grow before the colder months.
Step 5: Watering and Care
Turmeric thrives in consistently moist soil but doesn’t like to sit in water. Water your turmeric regularly, keeping the soil damp but not soggy. In dry climates, you may need to water more frequently. However, avoid overwatering, as this can cause the rhizomes to rot.
Turmeric prefers indirect sunlight, so if you’re growing it indoors or in a greenhouse, make sure it gets enough light without being exposed to direct, harsh sunlight.
You can also mulch around your turmeric plants to help retain moisture in the soil.
Step 6: Fertilizing
To ensure your turmeric grows strong and healthy, it’s essential to provide it with nutrients throughout the growing season. You can feed your plants with a balanced, organic fertilizer or liquid seaweed fertilizer every 4-6 weeks.
Turmeric is a heavy feeder, so regular fertilizing is key, especially if you are growing it in containers where nutrients are depleted faster.
Step 7: Growing Turmeric Indoors
If you live in a climate that experiences cold winters, you’ll want to grow turmeric indoors. Choose a large container and place it in a sunny spot, such as a windowsill or near a grow light. Turmeric grows well indoors as long as it’s kept warm and gets enough light.
Ensure your indoor space is humid enough. You can increase humidity by misting the leaves or placing a tray of water nearby.
Step 8: Harvesting Turmeric
Turmeric is ready for harvest 8-10 months after planting. You’ll know it’s ready when the leaves and stems start to turn yellow and dry out. Carefully dig up the rhizomes, being gentle to avoid damaging them.
Once harvested, wash the rhizomes thoroughly, and let them dry for a few days before storing them. You can store fresh turmeric in the refrigerator or freezer for future use.
Step 9: Storing and Using Turmeric
After harvesting, you can either use your turmeric fresh or dry it for long-term storage. To dry turmeric, boil the rhizomes for 30-45 minutes, then let them air dry for several days before grinding them into powder. Fresh turmeric can be stored in the fridge for a couple of weeks or frozen for up to six months.
Turmeric Troubleshooting: Common Issues and Solutions
While growing turmeric is relatively straightforward, there are a few potential problems you might encounter:
- Yellowing Leaves: If the leaves of your turmeric plant turn yellow prematurely, it could be a sign of overwatering or nutrient deficiency. Adjust your watering schedule and fertilize regularly.
- Fungal Diseases: Turmeric is susceptible to root rot and other fungal diseases, especially if the soil is too wet. Ensure proper drainage and avoid overwatering.
- Slow Growth: If your turmeric isn’t growing as quickly as expected, it may not be getting enough warmth or light. Move the plant to a warmer location or supplement with grow lights if necessary.
Growing Turmeric in Different Climates
Warm Climates
If you live in a warm, tropical climate, growing turmeric is relatively easy. Plant your rhizomes in the spring and let them grow throughout the warm months. You can leave the plants in the ground year-round and harvest them as needed.
Cooler Climates
In cooler climates, turmeric can still thrive with a bit of extra care. Start your turmeric indoors in early spring, and move it outside when the temperatures rise. In the fall, bring your plants back inside before the first frost. Growing turmeric in containers is an excellent option for cooler climates, as it allows for easy relocation.
Final Thoughts
Growing turmeric at home, no matter your climate, is a rewarding project that can provide you with fresh, organic turmeric year-round. From its numerous health benefits to its culinary uses, turmeric is a versatile and valuable plant to have in your garden. With a little attention and care, you can enjoy your own supply of this golden spice.
Get started today and share your turmeric-growing journey with us! 🌱✨
#GrowYourOwnSpice #TurmericGarden #OrganicGardening #GardeningHacks #HomeGardenIdeas #SpiceUpYourGarden