
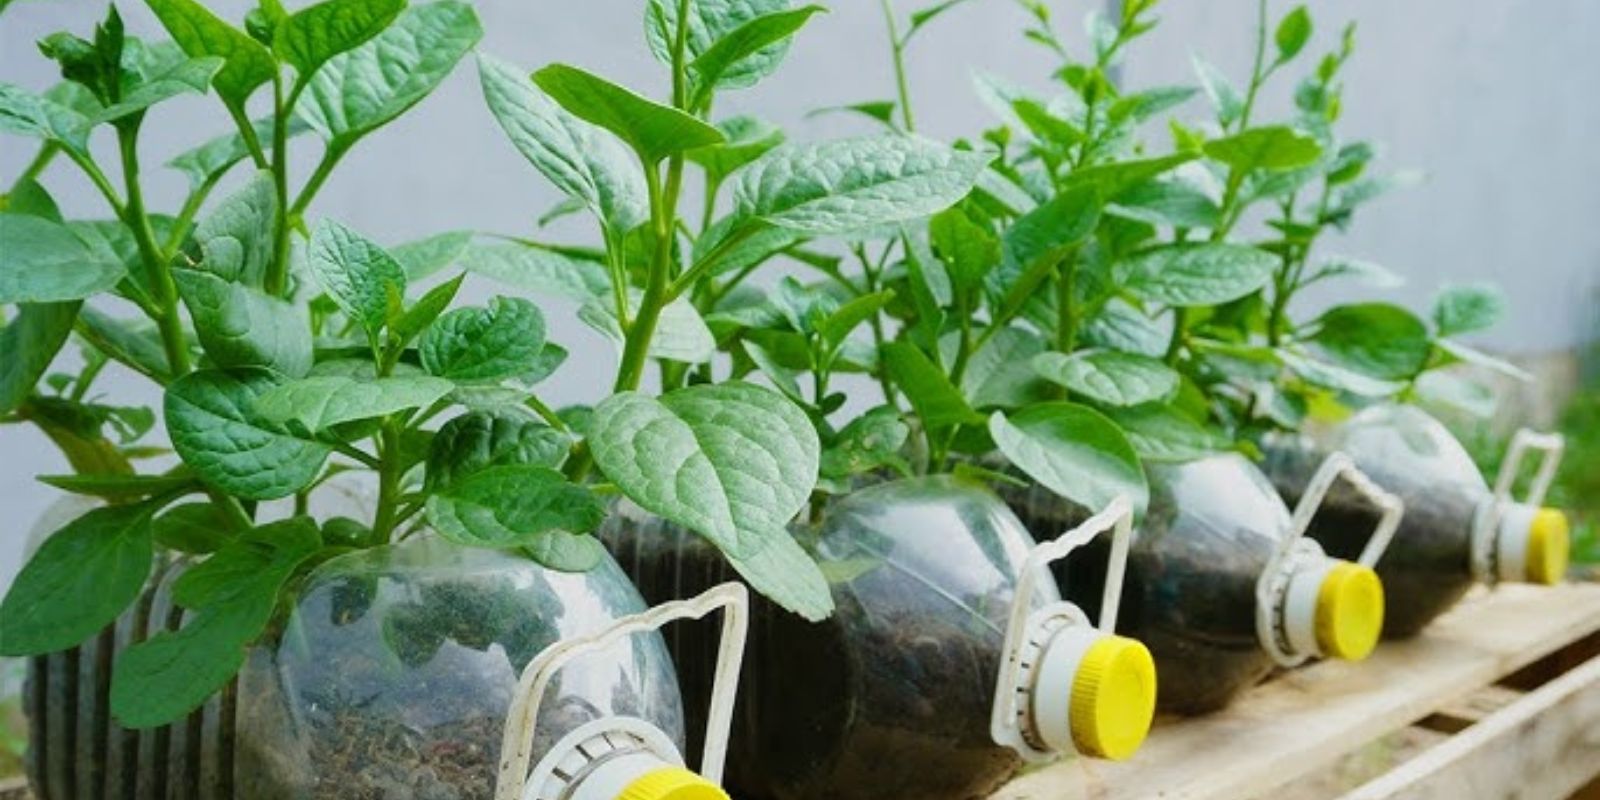
Spinach is one of the most versatile, nutrient-rich vegetables you can grow at home, whether you’re an experienced gardener or a complete beginner. The best part? You don’t need a huge backyard or fancy equipment to cultivate it. In fact, you can grow spinach in a waste bottle, transforming it into a sustainable gardening tool. This simple, eco-friendly method allows you to grow fresh spinach right on your windowsill, balcony, or even in a small apartment, making it an excellent choice for urban gardening.
Not only does growing spinach in waste bottles help you recycle, but it also gives you easy access to a steady supply of nutritious greens for your meals. Plus, it’s an incredibly rewarding and low-maintenance project. So if you’ve been wanting to try gardening but don’t have the space or time, here’s everything you need to know to get started with growing spinach in a waste bottle.
Why Grow Spinach in a Waste Bottle?
There are several benefits to growing spinach in a waste bottle:
- Space-Efficient: Growing spinach in containers like waste bottles is perfect for small spaces such as balconies, patios, or windowsills.
- Recycling: Using a waste bottle for planting is a sustainable and eco-friendly way to recycle plastic and keep it out of landfills.
- Ease of Maintenance: Spinach is relatively easy to grow, and using a bottle as a container simplifies the growing process.
- Quick Harvest: Spinach grows quickly, and you can harvest it in just a few weeks, making it one of the fastest crops to enjoy.
- Cost-Effective: By reusing a waste bottle, you eliminate the need to buy expensive planters, making this a low-cost gardening method.
What You’ll Need to Grow Spinach in a Waste Bottle
Before you begin, make sure you have the following materials:
- A clean, empty plastic bottle (preferably 2-liter size or larger)
- Scissors or a knife (to cut the bottle)
- Nutrient-rich soil (choose a well-draining soil for better results)
- Spinach seeds (you can opt for traditional spinach or baby spinach)
- A small shovel or spoon (to scoop the soil)
- A watering can or spray bottle (for watering the spinach)
- A sunny spot (spinach needs around 4-6 hours of sunlight daily)
Step-by-Step Guide to Growing Spinach in a Waste Bottle
Now that you have everything you need, let’s dive into the process of growing spinach in a waste bottle. It’s simple, easy, and fun!
Step 1: Prepare the Bottle
The first step in creating your spinach garden is to prepare your waste bottle. Choose a bottle that is clean and free from any labels. A 2-liter bottle is ideal for growing spinach, but you can also use larger or smaller bottles based on the available space. Here’s how to prepare the bottle:
- Cut the bottle: Use a pair of scissors or a knife to cut the bottle in half horizontally. You’ll want the top portion to be the larger part, which will hold the soil and the spinach seeds. The bottom portion can be discarded or used to catch excess water.
- Create drainage holes: Spinach requires well-draining soil, so it’s important to make sure your bottle has proper drainage. Use a sharp object like a knife or scissors to punch a few small holes in the bottom of the bottle. This will prevent the water from accumulating and causing root rot.
Step 2: Add Soil
Now it’s time to fill your bottle with soil. A good soil mix is essential for healthy spinach growth. You can either use a pre-mixed potting soil or create your own mixture by combining compost, peat moss, and perlite for better drainage. Make sure the soil is light, well-draining, and packed with nutrients.
- Fill the bottle: Pour the soil into the bottom part of the bottle (the larger half) until it is about 1-2 inches from the top. Make sure to press the soil gently so it is firm but not compacted.
- Level the soil: Use a spoon or your fingers to level the soil, ensuring an even surface where the seeds can be planted.
Step 3: Plant the Spinach Seeds
Next, it’s time to plant your spinach seeds. Spinach is an easy-to-grow vegetable that thrives in cool conditions, so this is the perfect time to get started.
- Sow the seeds: Gently scatter the spinach seeds over the surface of the soil. You can plant them about 1-2 inches apart, but if you want to grow a smaller amount of spinach, plant them closer together.
- Cover the seeds: Lightly cover the seeds with a thin layer of soil. Spinach seeds need a little bit of soil to protect them while they germinate, but they don’t require much to grow.
- Water gently: Use a watering can or spray bottle to lightly water the seeds. Make sure the water is gentle so that the seeds aren’t disturbed.
Step 4: Provide the Right Environment
Spinach grows best when it’s in the right environment, so make sure your spinach is getting the conditions it needs to thrive.
- Place in a sunny spot: Spinach loves sunlight and needs about 4-6 hours of direct sunlight every day. Place your waste bottle in a sunny location, such as a windowsill, balcony, or patio. If you live in an area with less sunlight, you may need to provide some artificial light.
- Maintain the temperature: Spinach grows best in cooler temperatures, ideally between 50-70°F (10-21°C). Avoid placing your container in direct sunlight during the hottest parts of the day, as this can cause the plants to wilt.
Step 5: Water Regularly
Watering your spinach plants regularly is crucial for their growth. Spinach requires consistent moisture to thrive, but it doesn’t like to be waterlogged. Follow these watering tips:
- Water consistently: Keep the soil moist, but not too wet. Spinach prefers a slightly damp soil environment, so make sure to check the soil regularly.
- Avoid overwatering: Excess water can lead to root rot, so ensure that the drainage holes in your waste bottle are working properly.
- Use a spray bottle: For a gentle watering technique, use a spray bottle to avoid disturbing the seeds or seedlings.
Step 6: Care and Maintenance
Once your spinach seeds have germinated and begun to grow, you’ll need to continue providing them with care.
- Thin the seedlings: As your spinach grows, you may find that some plants are too close together. Thin them by carefully removing the weakest seedlings, allowing the remaining plants to grow stronger and healthier.
- Fertilize occasionally: If your soil starts to look depleted, you can fertilize your spinach plants with an organic liquid fertilizer. However, spinach doesn’t require a lot of nutrients to grow, so be cautious not to over-fertilize.
- Remove pests: Keep an eye out for pests such as aphids or slugs. If you spot any, gently remove them by hand or use organic pest control methods like neem oil or insecticidal soap.
Step 7: Harvesting the Spinach
Spinach is a fast-growing plant, and you can begin harvesting it in just 4-6 weeks. When your spinach plants have reached maturity, it’s time to enjoy the fruits of your labor.
- Harvest the outer leaves: You can start harvesting by cutting the outer leaves with a sharp pair of scissors or garden shears. Leave the inner leaves to continue growing.
- Allow regrowth: If you leave the central part of the plant intact, it will continue to produce more leaves, providing a continuous harvest.
Conclusion: A Rewarding Experience
Growing spinach in a waste bottle is an easy, sustainable, and fun way to get fresh greens right at home. Whether you’re looking for a way to recycle plastic or you simply want to enjoy homegrown spinach, this method is perfect for beginners and experienced gardeners alike. By following these simple steps and taking care of your plants, you’ll have a steady supply of fresh, nutrient-packed spinach in no time.
So why not give it a try? Start your own mini spinach garden today and see how easy it is to grow healthy food in recycled containers!
Start growing spinach in your waste bottle now, and share your gardening journey with the world!
#HomeGardening #UrbanFarming #GrowYourOwn #SustainableLiving #RecycledGardening #ZeroWasteGarden #FreshGreens #SpinachGardening #EcoFriendly #GreenThumb