
Growing your own herbs at home is a rewarding experience, and rosemary (Rosmarinus officinalis) is one of the most popular choices for both beginner and experienced gardeners. This aromatic herb is not only a versatile addition to your culinary repertoire but also a beautiful, hardy plant that can thrive in a variety of conditions. One of the quickest and easiest ways to propagate rosemary is from cuttings. In this article, we will provide a comprehensive guide on how to grow Rosmarinus officinalis from cuttings, ensuring a fast and successful propagation process.
Introduction
Rosemary is a perennial herb that belongs to the mint family, Lamiaceae. Native to the Mediterranean region, it is well-known for its fragrant, needle-like leaves and beautiful blue flowers. Besides its culinary uses, rosemary has various medicinal properties and is often used in aromatherapy. Propagating rosemary from cuttings is an efficient way to expand your herb garden without having to purchase new plants. This method not only saves money but also allows you to clone your favorite rosemary varieties.
Benefits of Growing Rosemary From Cuttings
- Cost-Effective: Growing rosemary from cuttings eliminates the need to buy new plants.
- Faster Growth: Cuttings tend to establish and grow faster than starting from seeds.
- Clone Your Plants: Ensure you get the exact characteristics of the parent plant.
- Year-Round Propagation: You can take cuttings and propagate them at almost any time of the year.
Step-by-Step Guide to Growing Rosemary From Cuttings
1. Select Healthy Cuttings
Timing: The best time to take rosemary cuttings is during the spring or early summer when the plant is actively growing. However, with the right conditions, you can take cuttings at any time of the year.
Choosing the Cuttings: Select a healthy rosemary plant. Look for non-flowering stems that are free from disease and pests. Cut 4-6 inch long stems from the tips. It’s best to use new growth as it roots more easily than older, woody stems.
Tools: Use a pair of sharp, clean scissors or pruning shears to take the cuttings. This helps prevent any damage to the plant and reduces the risk of disease.
2. Remove Lower Leaves
Once you have your cuttings, remove the leaves from the bottom 2 inches of each stem. This part will be buried in the soil, and removing the leaves helps prevent rot and allows the cutting to focus on root development.
3. Prepare the Soil
Rosemary cuttings need a well-draining soil mix to root successfully. You can use a commercial seed-starting mix or make your own by combining equal parts of sand and peat moss. Fill a small pot or container with this soil mix, ensuring it is moistened but not waterlogged.
4. Dip in Rooting Hormone (Optional)
Although not strictly necessary, dipping the cut end of each cutting in rooting hormone can encourage faster and more robust root development. Rooting hormone is available in powder, liquid, or gel form at most garden centers. Simply dip the bottom of the cutting into the hormone before planting.
5. Plant the Cuttings
Insert the prepared cuttings into the soil, ensuring the stripped part is buried. Space the cuttings a few inches apart if you are planting multiple cuttings in the same pot. Firm the soil around each cutting to provide support and remove any air pockets.
6. Water Well
Water the cuttings thoroughly immediately after planting. Keep the soil consistently moist but not soggy. Overwatering can lead to rot, so it’s crucial to find a balance. Using a spray bottle can help maintain the right level of moisture without overdoing it.
7. Provide Light
Place the pot in a warm spot with indirect sunlight. A bright windowsill is ideal. Direct sunlight can be too harsh for the cuttings at this stage and may cause them to dry out. If you are propagating during the winter months or in a low-light environment, you might need to use grow lights to ensure the cuttings receive enough light.
8. Create a Humid Environment
Rosemary cuttings root best in a humid environment. You can create a mini greenhouse effect by covering the pot with a plastic bag or a clear plastic dome. Ensure the covering does not touch the cuttings. Open the covering for a few minutes each day to allow air circulation and prevent mold growth.
9. Monitor and Wait
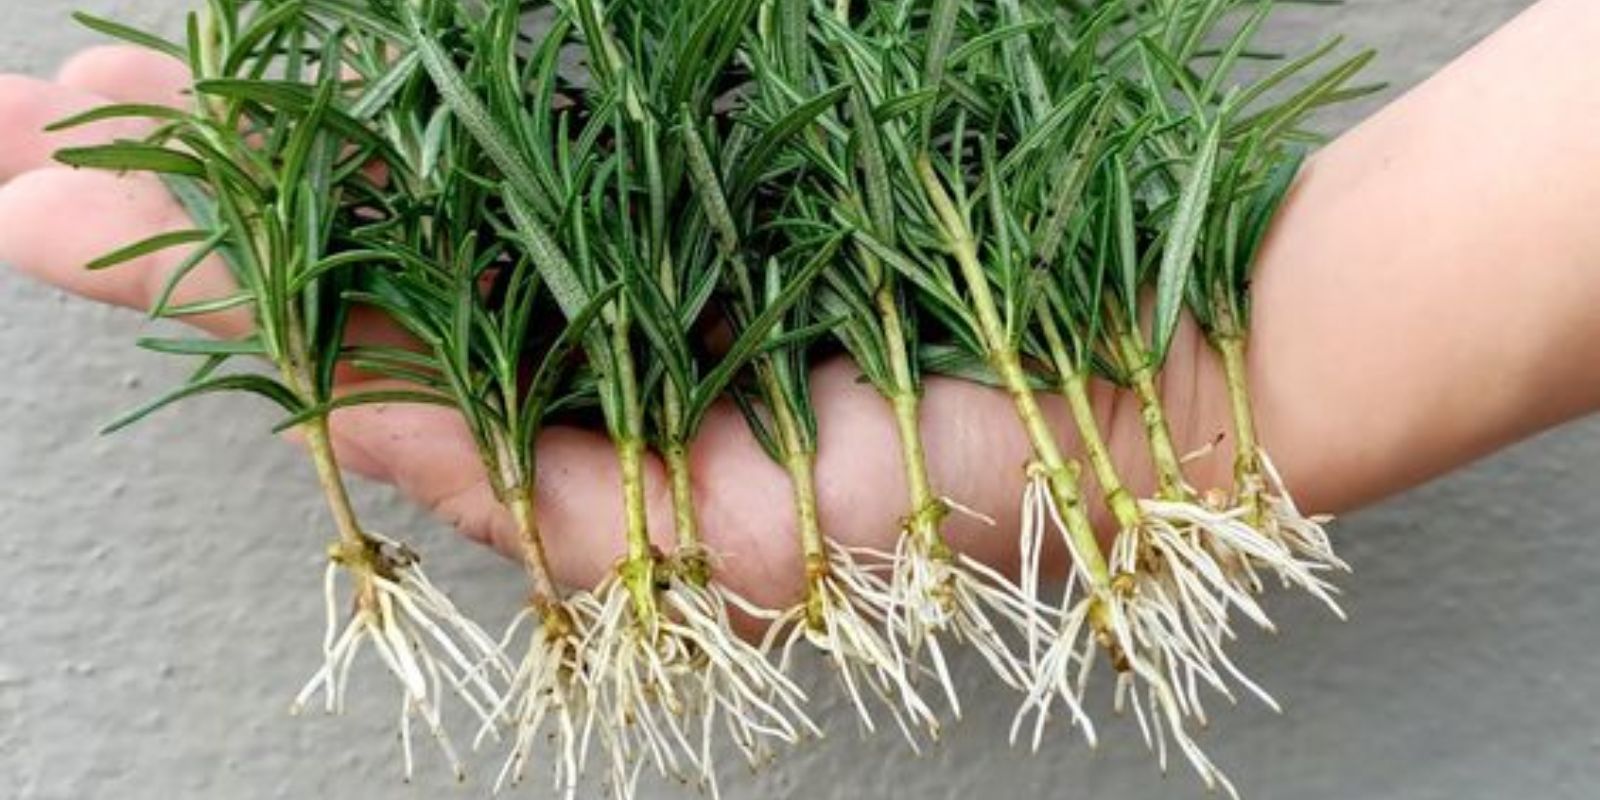
Check the cuttings regularly to ensure the soil remains moist and there are no signs of rot or mold. Root development usually takes about 4-6 weeks. You can test for root growth by gently tugging on the cuttings; if you feel resistance, roots have formed.
10. Transplant
Once the cuttings have developed a healthy root system, they are ready to be transplanted. Choose a larger pot or a suitable spot in your garden with well-draining soil. Carefully remove the cuttings from the pot, taking care not to damage the new roots. Plant them at the same depth they were growing in the propagation pot. Water well after transplanting.
Tips for Successful Rosemary Propagation
- Temperature: Rosemary prefers a warm environment. Aim to keep the temperature around 70°F (21°C) for optimal root development.
- Watering: Overwatering is a common mistake. Keep the soil moist but not saturated.
- Light: Ensure the cuttings receive enough light, but avoid direct sunlight until they are well-established.
- Patience: Rooting can take several weeks, so be patient and resist the urge to check for roots too frequently.
Conclusion
Growing Rosmarinus officinalis from cuttings is a straightforward and rewarding process. By following these steps, you can successfully propagate rosemary and enjoy the benefits of this versatile herb in your garden. Not only will you save money, but you’ll also have the satisfaction of nurturing new plants from cuttings. Whether you’re a seasoned gardener or a beginner, propagating rosemary from cuttings is an excellent way to expand your herb garden quickly and easily.
Start your rosemary propagation project today and soon you’ll have an abundance of fragrant, home-grown rosemary to use in your cooking, as well as beautiful plants to enhance your garden’s aesthetic appeal. Happy gardening! 🌿✨