
Roses are a symbol of love, beauty, and elegance, and growing them in your garden is a dream for many. While traditional propagation methods like cuttings and grafting are common, growing roses from a calyx offers a unique, sustainable, and exciting way to expand your rose collection. This article provides a comprehensive guide to growing roses from a calyx, turning a simple green part of the flower into a thriving rose plant. Let’s dive into the process!
What is a Calyx?
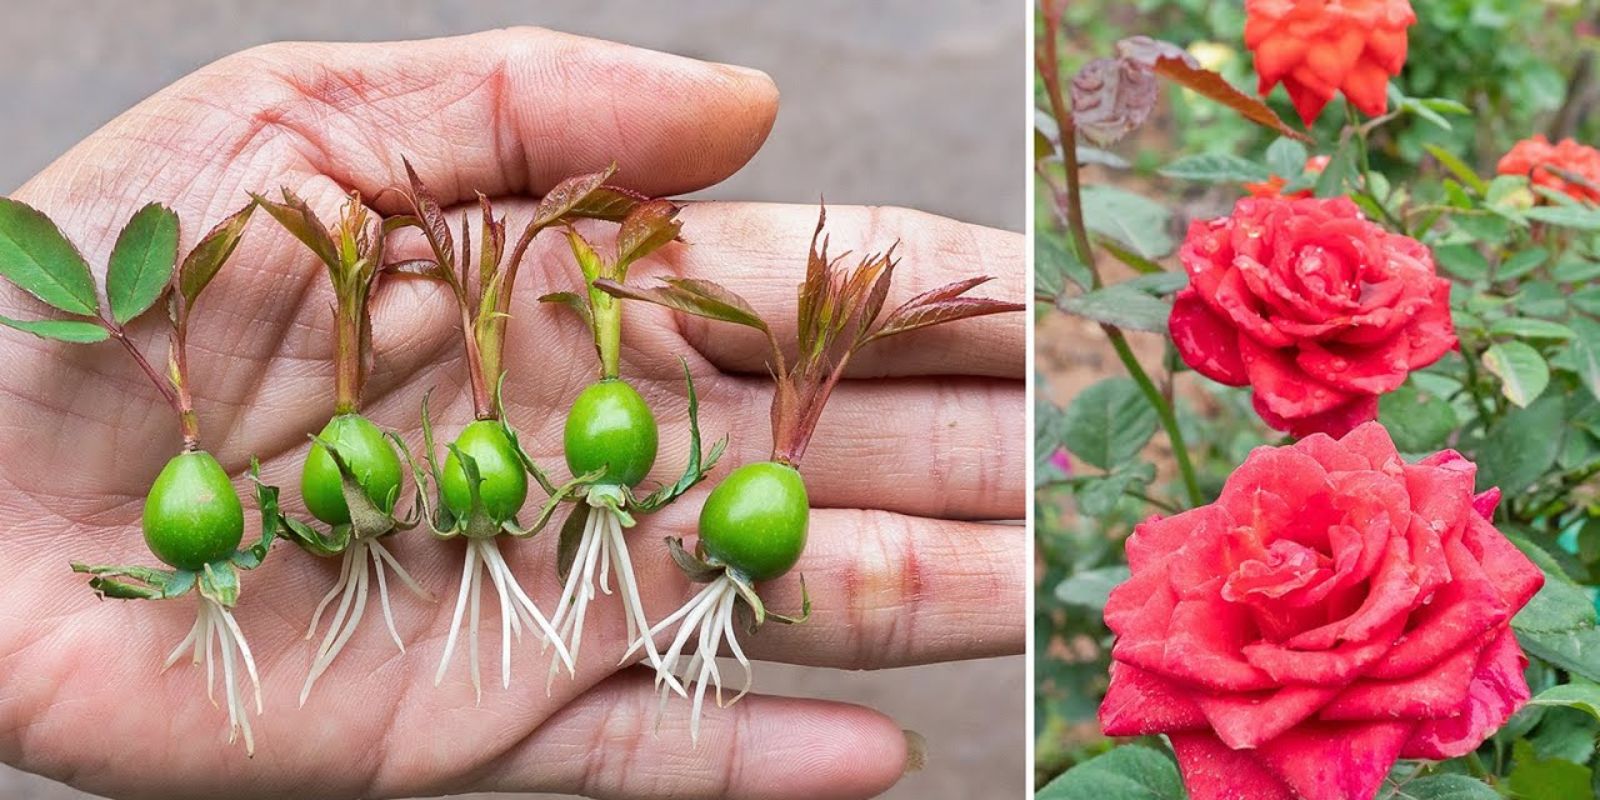
Before we get into the details, it’s important to understand what a calyx is. The calyx is the green, cup-like structure at the base of a flower that protects the petals during the bud stage. It plays a crucial role in the reproductive system of plants. With the right technique, this humble structure can be transformed into a new rose plant.
Why Grow Roses from a Calyx?
- Cost-Effective: No need to buy expensive plants or seeds—you can use roses you already have.
- Sustainability: Propagating plants reduces waste and contributes to eco-friendly gardening.
- Satisfaction: Watching a rose grow from such a small part of the plant is a deeply rewarding experience.
- Preservation: This method is ideal for preserving the genetics of a particular rose variety you love.
Materials Needed
To get started, you’ll need a few basic materials:
- A healthy rose with a strong calyx
- Sharp, clean scissors or pruning shears
- Well-draining potting soil or a mix of coco peat and compost
- Small pots or containers
- A watering can
- Plastic wrap or a small greenhouse for humidity control (optional)
- Rooting hormone (optional, but it can speed up root development)
Step-by-Step Guide to Growing Roses from a Calyx
1. Choose the Right Rose
Select a healthy rose with a fresh, intact calyx. Avoid roses that are wilted, diseased, or overly mature. Hybrid tea roses, floribundas, or miniature roses often work well for this method.
2. Prepare the Calyx
Using sharp, clean scissors or pruning shears, gently remove the flower petals, leaving the calyx intact. Make a clean cut at the base of the flower to detach it from the stem.
3. Apply Rooting Hormone (Optional)
Dip the base of the calyx in a rooting hormone powder or gel. While this step isn’t mandatory, it can significantly enhance root development and increase your chances of success.
4. Prepare the Soil
Choose a well-draining potting mix to prevent waterlogging. A mix of coco peat and compost provides the perfect balance of moisture retention and aeration. Fill a small pot or container with the prepared soil.
5. Plant the Calyx
Place the calyx upright in the soil, ensuring that the base is in contact with the soil. Gently press the soil around the calyx to secure it in place. Avoid burying it too deep; only the base should be covered.
6. Water Thoroughly
Water the soil lightly but thoroughly to settle it around the calyx. Be careful not to overwater, as excessive moisture can lead to rot.
7. Create a Humid Environment
Roses thrive in humid conditions during the early stages of growth. Cover the pot with plastic wrap or place it in a small greenhouse to maintain high humidity. Make sure to poke a few holes in the plastic wrap for ventilation.
8. Provide Proper Lighting
Place the pot in a location with indirect sunlight. Direct sunlight can be too harsh for the calyx during the rooting phase. After new growth appears, gradually introduce it to more sunlight.
9. Monitor and Maintain
Check the soil regularly to ensure it stays moist but not waterlogged. Keep an eye out for any signs of mold or rot, and remove the plastic wrap if excessive condensation forms.
10. Wait for Roots and Shoots
Be patient! It may take several weeks for roots and shoots to develop. Once you see new growth, it’s a sign that the calyx has successfully taken root.
11. Transplanting
When the new plant is strong enough and has developed a healthy root system, transplant it into a larger pot or directly into your garden. Ensure the new location has well-draining soil and receives plenty of sunlight.
Common Challenges and Solutions
- Rotting Calyx: Ensure proper drainage and avoid overwatering. Use a fungicide if necessary.
- No Root Growth: Be patient, and consider using rooting hormone for better results.
- Pests or Disease: Keep the environment clean and monitor for any signs of pests. Neem oil or an organic pesticide can help.
Caring for Your New Rose Plant
Once your calyx has grown into a healthy rose plant, follow these care tips:
- Watering: Water deeply once or twice a week, depending on the weather.
- Fertilizing: Feed with a balanced rose fertilizer during the growing season.
- Pruning: Remove dead or diseased stems to encourage healthy growth.
- Pest Control: Keep an eye out for aphids, spider mites, and other common rose pests.
Tips for Success
- Timing Matters: Spring and early summer are the best times to try this method, as the weather is conducive to growth.
- Healthy Specimens: Always use roses that are free from disease or pests for better results.
- Experiment: Not every calyx will succeed, so try propagating multiple calyces to increase your chances.
Conclusion
Growing roses from a calyx is a fascinating and fulfilling way to propagate these beloved flowers. With just a little patience and care, you can transform a simple green structure into a flourishing rose plant that adds beauty and fragrance to your garden. Whether you’re a seasoned gardener or a beginner, this method is worth trying.
Have you ever propagated roses using this technique? Share your experiences, tips, or photos in the comments below! 🌹✨
#GrowRosesAtHome #RosePropagation #DIYGardening #SustainableGardening #GardeningHacks #GardenInspiration #RosesForLife