
Growing rice may seem like a challenge reserved for large fields and specialized farms, but you can successfully cultivate it at home using store-bought brown rice. Not only is it a rewarding experience, but growing your own rice allows you to connect more deeply with the food you consume. This article will provide a comprehensive guide on how to grow rice from brown rice seeds in a pot at home. From preparation to harvesting, you’ll learn everything you need to know to embark on this exciting gardening adventure.
Understanding Rice Cultivation
Rice (Oryza sativa) is a staple food for over half of the world’s population. It thrives in warm, humid conditions, making it suitable for many regions around the globe. While commercial rice production requires extensive land and resources, growing it in a pot at home allows you to manage the process on a smaller scale. The beauty of using store-bought brown rice is that it is typically unprocessed and can germinate, making it an excellent choice for home cultivation.
Why Brown Rice?
Brown rice is whole grain rice with the outer hull removed, leaving the bran and germ intact. It retains more nutrients than white rice, making it a healthier choice. Additionally, brown rice tends to have a higher germination rate compared to white rice, increasing your chances of success when growing it at home.
Preparing to Grow Rice
1. Gather Your Supplies
Before you begin, you’ll need a few essential supplies:
- Pot: Choose a container that is at least 12 inches deep and has good drainage. A wider pot is preferable, as rice plants can spread out.
- Brown Rice: Purchase organic brown rice from the store. Look for non-irradiated seeds for better germination.
- Potting Soil: Use a high-quality potting mix that retains moisture but drains well.
- Water: Have enough water on hand for soaking and daily watering.
2. Prepare the Seeds
Soaking the Seeds
Start by rinsing the brown rice thoroughly in water to remove any dust or impurities. After rinsing, soak the rice in fresh water for 24 to 48 hours. Soaking helps to kickstart the germination process by softening the seed coat and allowing moisture to penetrate.
Germination Check
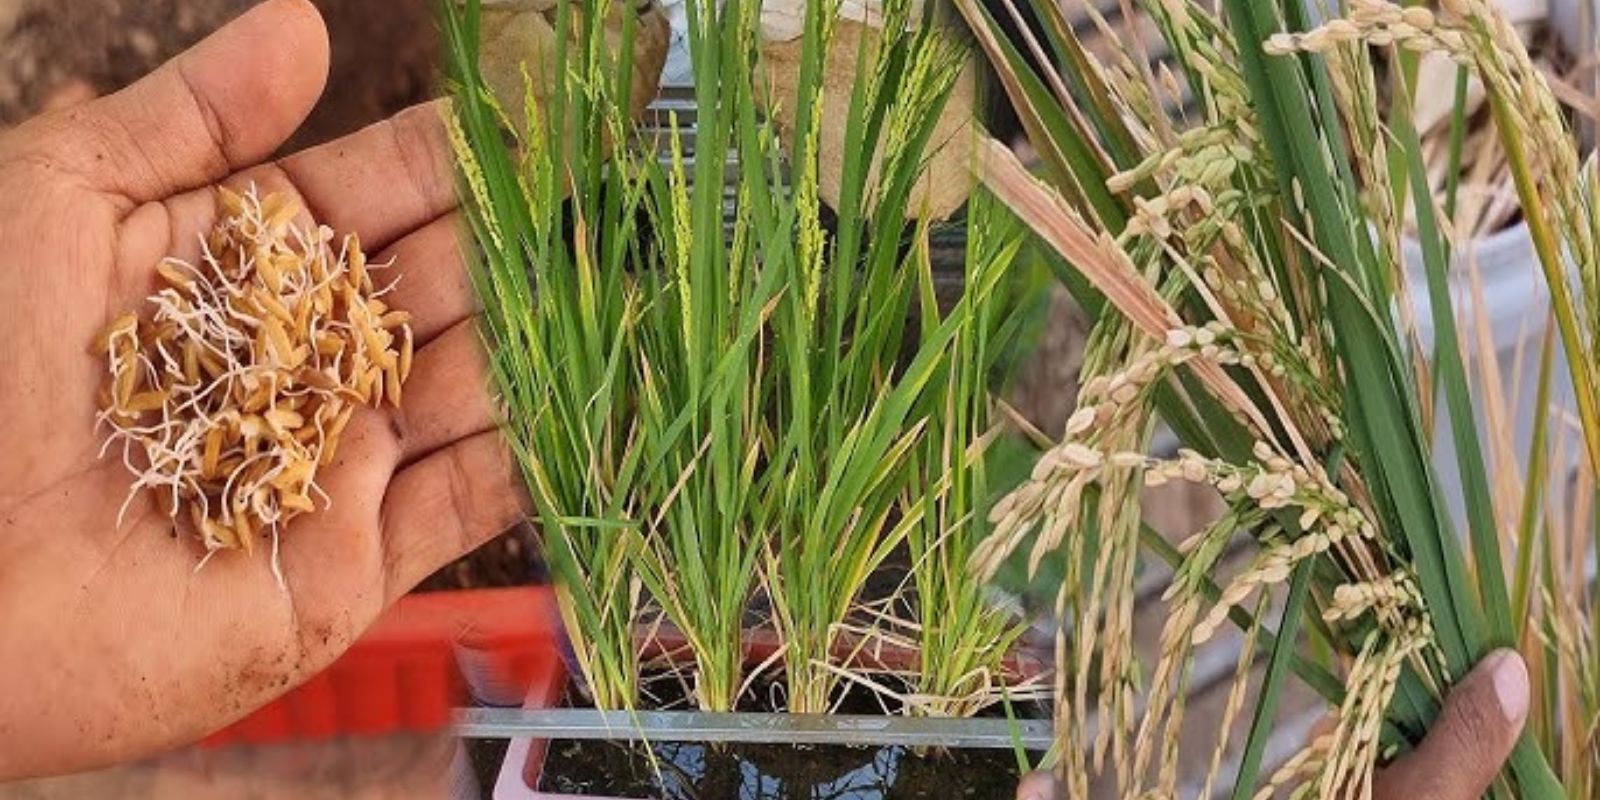
After soaking, check the seeds. If they appear plump and some have begun to sprout tiny shoots, they are ready for planting. If you don’t see any germination, let them soak for a few more hours.
Planting the Rice
3. Choose the Right Potting Mix
Fill your chosen pot with nutrient-rich potting soil, leaving about two inches of space from the top. Rice prefers slightly acidic soil, so consider mixing in some peat moss to help with acidity and moisture retention.
4. Plant the Seeds
Scatter the soaked rice seeds evenly across the surface of the soil. Gently press them into the soil without covering them completely, as they need light for germination. A depth of about ½ inch is sufficient. If you want to plant multiple seeds, consider planting 3-5 seeds in a small cluster to allow for thinning later.
5. Watering the Seeds
After planting, water the pot gently until the soil is moist but not waterlogged. It’s essential to keep the soil consistently moist throughout the germination process. Water the pot daily, ensuring that the soil remains damp but not overly saturated. Excessive water can lead to root rot, so monitor the moisture level closely.
Caring for Your Rice Plants
6. Provide Sunlight
Rice plants thrive in full sun, so place your pot in a location where it can receive at least 6-8 hours of direct sunlight daily. A sunny balcony, patio, or a south-facing window can work well. If sunlight is limited, consider using grow lights to supplement.
7. Thinning the Seedlings
Once the seedlings are about 2-3 inches tall, it’s time to thin them out. Choose the strongest plants to keep, and gently pull out the weaker ones, being careful not to disturb the roots of the remaining seedlings. Aim to leave about 3-4 healthy plants per cluster for optimal growth.
8. Maintain Moisture
Rice is a water-loving plant, so it’s crucial to maintain consistent moisture in the soil. You can flood the pot slightly for a few days to mimic the paddy field environment. This can help enhance growth, but ensure that the water level does not exceed 2-3 inches above the soil surface. Check the soil daily, watering as needed.
9. Fertilization
To support healthy growth, use a balanced, water-soluble fertilizer every 4-6 weeks. Choose a fertilizer with equal parts nitrogen, phosphorus, and potassium (N-P-K) for the best results. Dilute the fertilizer according to package instructions and apply it during your regular watering routine.
10. Pest Control
Keep an eye out for common pests such as aphids and spider mites. If you notice any infestations, treat them with a gentle insecticidal soap or neem oil. Regularly inspecting your plants will help catch any issues early on.
Harvesting Your Rice
11. Timing the Harvest
After about 3-4 months of growth, your rice plants will be ready for harvest. You’ll know it’s time to harvest when the grains turn golden brown, and the plants begin to fall over. The grains should feel firm to the touch.
12. Cutting the Plants
Using sharp garden shears or scissors, cut the rice stalks about an inch above the soil line. Gather the cut stalks and tie them together with string or rubber bands. Hang the bundles upside down in a cool, dry place to dry out completely. This process can take about 1-2 weeks.
13. Separating the Grains
Once the stalks are thoroughly dried, you can start separating the grains from the husks. Gently rub the stalks between your hands or use a rolling pin to help release the grains. Be sure to catch all the grains in a clean container.
14. Storing the Rice
Store the harvested rice in an airtight container in a cool, dark place. Properly stored, it can last for several months. For best quality, consume within a year.
Conclusion
Growing rice from store-bought brown rice is a simple yet rewarding project that anyone can do at home. Not only do you get to enjoy fresh rice, but you also gain a deeper appreciation for this staple food and the effort that goes into its cultivation. By following the steps outlined in this guide, you can successfully grow rice in a pot, adding a unique and fulfilling gardening experience to your repertoire.
Final Thoughts
So, what are you waiting for? Start your rice-growing journey today, and share your experiences in the comments below! Whether you have questions or tips to share, we’d love to hear from you. 🌱✨
#GrowYourOwnRice #HomeGardening #SustainableLiving #UrbanFarming #GardeningTips #FoodFromHome #RiceInAPot #GardeningForAll #HealthyEating