
Introduction
Rhubarb is a versatile perennial plant cherished for its tart, flavorful stalks. While it’s commonly grown from crowns or divisions, starting rhubarb from seed offers an affordable and rewarding way to establish your own rhubarb patch. Although it requires patience, growing rhubarb from seed allows you to enjoy watching your plants develop from tiny sprouts to robust producers over time. In this guide, we’ll walk you through the process of growing rhubarb from seed, offering tips for a bountiful and thriving harvest.
Why Grow Rhubarb from Seed?
Growing rhubarb from seed has several advantages:
- Cost-Effective: Seeds are significantly cheaper than purchasing crowns.
- Variety: Seeds provide the opportunity to explore unique rhubarb varieties.
- Satisfaction: Watching your plants grow from seed to harvest is deeply fulfilling.
While it takes 2–3 years for seed-grown rhubarb to reach full maturity, the wait is worth it for the abundant harvests and beautiful foliage.
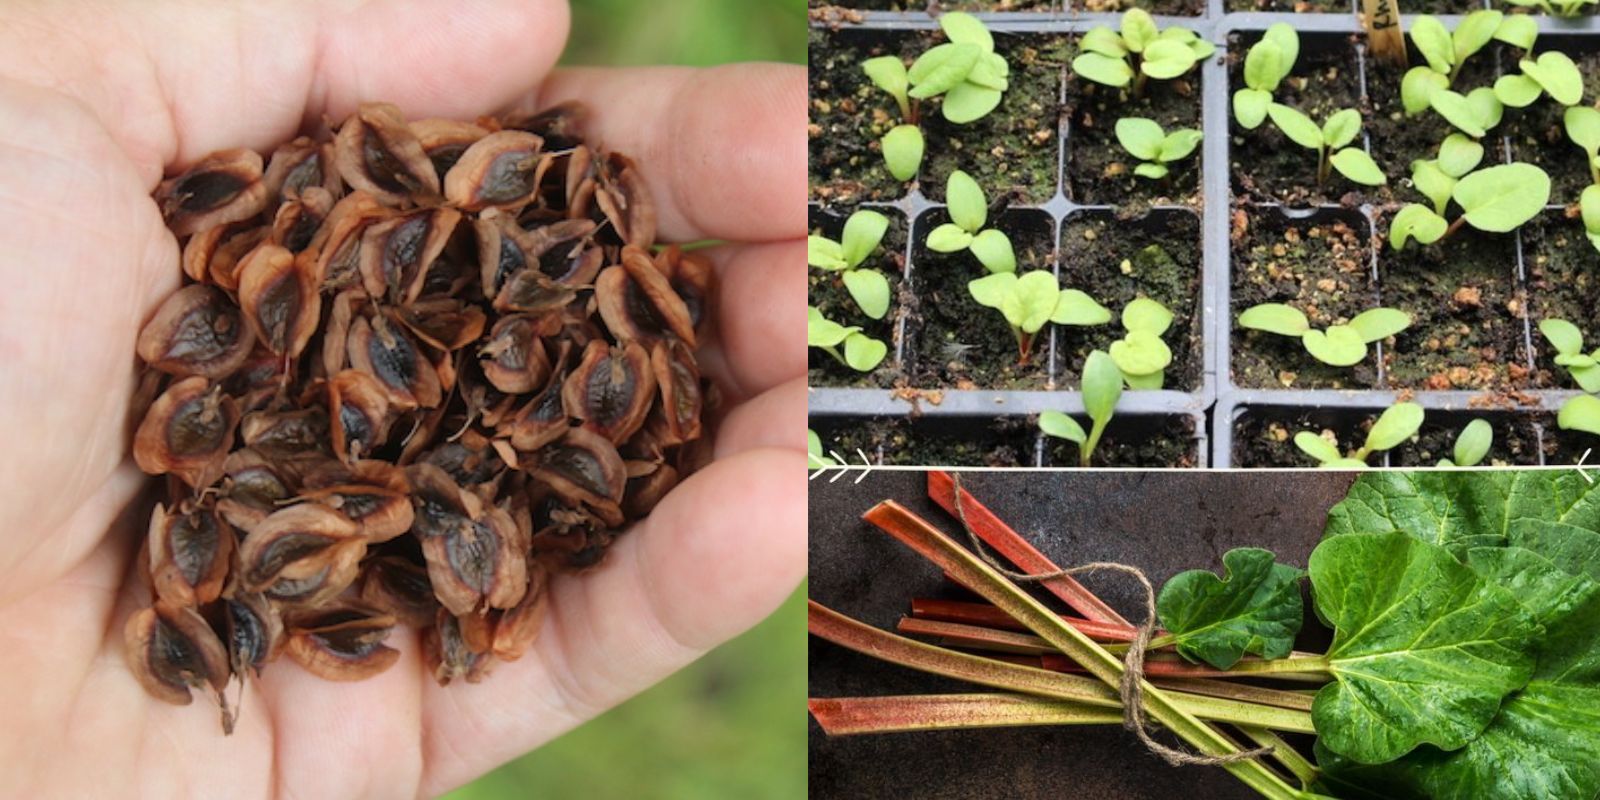
Step 1: Selecting the Right Rhubarb Seeds
Start by choosing a reliable seed variety suitable for your climate. Some popular seed varieties include ‘Victoria’ and ‘Glaskins Perpetual,’ known for their vibrant red stalks and rich flavor. Ensure the seeds are fresh for better germination rates.
Step 2: Preparing the Seeds
Rhubarb seeds have a tough outer coating that can slow germination. To enhance their chances:
- Soak the seeds in warm water for 2–3 hours before planting. This softens the seed coat, speeding up the germination process.
- Alternatively, you can scarify the seeds lightly with sandpaper to improve water absorption.
Step 3: Sowing Seeds Indoors
Rhubarb seeds are best started indoors in late winter or early spring to give them a head start before transplanting outdoors.
Materials Needed:
- Seed trays or small pots
- Well-draining seed-starting mix
- Spray bottle for watering
Steps:
- Fill the trays or pots with the seed-starting mix, leaving about an inch of space at the top.
- Sow seeds about 1/2 inch deep and cover them lightly with soil.
- Water gently using a spray bottle to moisten the soil without disturbing the seeds.
- Place the trays in a warm spot with temperatures between 65–75°F.
Germination Timeline:
Rhubarb seeds typically germinate within 10–20 days. Keep the soil consistently moist during this period, but avoid waterlogging.
Step 4: Providing Light for Seedlings
Once the seeds germinate, move the seedlings to a bright spot with plenty of indirect sunlight. If natural light is limited, use grow lights to ensure the seedlings receive 12–16 hours of light daily. This prevents them from becoming leggy and weak.
Step 5: Transplanting Seedlings
When the seedlings develop their first set of true leaves, they are ready to be transplanted into larger pots or directly into the garden.
Hardening Off:
Before transplanting outdoors, harden off the seedlings by gradually exposing them to outdoor conditions over 7–10 days. This minimizes transplant shock.
Garden Location:
Choose a location with:
- Full Sun: Rhubarb thrives in 6–8 hours of direct sunlight.
- Rich Soil: Prepare the planting area by incorporating compost or well-rotted manure to enrich the soil.
- Good Drainage: Avoid areas prone to waterlogging.
Step 6: Planting in the Garden
Space the seedlings 2–3 feet apart, as rhubarb plants grow large and need plenty of room to spread. Dig holes large enough to accommodate the root system, and plant the seedlings at the same depth they were growing in the pots.
Step 7: Watering and Mulching
Rhubarb requires consistent moisture for healthy growth:
- Water deeply once or twice a week, depending on weather conditions.
- Mulch around the plants with straw, compost, or shredded leaves to retain moisture and suppress weeds.
Step 8: Caring for Your Rhubarb Plants
Rhubarb is a hardy plant, but proper care ensures vigorous growth:
- Fertilize: Apply a balanced fertilizer or compost in spring and mid-summer. Avoid over-fertilizing, as this can lead to excessive leaf growth at the expense of stalks.
- Pest Control: Keep an eye out for pests like aphids and slugs. Use organic pest control methods, such as neem oil or diatomaceous earth, to protect your plants.
- Weeding: Remove weeds regularly to prevent competition for nutrients.
Step 9: Harvesting Rhubarb
Patience is key when growing rhubarb from seed. Do not harvest the stalks during the first two years, as the plant needs time to establish a strong root system.
Harvest Timeline:
- Year 1 & 2: Focus on nurturing the plant without harvesting.
- Year 3: Harvest sparingly, taking only a few stalks at a time.
To harvest, pull the stalks gently from the base instead of cutting them, as this encourages new growth. Always leave at least 1/3 of the stalks to sustain the plant’s energy reserves.
Common Challenges and Solutions
- Slow Germination
If seeds don’t germinate, check the temperature and moisture levels. Cold or dry conditions can hinder germination. - Yellowing Leaves
Overwatering or poor drainage may cause yellowing. Adjust your watering schedule and ensure the soil drains well. - Frost Damage
Protect young plants from late spring frosts with cloches or row covers.
Benefits of Growing Rhubarb from Seed
- Sustainability: Cultivate your own food source while reducing dependence on store-bought produce.
- Nutrition: Rhubarb is rich in fiber, vitamin K, and antioxidants, making it a healthy addition to your diet.
- Aesthetic Appeal: With its large, lush leaves and vibrant stalks, rhubarb adds a decorative touch to any garden.
Conclusion
Growing rhubarb from seed is a fulfilling process that combines patience with the joy of nurturing a plant from its earliest stages. By following these steps and maintaining proper care, you’ll soon have a thriving rhubarb patch ready to provide you with years of delicious harvests.
Call to Action:
Have you tried growing rhubarb from seed? Share your experiences, tips, and photos with us in the comments below! Let’s inspire each other to grow more sustainable gardens.
Viral Gardening Hashtags:
#GrowRhubarb #SeedStarting #SustainableGardening #HomegrownHarvest #RhubarbPatch #GardeningLife #GrowYourOwnFood #PerennialGarden #HealthyLiving #EcoFriendlyGardening