
Growing red peanuts at home is a satisfying and rewarding experience, particularly for those who love fresh, homegrown snacks. While peanuts are typically associated with large-scale commercial farms, they can actually be cultivated successfully in containers or small garden beds. This guide will take you through the step-by-step process of growing red peanuts at home, from planting to harvest.
Why Grow Red Peanuts at Home?
Red peanuts, scientifically known as Arachis hypogaea, are a variety of peanuts distinguished by their reddish-brown skin. Unlike the common yellow-skinned peanuts typically found in stores, red peanuts have a slightly different flavor and texture, making them a delicious alternative.
Growing red peanuts at home offers several benefits:
- Freshness: There’s nothing like fresh, homegrown peanuts. You’ll get peanuts that are free from pesticides and chemical fertilizers.
- Sustainability: By growing your own peanuts, you can reduce your carbon footprint and your dependence on store-bought snacks.
- Educational: It’s a great learning experience for both adults and kids to witness the entire growth process.
- Health Benefits: Peanuts are an excellent source of protein, healthy fats, vitamins, and minerals, making them a nutritious snack.
Now, let’s dive into how you can grow red peanuts at home.
Step 1: Choose the Right Location
Peanuts thrive in warm weather, making them an ideal crop for regions with long growing seasons and plenty of sunlight. If you live in a region that gets hot summers, peanuts will grow well in your garden. Ideally, red peanuts need at least 6 hours of sunlight per day to grow optimally. Here are some location considerations:
- Full Sun: Select a sunny spot in your garden or balcony that gets direct sunlight for most of the day.
- Well-Drained Soil: Peanuts are prone to root rot if the soil retains too much moisture. Therefore, it’s important to plant them in soil that drains well.
- Space: Red peanuts need ample space to spread. Ensure the growing area is wide enough to accommodate multiple plants with enough air circulation to prevent fungal issues.
If you’re growing them in containers, choose large, deep pots (at least 12 inches in depth) with proper drainage holes.
Step 2: Prepare the Soil
Peanuts grow best in loose, sandy loam soil that is slightly acidic, with a pH level of 5.8 to 6.2. Before planting, it’s essential to prepare the soil properly for optimal growth. Here’s what you should do:
- Loosen the Soil: Use a shovel or garden fork to loosen the soil to a depth of 8-10 inches. Peanuts have deep roots, and the soil must be friable enough for them to penetrate easily.
- Add Organic Matter: Mix in compost or well-rotted manure to improve soil fertility. Peanuts prefer soil that’s rich in organic matter, which helps improve nutrient availability and water retention.
- pH Testing: Test the soil’s pH and adjust it if necessary. You can add lime to raise the pH or sulfur to lower it, ensuring that the soil is within the ideal range for peanuts.
Step 3: Planting Red Peanuts
Red peanuts are typically planted in the spring, after the last frost date, when the soil has warmed up to around 65°F (18°C). You can plant them directly in the garden or in containers. Here’s how you can plant them:
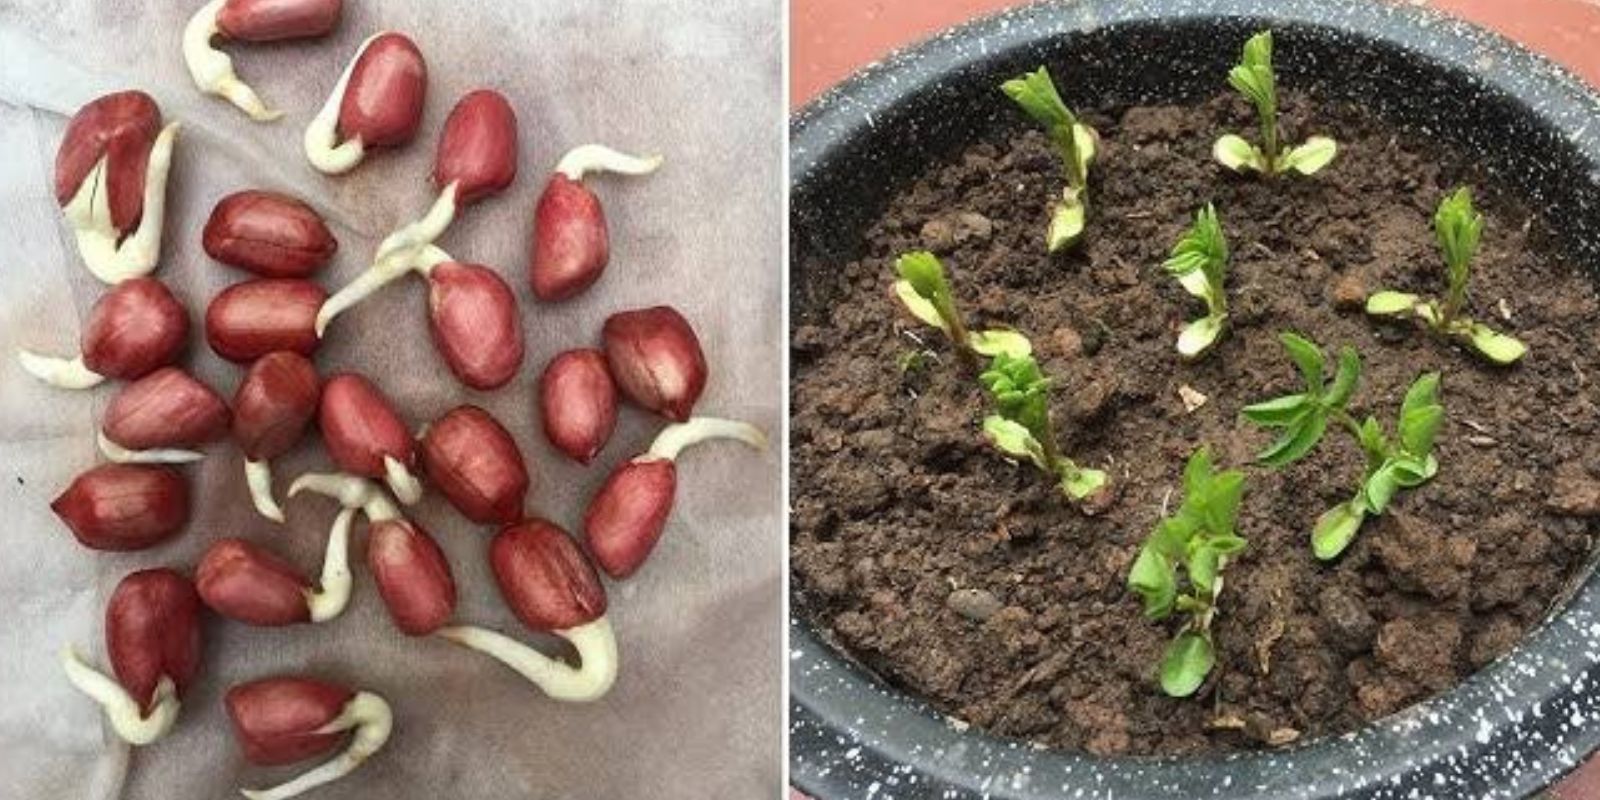
- Select Raw Peanuts: Use raw, unshelled peanuts (with skins intact) for planting. The peanuts you purchase for eating at the store may have been roasted, which will prevent germination. Look for raw peanuts at your local grocery store or online.
- Scarify the Seeds: Before planting, you can slightly scarify the peanut seeds (nick the outer shell) to enhance germination. This step isn’t mandatory but can help improve your success rate.
- Planting Depth: Dig small holes about 2-3 inches deep and space them 6-8 inches apart in rows. If you’re planting in containers, plant 1-2 peanuts per pot and space them apart.
- Cover the Seeds: Cover the peanuts with soil and lightly tamp it down. Water thoroughly right after planting, ensuring that the soil stays consistently moist but not soggy.
Step 4: Watering and Fertilizing
Proper watering and fertilizing are critical to growing healthy peanut plants. Follow these tips:
- Watering: Keep the soil consistently moist throughout the growing season, especially during hot weather. Peanuts need ample water to develop strong roots and healthy pods. However, avoid overwatering, as peanuts do not like wet feet. Water in the morning to prevent fungal growth, ensuring the soil is moist but not soggy.
- Fertilizing: Peanuts have a natural ability to fix nitrogen in the soil, so they don’t require much fertilizer. You can add a balanced fertilizer at the beginning of the growing season, but avoid over-fertilizing, as this can result in excessive foliage growth and poor pod development. Adding compost or organic matter once a month is usually sufficient.
- Mulching: Applying mulch around the base of the plant helps retain moisture, suppress weeds, and regulate soil temperature. Organic mulch, like straw or leaves, works best.
Step 5: Maintaining Your Peanut Plants
Once planted, it’s important to regularly care for your peanut plants. Here are some key tips for maintenance:
- Weeding: Keep the growing area free from weeds, as they compete with peanuts for nutrients and water. Use mulch to help suppress weeds naturally.
- Pest Control: Peanuts are generally pest-resistant, but keep an eye out for common garden pests like aphids or caterpillars. Organic pest control methods, such as neem oil or insecticidal soap, can be used if necessary.
- Incorporating the “Peg” Stage: After a few weeks, you may notice the plant producing “pegs,” which are long, slender stems that grow from the base of the plant. These pegs will eventually burrow into the soil, where they will develop into peanut pods. Ensure the soil remains loose enough to allow the pegs to penetrate easily.
Step 6: Harvesting Red Peanuts
Red peanuts typically take around 4 to 5 months to mature. The plants will start to turn yellow as they approach maturity, and the leaves will begin to wither. When this happens, it’s time to harvest the peanuts. Here’s how to do it:
- Check the Peanuts: Gently dig around the base of the plants and check for developing pods. If the pods are brown and hard, then they are ready for harvest.
- Digging Up the Plants: Use a shovel or garden fork to carefully dig up the plants. Be gentle to avoid damaging the peanut pods. Once the plant is out of the soil, shake off any excess dirt.
- Drying: Hang the peanut plants in a dry, warm, and well-ventilated area for about 1-2 weeks. This will allow the peanuts to dry properly, which is essential for preserving them.
- Shelling: After the peanuts have dried, remove the pods from the plant and shell them. You can store the peanuts in a cool, dry place or use them immediately in your favorite dishes.
Step 7: Storing Your Harvest
Once harvested, your red peanuts will last for several months if stored correctly. Follow these guidelines for storage:
- Air-tight containers: Store your peanuts in air-tight containers or jars to keep them fresh.
- Cool, dry place: Keep your peanuts in a cool, dry place away from sunlight.
- Freezing for Long-Term Storage: If you want to store your peanuts for even longer, you can freeze them. Freezing helps preserve the flavor and prevents spoilage.
Conclusion
Growing red peanuts at home is a rewarding and enjoyable experience. Whether you’re cultivating them in your garden or on a balcony, the process can be relatively simple as long as you follow the proper steps. With adequate care, you can harvest a plentiful crop of peanuts to enjoy in various dishes, as a snack, or even to replant for the following season.
By following these guidelines, you will be well on your way to growing healthy, tasty red peanuts right at home. Enjoy the fruits of your labor and share your homegrown peanuts with family and friends!
Happy gardening! 🌱