
Pitaya, also known as dragon fruit, is a vibrant, exotic fruit that has become increasingly popular due to its striking appearance and sweet, mildly tangy flavor. Often grown in tropical and subtropical regions, pitaya is not only a delight to eat but also a fascinating plant to grow. Whether you’re a seasoned gardener or a beginner looking for a fun challenge, growing pitaya from store-bought fruit is an exciting and achievable project. This guide will walk you through the process of growing pitaya from seeds extracted from a fruit purchased at the store.
Introduction: What is Pitaya?
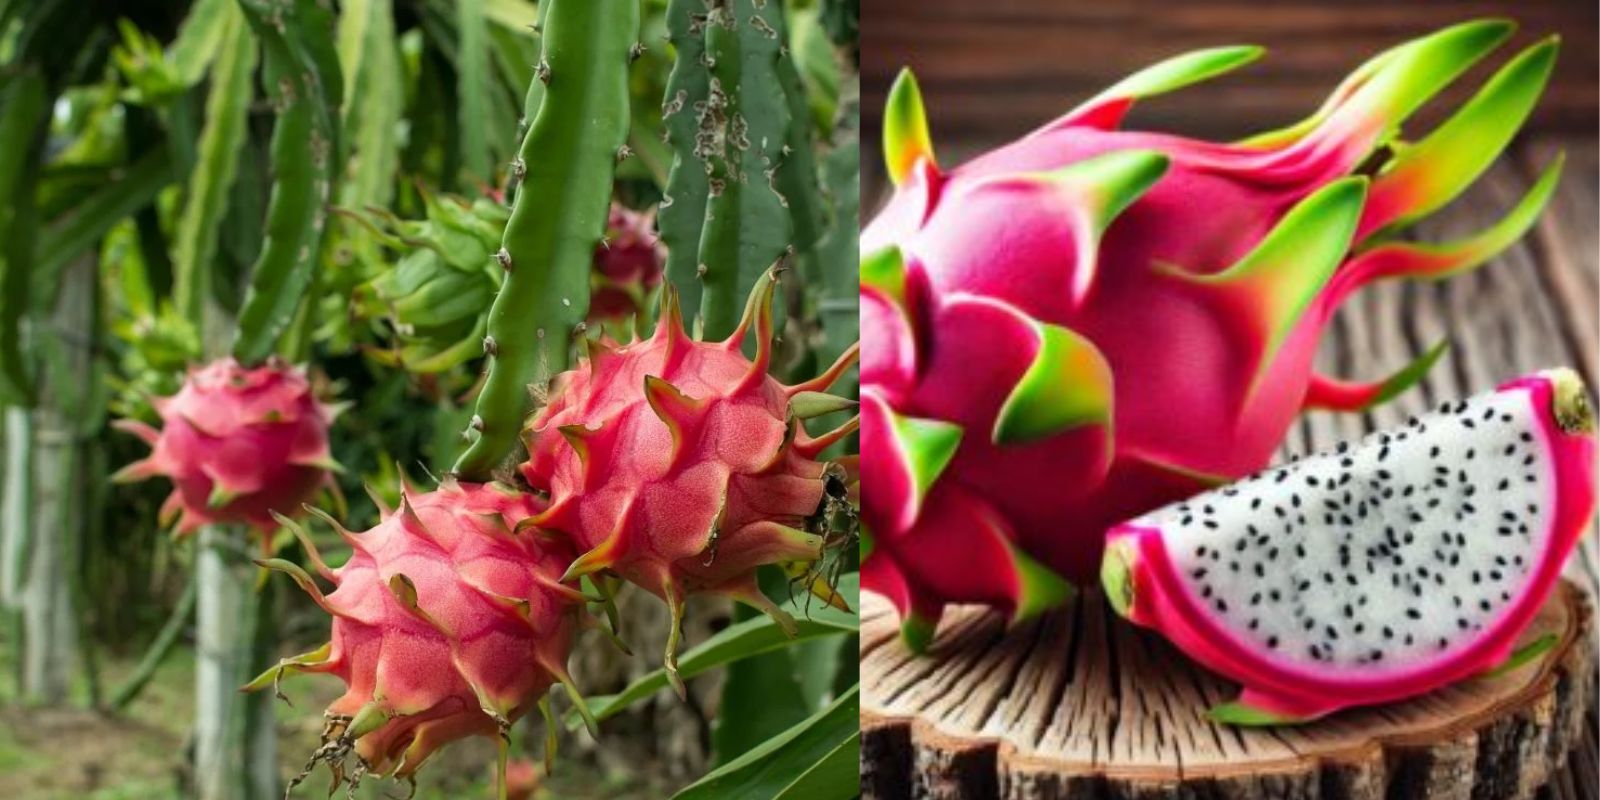
Pitaya, or dragon fruit, belongs to the genus Hylocereus and is a type of cactus native to Central America. Its bright pink or yellow skin and white or red flesh speckled with tiny black seeds make it instantly recognizable. The fruit grows on a climbing cactus that can be grown both indoors and outdoors, depending on the climate. While it thrives in tropical or subtropical conditions, with a little care and the right environment, growing pitaya at home can be a rewarding experience.
In this article, we will explore how to grow pitaya from seeds sourced from a store-bought pitaya, including all the necessary steps to ensure a healthy and thriving plant.
Why Grow Pitaya from Store-Bought Fruit?
Growing pitaya from seeds taken from a store-bought fruit is a cost-effective and enjoyable way to grow this exotic fruit. It’s an excellent way to experiment with gardening and learn about the growth habits of this unique plant. Pitaya seeds are readily available in the fruit, which makes it an easy starting point for beginners, especially those who might not have access to a pitaya plant or commercial seeds.
Growing your own pitaya also offers several advantages:
- Fresh, homegrown fruit: Enjoy fresh, organic pitaya grown right in your own garden or home.
- Educational experience: Learning about the plant’s growth process can be both informative and rewarding.
- Aesthetically pleasing: The pitaya plant is an attractive, climbing cactus that can add a touch of beauty to your garden or indoor space.
What You Need to Grow Pitaya from Store-Bought Fruit
Before you begin the process of growing pitaya from a store-bought fruit, make sure you have the following materials:
- A ripe, fresh pitaya (dragon fruit) from your local grocery store or farmer’s market.
- A sharp knife or spoon to extract the seeds.
- A small pot or seed tray for sowing the seeds.
- Well-draining soil mix (sandy, loamy, or cactus mix).
- A plastic cover or clear plastic wrap to create humidity.
- A sunny spot for the plant to receive indirect sunlight.
- Water and patience!
Step-by-Step Guide: How to Grow Pitaya from Store-Bought Fruit
1. Choose a Ripe Pitaya
The first step in growing pitaya from seeds is to select the right fruit. You will need a ripe, healthy pitaya for the best results. Look for a fruit that is firm but slightly soft to the touch, with vibrant skin that is free from bruises or mold. Avoid overly ripe or damaged fruit, as this may contain fewer viable seeds.
2. Extract the Seeds from the Fruit
Once you have a ripe pitaya, it’s time to extract the seeds. Cut the pitaya in half lengthwise using a sharp knife. You should see the flesh filled with small, black seeds similar to those found in kiwi. Use a spoon to scoop out the flesh and place it into a small bowl.
Next, separate the seeds from the flesh by gently rinsing them in water. Be careful not to damage the seeds during this process. Once the seeds are clean, set them aside to dry on a paper towel or cloth for about 24 hours.
3. Prepare the Soil
Pitaya plants prefer well-draining soil, as they are a type of cactus that doesn’t like to be waterlogged. A cactus mix or a mix of sandy and loamy soil works best. If you’re mixing your own soil, combine equal parts of sand, potting soil, and perlite to ensure excellent drainage. If you’re using a pre-packaged mix, look for one labeled for cacti or succulents.
Fill a small pot or seed tray with the prepared soil, leaving about half an inch of space at the top. If you’re growing several plants, consider using a seed tray or shallow container to start multiple seeds, as pitaya can be grown in clusters before transplanting.
4. Sow the Seeds
Now that your seeds are dry, it’s time to sow them. Sprinkle the seeds evenly over the surface of the soil, but do not bury them too deep. Pitaya seeds need light to germinate, so simply press them gently into the soil. You can also lightly cover them with a thin layer of soil, but be careful not to bury them completely.
5. Create a Humid Environment
Pitaya seeds need warmth and humidity to germinate. Once the seeds are sown, lightly water the soil to keep it moist, but not soaked. To maintain high humidity, cover the pot or seed tray with a clear plastic lid or plastic wrap. This will help trap moisture and keep the seeds warm.
Place the covered pot in a location with indirect sunlight, such as near a window with filtered light. Pitaya seeds typically need temperatures of 70°F to 85°F (21°C to 29°C) to germinate. Germination can take anywhere from 2 weeks to a month, so be patient!
6. Care for the Seedlings
Once the seeds begin to germinate, you will notice small green sprouts emerging from the soil. At this stage, continue to keep the soil moist and remove the plastic covering when the seedlings appear large enough. Make sure they receive at least 6 hours of indirect sunlight per day, as pitaya plants thrive in bright but not direct light.
As the seedlings grow, you may want to thin them out by removing the weaker ones, leaving the strongest plants to continue growing. Water the seedlings carefully, ensuring the soil stays moist but never soggy.
7. Transplanting the Seedlings
Pitaya seedlings will need to be transplanted into larger pots or directly into the ground once they have developed a strong root system and are at least 4 to 6 inches tall. At this point, the plants are ready for a new, more spacious home.
If you live in a region with a warm climate, you can transplant the seedlings outdoors into your garden. Choose a location with full sun, as pitaya plants love sunlight. Ensure the soil is well-draining and slightly acidic, as this will encourage healthy growth.
If you are growing pitaya indoors, transplant the seedlings into larger pots with good drainage. Place the pots in a sunny window or near a light source. You may also want to provide additional support for the climbing vines by adding a trellis or stake.
8. Ongoing Care and Maintenance
Pitaya plants are relatively low-maintenance but do require regular care to thrive. Here are some tips for ensuring healthy growth:
- Watering: Water the plant regularly, allowing the soil to dry out between waterings. Pitaya is drought-tolerant but grows best when kept slightly moist.
- Fertilizing: Feed your pitaya plant with a balanced fertilizer every 4 to 6 weeks during the growing season (spring and summer). Reduce fertilization during the fall and winter months when the plant is dormant.
- Pruning: Prune the plant to encourage new growth and remove any dead or damaged branches. Since pitaya is a vine, it will need support as it grows. Use a trellis or stakes to help the plant climb.
- Pest control: Keep an eye out for common pests like aphids or mealybugs, and treat the plant with organic pest control methods if necessary.
9. Harvesting the Fruit
It can take several months, even years, before your pitaya plant produces fruit. Pitaya plants typically begin fruiting when they are 1 to 2 years old, depending on the growing conditions and the variety of pitaya. Once the fruit is ripe, you will notice the skin turning bright pink or yellow, depending on the variety.
To harvest the fruit, carefully cut the pitaya from the plant using a sharp knife. The fruit should be firm but slightly soft to the touch when it’s ready to eat.
Conclusion: Enjoying Your Homegrown Pitaya
Growing pitaya from seeds can be a long but rewarding process, and it’s an excellent way to connect with nature while enjoying the beauty and benefits of this exotic fruit. With a little patience and attention, your pitaya plant will thrive and eventually produce the colorful, sweet fruit you love.
Whether you’re growing pitaya indoors or outdoors, this step-by-step guide will help you get started on your journey to becoming a pitaya grower. Happy gardening!
Hashtags: #GrowPitaya #DragonFruit #HomeGardening #PlantPropagation #GardeningTips #UrbanGardening #ExoticFruit #PlantLovers #GardeningCommunity #GrowYourOwn #SustainableLiving #GardeningLife