
Growing onions from seed is a satisfying and rewarding experience for any gardener, whether you’re a seasoned grower or just starting. Onions are versatile vegetables used in countless dishes, and having your own fresh supply can enhance your cooking while saving you money. While onions are often grown from sets (small bulbs), starting them from seed can give you a greater variety of options and healthier plants, and it’s more cost-effective.
This comprehensive guide will walk you through the process of growing onions from seed, from selecting the right variety to harvesting, so you can enjoy a successful onion crop in your garden.
Why Grow Onions from Seed?
Onions can be grown from three main sources: seeds, sets, or transplants. While sets and transplants are commonly available and easy to plant, starting onions from seed offers several advantages:
- Wider Variety: When growing onions from seed, you can choose from a broader range of varieties, including specialty or heirloom types that may not be available as sets or transplants.
- Healthier Plants: Seeds allow for stronger root development and healthier plants compared to sets, which can sometimes carry diseases or have stunted growth.
- Cost-Effective: Seeds are much cheaper than buying sets or transplants, especially if you’re planting a large garden.
Now that you know the benefits of growing onions from seed, let’s dive into the steps to get started.
Step 1: Choose the Right Onion Seeds
Before you begin planting, it’s essential to select the right onion variety for your garden. Onions are typically categorized by day-length requirements, which affect how and when they form bulbs. These categories are:
- Short-day onions: These varieties require 10-12 hours of daylight to form bulbs and are best suited for southern regions with mild winters. Varieties include Red Creole and Texas Grano.
- Long-day onions: These onions need 14-16 hours of daylight and are ideal for northern regions where summer days are long. Varieties like Walla Walla and Yellow Sweet Spanish fall into this category.
- Intermediate-day onions: Also known as day-neutral onions, these varieties will bulb with 12-14 hours of daylight and can be grown in most regions. Varieties like Candy and Superstar are popular choices.
Selecting the right onion variety for your region is crucial for successful growth, so be sure to check which types are best for your area.
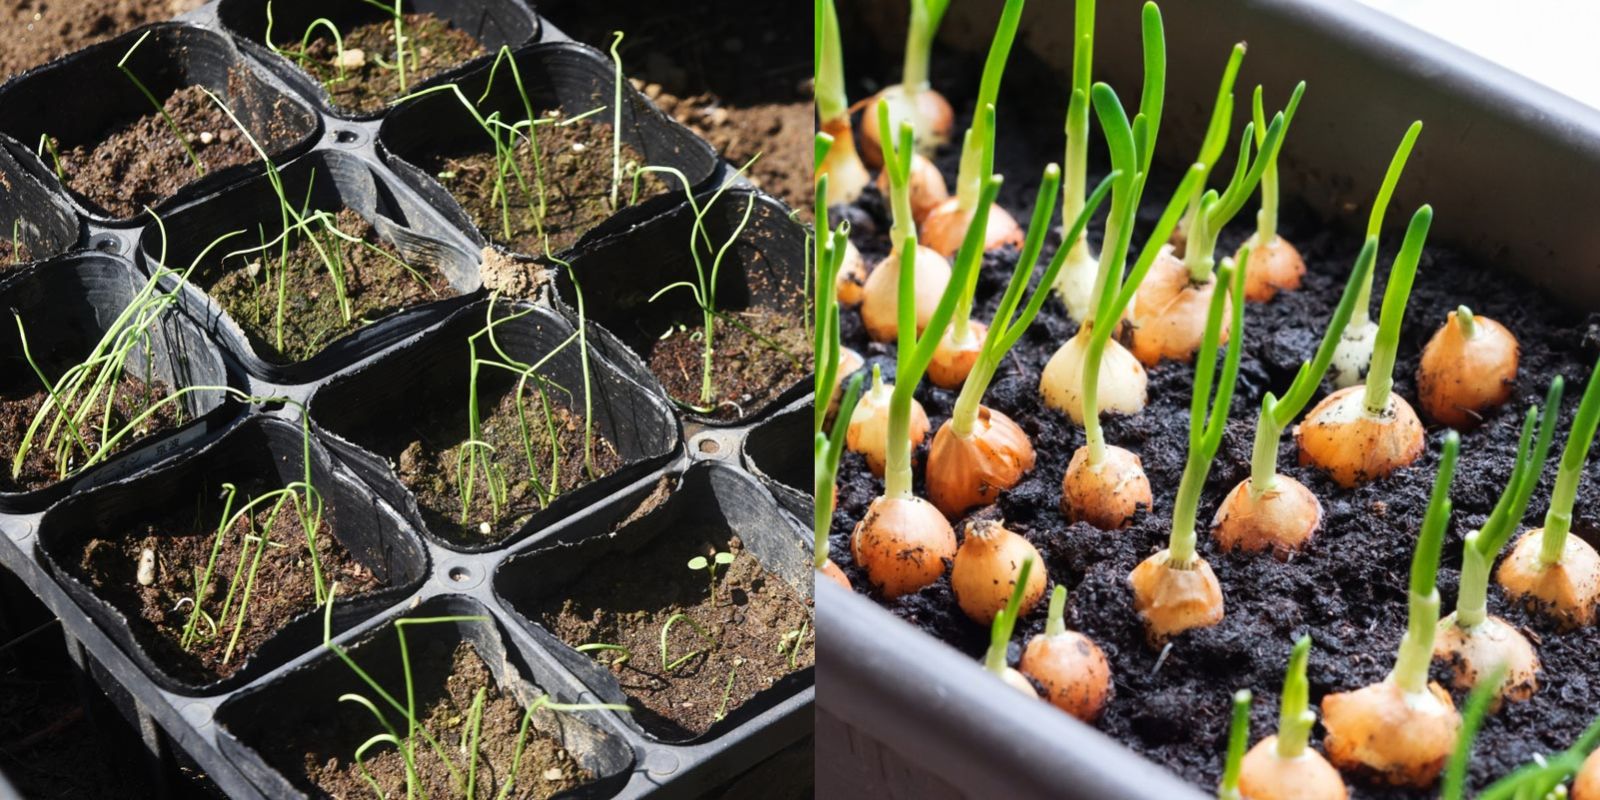
Step 2: Start Onions Indoors
Onions are typically grown as cool-season crops, and to get the best results, you should start your onion seeds indoors 8-10 weeks before the last frost in your area. Starting indoors allows the onions to establish strong roots before transplanting them into the garden. Here’s how you can do it:
Materials Needed:
- Onion seeds
- Seed trays or shallow containers
- Seed-starting mix or potting soil
- Plastic wrap or a clear cover
- Grow lights or a sunny window
Instructions:
- Fill the Seed Trays: Fill your seed trays or containers with a seed-starting mix. Onion seeds are small, so using a fine mix will make it easier for them to sprout.
- Sow the Seeds: Scatter the onion seeds across the surface of the soil, spacing them about 1/4 inch apart. Lightly press them into the soil and cover with a thin layer of mix—about 1/8 inch deep.
- Water and Cover: Gently water the seeds using a spray bottle to avoid washing them away. Cover the trays with plastic wrap or a clear lid to maintain moisture and humidity.
- Provide Light and Warmth: Onion seeds need warmth to germinate, so place the trays in a warm location (around 70°F) or use a heat mat if necessary. Once the seeds sprout, move them to a well-lit area or under grow lights for 12-16 hours per day. Keep the temperature between 60-65°F to promote strong growth.
- Thin the Seedlings: After a couple of weeks, when the seedlings are about 2-3 inches tall, thin them out so each plant has room to grow. Aim to space them about 1 inch apart.
- Keep Moist and Fertilize: Water the seedlings regularly to keep the soil evenly moist but not waterlogged. You can also use a diluted liquid fertilizer every two weeks to encourage healthy growth.
Step 3: Harden Off and Transplant the Seedlings Outdoors
Once the last frost has passed and your onion seedlings are about 6-8 inches tall, it’s time to transplant them into your garden. However, before moving them outside, you need to harden off the seedlings to help them adjust to outdoor conditions. Hardening off is a gradual process that strengthens the plants and prevents transplant shock.
Steps for Hardening Off:
- Gradual Exposure: About one week before transplanting, start placing your seedlings outside for a few hours each day, gradually increasing the time they spend outdoors. Begin with shaded areas and eventually move them to direct sunlight.
- Reduce Watering: Cut back slightly on watering during the hardening-off period to encourage root growth.
After hardening off, you’re ready to transplant your onion seedlings.
Transplanting Steps:
- Prepare the Soil: Onions prefer well-drained, loose soil with plenty of organic matter. Add compost or well-rotted manure to your garden bed to enrich the soil.
- Space the Seedlings: Dig small holes about 4-6 inches apart in rows that are 12-18 inches apart. This spacing ensures the onions have enough room to grow and develop large bulbs.
- Plant the Seedlings: Gently remove the seedlings from their trays, being careful not to damage the roots. Plant them in the prepared holes so that the roots are covered, but the base of the leaves remains above the soil. Lightly firm the soil around the seedlings.
- Water Well: Water the newly transplanted onions thoroughly to help them settle into their new environment.
Step 4: Care for Your Onion Plants
Onions are relatively low-maintenance plants, but they do require consistent care to grow strong and healthy bulbs. Here’s how to care for your onion plants as they grow:
- Watering: Onions need consistent moisture, especially during the early stages of growth. Water deeply about once a week, ensuring the soil remains moist but not waterlogged. Mulching around the plants can help retain moisture and reduce the need for frequent watering.
- Fertilizing: Onions are heavy feeders, so it’s essential to provide them with adequate nutrients. Apply a nitrogen-rich fertilizer every 2-3 weeks to promote strong leaf growth, as this directly impacts bulb development.
- Weeding: Keep your onion bed free of weeds, as they compete with onions for nutrients and water. Hand-pull weeds or use shallow hoeing to avoid disturbing the onion bulbs.
- Pest Control: Onions are generally pest-resistant, but you should still keep an eye out for common garden pests such as onion maggots, aphids, and thrips. Regularly inspect your plants and treat any infestations with organic pest control methods if necessary.
Step 5: Harvest and Cure Your Onions
Onions are ready to harvest when the tops begin to yellow and fall over, signaling that the bulbs have finished growing. This usually occurs about 100-120 days after planting.
Harvesting Steps:
- Lift the Bulbs: Using a garden fork or trowel, gently lift the onion bulbs from the soil. Be careful not to bruise or damage them during the process.
- Cure the Onions: After harvesting, let the onions cure by placing them in a warm, dry, and well-ventilated area for 1-2 weeks. Curing allows the outer layers to dry and form a protective skin, which helps the onions store longer.
- Trim and Store: Once the onions are fully cured, trim the tops and roots, and store them in a cool, dry place. Properly cured onions can last for several months, giving you a long-lasting supply of homegrown goodness.
Bonus Tips for Growing Onions from Seed:
- Companion Planting: Onions benefit from being planted near carrots, lettuce, and herbs like basil and mint, which can help deter pests. Avoid planting onions near beans and peas, as they can hinder growth.
- Succession Planting: To ensure a continuous supply of onions, try succession planting by sowing seeds every few weeks during the growing season.
- Saving Seeds: If you want to save seeds for future planting, allow a few onion plants to bolt (flower and produce seeds). Collect the seeds once the flower heads dry out and store them in a cool, dry place.
Conclusion
Growing onions from seed may require a bit more time and patience compared to planting sets, but the rewards are well worth it. By following these steps, you can enjoy a healthy, bountiful onion harvest that enhances your meals and gives you the satisfaction of growing your food from scratch.
Ready to grow your onions from seed? Grab your seeds, prepare your trays, and start the journey to a flavorful harvest! 🌱🧅