
Microgreens are not just a trendy addition to salads and sandwiches; they are nutrient-dense powerhouses that can enhance any meal with their vibrant flavors and health benefits. Growing microgreens without soil is an efficient, eco-friendly, and space-saving way to enjoy these fresh greens year-round. This method simplifies the growing process and provides an excellent solution for those living in urban environments or with limited gardening space. In this comprehensive guide, we’ll explore how to successfully cultivate microgreens without soil, from selecting seeds to harvesting your greens.
Introduction to Soil-Free Microgreen Cultivation
Soil-free cultivation methods, such as hydroponics and soilless media, are increasingly popular among home gardeners and commercial growers alike. These methods eliminate the need for traditional soil and can lead to faster growth, reduced pests, and more controlled growing conditions. Growing microgreens without soil allows you to enjoy fresh greens right from your kitchen counter or windowsill, regardless of the season.
Step 1: Choose Your Seeds
The first step in growing microgreens without soil is selecting the right seeds. Microgreens can be grown from various plant seeds, but some are particularly well-suited for soil-free cultivation. Popular microgreen varieties include:
- Radish: Radish microgreens are known for their spicy flavor and fast growth.
- Mustard Greens: These have a peppery taste and grow quickly in hydroponic systems.
- Arugula: Arugula adds a zesty kick to salads and is easy to grow.
- Broccoli: Broccoli microgreens are mild and packed with nutrients.
Choose high-quality, organic seeds from a reputable source to ensure healthy and productive plants.
Step 2: Prepare Your Growing Medium
Instead of soil, you’ll use a soilless growing medium suitable for hydroponics. Common options include:
- Coconut Coir: Made from coconut husks, this medium retains moisture well and provides good aeration.
- Hemp Mats: These mats are pre-soaked and provide a stable base for seeds to germinate.
- Hydrogel Crystals: These absorb and release water, keeping the growing medium moist.
Ensure the medium you choose is free of chemicals and contaminants to provide a healthy environment for your microgreens.
Step 3: Soak the Seeds
Soaking the seeds before planting helps to speed up germination. Place the seeds in a bowl of water and let them soak for 4-6 hours. This process softens the seed coats and encourages faster sprouting. For larger seeds, such as sunflower or pea, you might need to soak them longer.
Step 4: Sow the Seeds
Once the seeds have been soaked, it’s time to sow them on your chosen growing medium. Gently spread the seeds evenly over the surface of the medium. For best results, use a fine mist to wet the seeds and help them adhere to the medium. Avoid overcrowding the seeds; leave enough space between them to ensure healthy growth and prevent mold.
Step 5: Provide Adequate Light
Microgreens require ample light to grow strong and healthy. Place your growing setup under a grow light or in a sunny window where they can receive 12-16 hours of light daily. Grow lights with a full spectrum of light, including both blue and red wavelengths, are ideal for promoting robust growth.
Step 6: Maintain Moisture
Keeping the growing medium consistently moist is crucial for the health of your microgreens. Use a spray bottle to mist the surface of the medium daily or as needed. Alternatively, you can use a hydroponic nutrient solution to water the microgreens, which provides additional nutrients and promotes healthy growth.
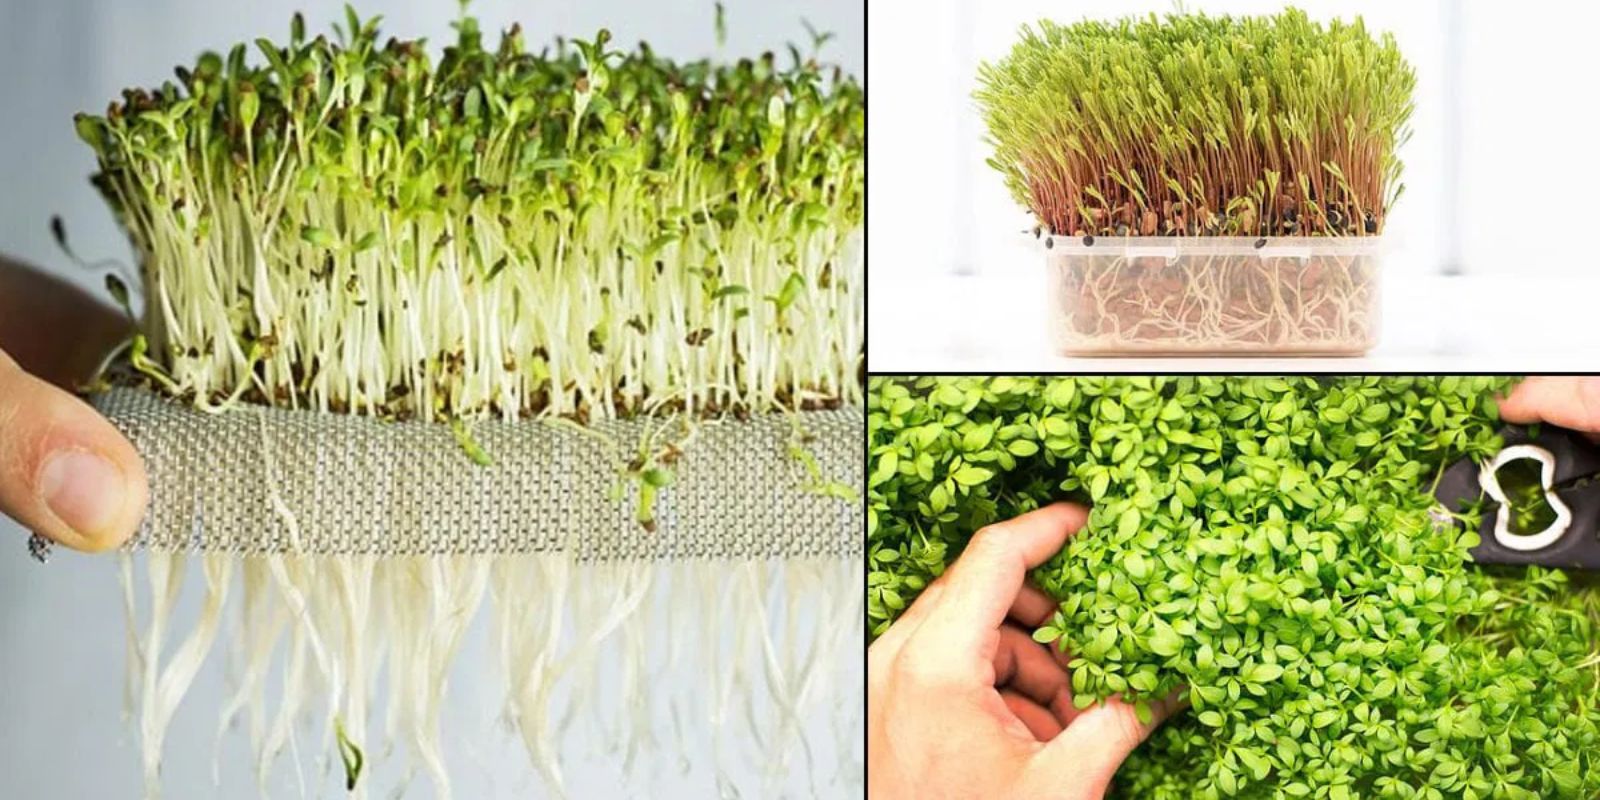
Step 7: Harvest Your Microgreens
Microgreens are typically ready for harvest within 7-14 days, depending on the variety and growing conditions. Harvest them once they have developed their first set of true leaves, also known as cotyledons. Use clean scissors to cut the microgreens just above the growing medium, taking care not to disturb the roots or surrounding seedlings.
Additional Tips for Successful Soil-Free Microgreen Cultivation
- Temperature: Maintain a consistent temperature between 60-75°F (15-24°C) for optimal growth. Avoid placing the microgreens in direct sunlight, which can cause overheating.
- Air Circulation: Good air circulation helps prevent mold and fungal growth. Use a small fan to keep the air moving around your microgreens.
- Fertilization: If you’re using a hydroponic medium, consider using a balanced liquid fertilizer to provide essential nutrients. Follow the manufacturer’s instructions for dilution and application.
Conclusion
Growing microgreens without soil is an accessible and rewarding way to enjoy fresh, nutrient-rich greens right from your home. By following these steps—choosing the right seeds, preparing the growing medium, soaking seeds, sowing, providing light, maintaining moisture, and harvesting—you can successfully cultivate a thriving microgreen garden. Whether you’re a seasoned gardener or a beginner, soil-free microgreens offer a convenient and effective way to enhance your meals with homegrown flavor and nutrition.
Motivational Sentence: “Discover the joy of growing your own fresh microgreens without soil—simple, sustainable, and always delicious! 🌱✨ #Microgreens #SoilFreeGardening #IndoorGardening #UrbanFarming #GrowYourOwn #FreshGreens #Hydroponics”