
Growing your own food can be incredibly rewarding, and when you grow melons in containers, it’s even more satisfying. Melons are not only delicious and refreshing, but they also thrive in containers with the right care and conditions. What makes this process even better is that you can do it in an eco-friendly, sustainable way by using kitchen waste as a natural fertilizer. This method promotes healthier plants, saves money, and helps you reduce waste. In this article, we’ll walk you through every step of the process to grow melons in containers using kitchen waste, from choosing the right materials to harvesting your fruit.
Why Grow Melons in Containers?
Container gardening is an excellent option for those who have limited space, such as apartment dwellers or people with small yards. Melons are typically large plants that require significant space, but growing them in containers allows you to control their environment while still enjoying fresh fruit. Containers also make it easier to manage the growing conditions, ensuring that your melons have proper drainage, nutrient-rich soil, and adequate sunlight.
Moreover, container gardening can be sustainable. By utilizing kitchen waste to create a natural, organic fertilizer, you can minimize your carbon footprint and keep your gardening efforts eco-friendly. Plus, this method reduces food waste, turning scraps into valuable plant nutrients.
Materials Needed
Before starting your melon-growing adventure, here’s a list of the materials you’ll need:
- Melon Seeds – Choose melon varieties that grow well in your climate and container space.
- Two Glasses of Water – For soaking the seeds and later for watering the plants.
- One Glass of Hot Water – This will help sterilize the seeds before planting.
- Paper Towels – Used for pre-germinating the seeds.
- Seedling Pots – Small pots to hold the seeds as they start to sprout.
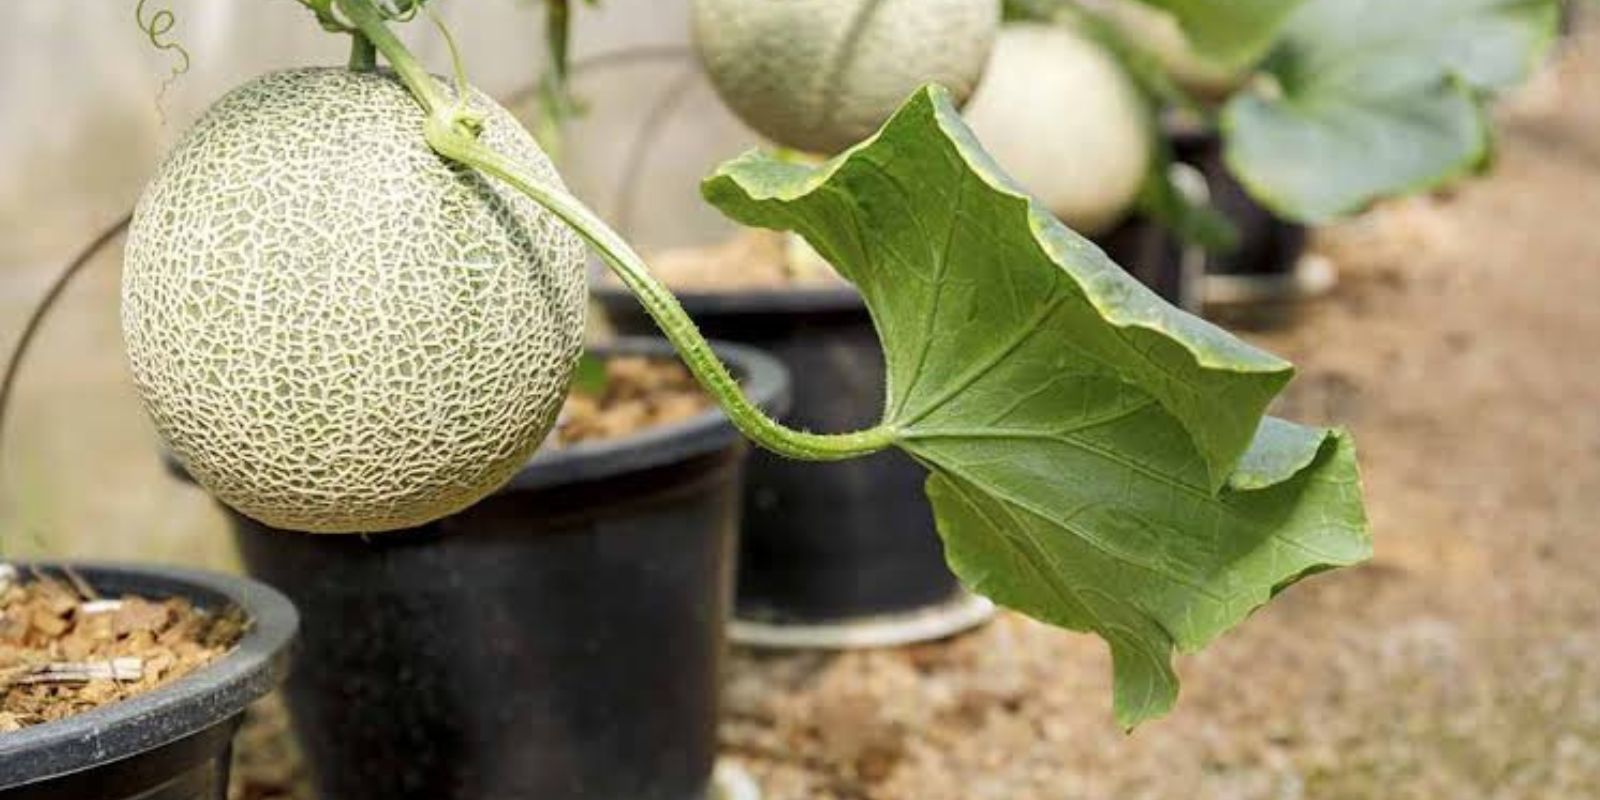
- Container with Drainage Holes (50cm x 50cm) – A spacious container to accommodate the growing melons.
- Compost – To create a nutrient-rich soil mixture for the melons.
- Crushed Eggshells – For adding extra nutrients to the soil and preventing pests.
- Bamboo Stakes and Stainless Steel Wire – For supporting the plants as they grow and vine.
- Liquid Kitchen Waste Fertilizer – To use as a natural fertilizer made from leftover kitchen scraps.
- Bananas – Rich in potassium, bananas help promote healthy melon growth.
Step-by-Step Guide to Growing Melons in Containers Using Kitchen Waste
1. Soak Melon Seeds in Hot Water
The first step in preparing your melon seeds is to soak them in hot water for about 20 minutes. This is a simple technique to kill any potential germs and bacteria that could affect seedling growth. This step ensures your seeds start on the right foot.
2. Pre-Germinate Seeds Using Paper Towels
After soaking the seeds, clean them thoroughly and place them on a paper towel. Keep the paper towel in a warm, dry place to encourage germination. This process can take several days, so be patient. Once you see the seeds sprout tiny roots, you’re ready to move on to the next step.
3. Transplant Sprouted Seeds into Seedling Pots
Once the seeds have sprouted, carefully transplant them into small seedling pots. Fill the pots with a well-draining potting mix and make a small hole in the center for each seedling. Place the sprouted seeds into the holes and cover them lightly with soil. Be sure to keep the soil moist but not waterlogged.
4. Prepare the Container
Choose a container that is at least 50cm x 50cm in size to give the melons plenty of space to grow. Make sure the container has drainage holes to prevent water from pooling and causing root rot. Add a layer of compost to the bottom of the container to provide essential nutrients for the young seedlings.
5. Set Up Your Kitchen Waste Fertilizer Bottle
To create an eco-friendly fertilizer, set up a bottle filled with liquid kitchen waste fertilizer. This can be made from food scraps such as fruit peels, vegetable remnants, coffee grounds, and egg shells. By fermenting these scraps, you create a nutrient-dense solution that will nourish your plants naturally.
6. Deep Water Seedlings Before Transplanting
Before you transplant the seedlings into the larger container, make sure to deeply water them. This helps the seedlings develop strong roots. Once the seedlings are fully hydrated, you can carefully transplant them into the prepared container.
7. Plant the Seedlings and Cover Soil with Crushed Eggshells
Plant up to six seedlings in your container. Make sure to space them at least 12 inches apart. After planting the seedlings, cover the surface of the soil with crushed eggshells. This provides an extra layer of nutrients, including calcium, and helps keep pests away.
8. Apply Kitchen Waste Fertilizer Weekly
Every week, apply a diluted solution of kitchen waste fertilizer to your melon plants. This helps provide a steady supply of essential nutrients. You can mix the fertilizer with water to ensure that the soil remains moist and the plants are constantly nourished.
9. Support the Melon Vines
As melons grow, they send out vines that need support. To help the plants grow vertically and avoid overcrowding, use bamboo stakes and stainless steel wire. Insert the stakes into the soil and gently tie the vines to the supports. This allows the melons to grow upwards instead of sprawling outwards, which is particularly helpful for container gardening.
10. Prune Leaves and Lower Branches After 30 Days
After about 30 days of growth, start pruning your melon plants. Remove any dead or yellowing leaves, as well as lower branches that may be hindering growth. This encourages the plant to focus its energy on producing fruit rather than supporting unnecessary foliage.
11. Manage Flowers: Female Flowers from the 8th to 13th Leaves
Melons have both male and female flowers, but only the female flowers produce fruit. To maximize fruit production, focus on keeping female flowers that are located between the 8th and 13th leaves of each vine. Remove male flowers or any flowers located below the 8th leaf.
12. Remove Unwanted Flowers After 35 Days
After 35 days, remove all male and female flowers that are located under the 8th leaf. This forces the plant to direct its energy towards producing fruit on the upper branches.
13. Pollinate Flowers by Sprinkling Male Pollen
Once your female flowers are ready, it’s time to pollinate them. Use male flowers to collect pollen and sprinkle it onto the female flowers. Pollination is crucial for melon growth, and manually transferring the pollen ensures successful fruit development.
14. Prune the Second End of Fruit-Bearing Branches
Around 38 days after planting, prune the second end of the fruit-bearing branches. This helps the plant focus its energy on developing the fruit rather than continuing to grow longer vines.
15. Keep Only One Healthy Melon Per Plant
By 42 days, your melon plant will begin to bear fruit. Keep only one healthy melon per plant to ensure that the plant can put all its resources into developing that single melon. This also prevents overcrowding and promotes better growth.
16. Prune the Main Stem After the 26th Leaf
At 50 days, prune the top of the main stem after the 26th leaf. This helps regulate the plant’s growth and directs its energy towards the fruit.
17. Support the Growing Melons with Strings
As the melons grow, use strings to support the developing fruits. This keeps them off the soil, preventing rot and allowing them to grow evenly.
18. Continue Weekly Fertilizing
For continued healthy growth, keep applying kitchen waste fertilizer weekly. This ensures that the plant continues to receive the necessary nutrients throughout the growing season.
19. Use Bananas as a Potassium-Rich Fertilizer
On day 60, use bananas as a potassium-rich fertilizer. Soak bananas in water overnight and use the water to feed your plants. Potassium is essential for the development of melons, as it encourages strong growth and fruiting.
20. Harvesting the Melons
After about 75 days, your melons will be ready to harvest. Check for signs that the melons are ripe, such as a sweet aroma and the color changing to a golden or yellow hue, depending on the variety. Use a sharp knife to cut the melons from the vine.
Conclusion: Sustainable Gardening for a Healthier Future
Growing melons in containers using kitchen waste not only helps you enjoy fresh, homegrown fruit but also contributes to a more sustainable and eco-friendly lifestyle. By incorporating food scraps into your gardening routine, you’re reducing waste and creating a healthier, more productive garden. With these simple steps, you can grow delicious melons right on your balcony or patio while nurturing the planet. Happy gardening!
Ready to start your melon-growing journey? Tag your friends and share your experiences with #SustainableGardening #EcoFriendlyGardening #GrowYourOwnMelons #ContainerGardening #KitchenWasteFertilizer!