
Growing lemons from seeds is a delightful and rewarding gardening project that can yield fresh fruit right from your own backyard. Whether you’re interested in growing lemons for their juicy fruit, fragrant flowers, or simply as a fun gardening challenge, starting from seeds is one of the most cost-effective and exciting ways to grow your very own lemon tree.
In this comprehensive guide, we’ll walk you through the process of growing lemons from seeds, providing all the necessary steps, tips, and tricks to ensure your tree flourishes. With the right care, your lemon tree could one day be producing fruit you can enjoy in your favorite recipes, drinks, or simply plucked fresh from the tree!
Why Grow Lemons from Seeds?
Lemon trees are famous for their vibrant, aromatic fruits and their glossy green foliage, making them an attractive addition to any garden or indoor space. While growing lemons from seed might not yield fruit as quickly as purchasing a mature tree, it is a fulfilling process that allows you to learn and experience the growth cycle from start to finish.
Starting from seed is also a great option if you have limited access to mature lemon trees or nurseries that sell young plants. Plus, growing your own lemon tree means you get to enjoy the pride and joy of knowing you nurtured your tree from its very first sprout!
What You’ll Need
Before diving into the steps of growing lemons from seeds, gather the following materials:
- A fresh, organic lemon (preferably one without pesticides or chemicals, as treated seeds may not germinate)
- A bowl of water for cleaning the seeds
- Paper towels or a damp cloth for pre-germination
- A plastic sandwich bag or container for the germination process
- A small pot (about 6 inches in diameter) with good drainage holes
- Well-draining potting soil (such as cactus or citrus potting mix)
- A sunny spot (windowsill or outdoor area with plenty of sunlight)
- A watering can with gentle watering settings to keep the soil moist but not soggy
Step-by-Step Guide to Growing Lemons from Seeds
Step 1: Choose the Right Lemon
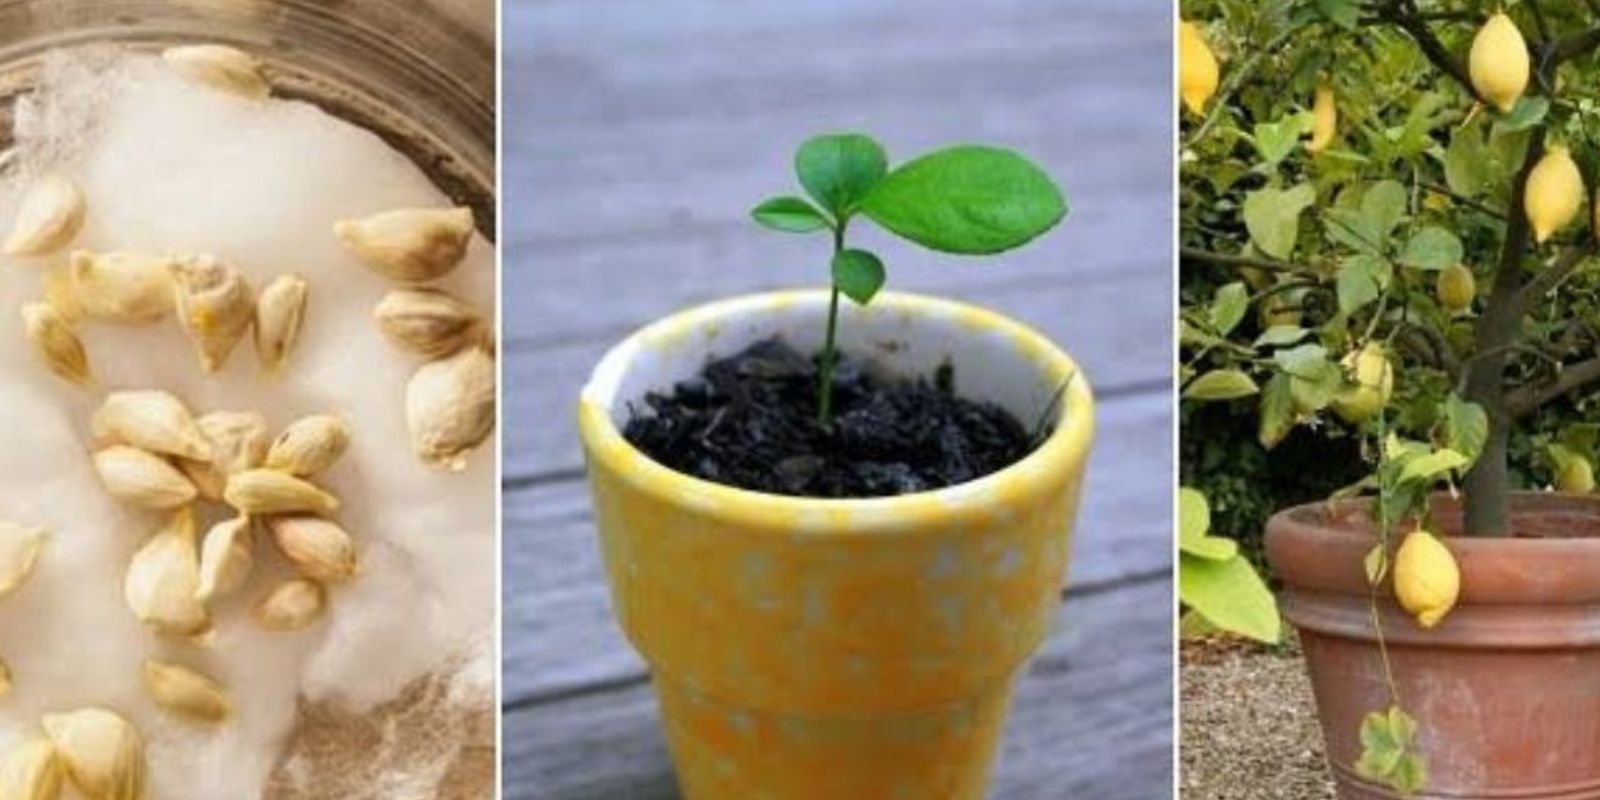
The first step in growing lemons from seeds is to choose a fresh, healthy lemon. Opt for organic lemons if possible, as they are free of chemical treatments like wax or pesticides that may prevent the seeds from sprouting. Cut the lemon open and carefully remove the seeds, making sure to handle them gently to avoid damaging the delicate embryos inside.
Step 2: Clean and Dry the Seeds
Once you’ve removed the seeds, rinse them in a bowl of water to wash off any pulp or juice. It’s important to thoroughly clean the seeds to prevent mold growth and to give them the best chance of sprouting. After rinsing, gently dry the seeds with a paper towel.
Step 3: Pre-Germinate the Seeds
Before planting your lemon seeds in soil, it’s helpful to pre-germinate them. This involves encouraging the seed to begin sprouting by keeping it in a warm, moist environment. To pre-germinate your seeds, follow these steps:
- Dampen a paper towel or a cloth and wrap the lemon seeds in it.
- Place the wrapped seeds inside a plastic sandwich bag or small container to create a humid environment.
- Keep the bag in a warm place—ideally between 70-80°F (21-27°C)—for 1 to 2 weeks.
- Check the seeds regularly for signs of sprouting. You should start to see tiny white rootlets emerging from the seeds.
Pre-germination is a crucial step, as it increases the chances of successful germination and allows you to see if your seeds are viable before planting them in soil.
Step 4: Plant the Seeds in Soil
Once your seeds have sprouted roots during the pre-germination process, they’re ready to be planted in soil. Here’s how to do it:
- Fill a small pot (about 6 inches in diameter) with well-draining potting soil. A cactus or citrus-specific mix works well because it drains easily and doesn’t retain too much moisture.
- Make a small hole in the center of the soil, about ½ inch deep.
- Gently place the germinated seeds into the hole with the root facing down.
- Lightly cover the seeds with soil, and water them gently to settle the soil around them.
It’s important to use a small pot initially because a large pot can hold too much moisture and cause the seedling to rot. Choose a pot with good drainage to avoid waterlogging.
Step 5: Provide the Right Environment
Lemon trees need plenty of light to grow, so place your pot in a sunny location. Ideally, this would be on a south-facing windowsill where the plant will receive at least 8 hours of direct sunlight each day. If you’re growing indoors, make sure the tree gets enough light to thrive.
You can also grow your lemon tree outdoors, provided you live in a warm, temperate climate. If you’re growing lemons outside, choose a spot with good sunlight and plenty of space for the tree to spread its roots.
Step 6: Watering and Care
Water your lemon seedling regularly, keeping the soil moist but not waterlogged. Overwatering can lead to root rot, so make sure the pot has good drainage to allow excess water to escape. When the top layer of soil feels dry, it’s time to water.
During the growing season (spring and summer), lemon trees are more active and require more frequent watering. In the winter months, reduce watering since the tree’s growth slows down.
Step 7: Fertilizing Your Lemon Tree
Once your lemon tree begins to grow, it will benefit from regular feeding to encourage healthy growth. Use a balanced, slow-release fertilizer designed for citrus trees. Apply the fertilizer every 6-8 weeks, following the manufacturer’s instructions to avoid overfeeding.
You can also use organic fertilizers, such as compost or worm castings, which provide essential nutrients without the risk of chemical buildup.
Step 8: Transplanting to a Larger Pot
As your lemon tree grows, you may need to transplant it into a larger pot to accommodate its expanding root system. Choose a pot that’s about 2-3 inches larger in diameter than the current one. Be sure the new pot has adequate drainage holes.
Gently remove the tree from its current pot, taking care not to damage the roots. Place it in the new pot with fresh, well-draining soil and water it thoroughly.
Step 9: Pruning and Shaping
Lemon trees benefit from occasional pruning to remove dead or damaged branches, encourage branching, and maintain their shape. Pruning should be done during the tree’s dormant period, typically in late winter or early spring.
Focus on cutting back any weak or overly long branches and thinning the tree’s canopy to allow sunlight to reach all parts of the plant.
Step 10: Patience and Long-Term Care
It can take several years for a lemon tree grown from seed to produce fruit. Don’t be discouraged by the time it takes—growing a lemon tree is a long-term commitment, but with patience, you’ll eventually be rewarded with beautiful blossoms and fresh fruit.
If your tree is growing indoors, it may not flower or fruit as easily as outdoor trees, but with the right care and attention, it is possible. Keep providing optimal light, watering, and fertilizing to support its growth.
Final Thoughts: Enjoying the Fruits of Your Labor
Growing lemons from seed is a fulfilling and educational journey. While it requires patience, dedication, and a little bit of care, the result—a healthy, productive lemon tree—is well worth the wait. Whether you’re growing lemons for their fruit, flowers, or simply as a hobby, the experience of nurturing a tree from seed to fruit is a deeply satisfying one.
By following these steps, you can successfully grow your own lemon tree and enjoy fresh, homegrown lemons in the future. So, grab a lemon, start your seeds, and embark on the exciting journey of growing your very own citrus tree at home!