
Hydrangeas are among the most beloved flowering shrubs, known for their vibrant, large blooms that come in various colors, from pink and blue to white and purple. While buying hydrangeas from a nursery is an easy way to add these stunning plants to your garden, growing hydrangeas from cuttings offers a fun and rewarding way to propagate new plants. It’s also an affordable method to increase the number of hydrangeas in your garden or share them with friends and family.
In this article, we’ll guide you through the process of growing hydrangeas from cuttings, offering tips and insights for success. Whether you’re a beginner or an experienced gardener, this step-by-step guide will help you master the art of propagating hydrangeas and enjoy beautiful blooms in your own garden.
Why Grow Hydrangeas from Cuttings?
Growing hydrangeas from cuttings is an effective way to propagate new plants. It’s a great method if you want to:
- Save Money: Instead of purchasing new plants, you can create your own from existing hydrangeas.
- Preserve Specific Varieties: If you have a hydrangea that you particularly love, growing it from a cutting ensures that the new plant will have the same characteristics (color, size, shape).
- Increase Your Collection: It’s an affordable way to multiply the number of hydrangeas in your garden.
Hydrangeas are relatively easy to propagate from cuttings, and with patience, you can enjoy their beauty without having to buy new plants each season.
Step-by-Step Guide to Growing Hydrangeas from Cuttings
1. Choose Your Cutting
The first step in growing hydrangeas from cuttings is selecting a healthy stem. Here’s what to look for:
- Choose a Non-Flowering Stem: Cuttings taken from flowering stems tend to root less successfully. Look for stems that have no flowers or faded blooms.
- Look for New Growth: Choose a young, healthy stem with fresh growth. Ideally, the stem should be 5-6 inches long.
- Two Sets of Leaves: The cutting should have at least two sets of leaves, as the leaves will help with photosynthesis while the cutting is developing roots.
Cutting a healthy stem is crucial for success, so avoid stems that are old, damaged, or diseased.
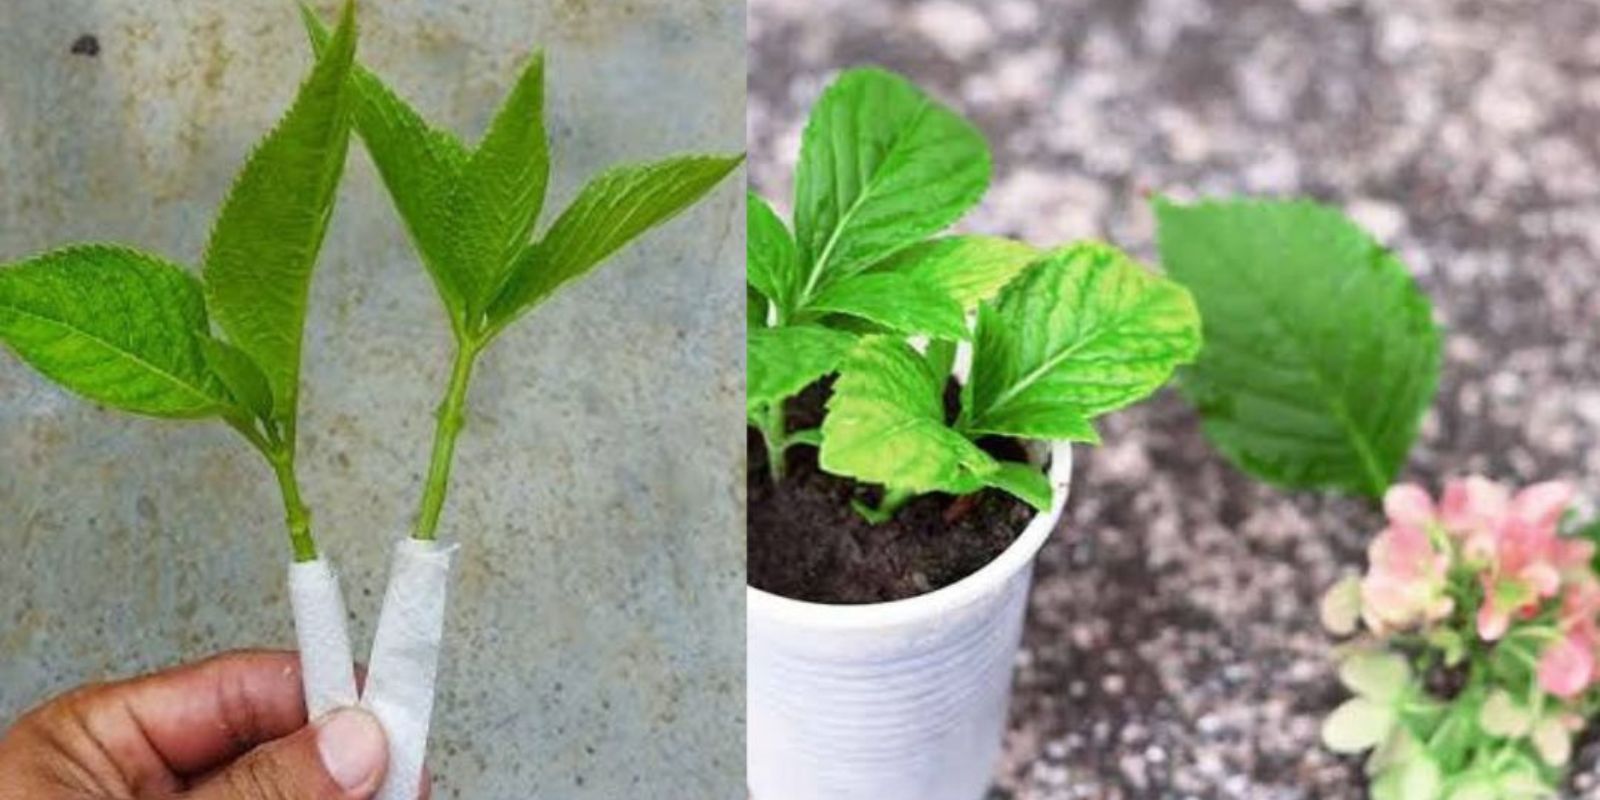
2. Prepare the Cutting
Once you’ve selected a healthy stem, it’s time to prepare it for rooting:
- Make the Cut: Use a sharp, clean pair of pruning shears to cut the stem at a 45-degree angle. This angle helps to maximize the surface area for rooting.
- Remove Lower Leaves: Strip off the bottom set of leaves so that there’s no foliage below the point where the cutting will be inserted into the soil. Leave the top two sets of leaves to help the cutting retain moisture.
- Optional Rooting Hormone: While not essential, dipping the cut end of the stem into rooting hormone can encourage faster root development. Rooting hormone is available at most garden centers and can significantly improve your chances of success.
Take care when preparing your cutting to avoid damaging the stem. The cleaner and smoother the cut, the better the chances of successful rooting.
3. Plant the Cutting
Now that you’ve prepared your cutting, it’s time to plant it in the soil:
- Select the Right Potting Mix: Choose a well-draining potting mix to prevent root rot. A good mix contains equal parts of perlite, vermiculite, and peat moss. This combination ensures proper drainage while retaining some moisture.
- Make a Hole in the Soil: Using a pencil or stick, create a hole in the soil. Insert the cutting into the hole, making sure the cut end is submerged about 2 inches into the soil. Firm the soil around the cutting to ensure it stands upright and is well-supported.
- Water the Cutting: Gently water the soil around the cutting to settle it in place. Be careful not to soak it too much, as excess moisture can cause the cutting to rot.
After planting, keep the soil slightly moist, but avoid overwatering.
4. Create a Mini Greenhouse
To create the ideal environment for your cutting to root, you’ll need to maintain a high level of humidity. This can be achieved by creating a mini greenhouse effect:
- Cover the Pot: Place a plastic bag or plastic cover over the pot. This will trap moisture and create a humid environment, which is crucial for root development.
- Avoid Direct Contact with Leaves: Be sure the plastic cover does not touch the leaves of the cutting. You can use sticks or small supports to keep the plastic off the plant.
- Ensure Proper Ventilation: While humidity is important, air circulation is also necessary. Open the plastic bag occasionally to prevent mold or fungus growth, and make sure there’s some airflow to keep the cutting from getting too damp.
Creating a mini greenhouse will encourage your hydrangea cutting to thrive and root more successfully.
5. Care for Your Cutting
With your cutting planted and covered, it’s time to provide it with the proper care:
- Light Requirements: Place the pot in a location with bright, indirect light. Avoid direct sunlight, as this can cause the cutting to dry out.
- Maintain Moisture: Keep the soil consistently damp, but not soaking wet. Check the soil every few days and water as needed.
- Check for Condensation: Keep an eye on the inside of the plastic cover. If condensation builds up, open the cover slightly to allow ventilation and prevent mold or fungal growth.
The key to success is maintaining the right balance of moisture and light for your cutting.
6. Check for Root Growth
After about 2-4 weeks, it’s time to check if your cutting has rooted. Gently tug on the stem of the cutting. If you feel resistance, that’s a good sign that roots have started to form.
It’s important not to disturb the cutting too much during this period, as roots are delicate and may take time to develop. Be patient, as it can take a few weeks for roots to form.
7. Transplant Your New Hydrangea
Once your cutting has a healthy root system, it’s time to transplant it into a larger pot or directly into your garden:
- Choose the Right Location: If transplanting outdoors, select a spot with well-draining soil and preferably morning sun with afternoon shade. Hydrangeas thrive in partially shaded areas.
- Transplant Carefully: When transplanting, gently remove the cutting from its pot, being cautious not to damage the roots. If it’s been in a pot, you may need to loosen the root ball before planting.
- Water Well: After transplanting, water your hydrangea well to help it settle into its new home.
Hydrangeas may need some time to acclimate to their new environment. Be patient and continue caring for them as they grow.
Tips for Success
- Timing: The best time to take hydrangea cuttings is during the summer months when the plant is actively growing.
- Temperature: Keep your cutting in a warm environment (around 65-75°F or 18-24°C) for optimal rooting.
- Patience: Not every cutting will root successfully, so don’t be discouraged. Try taking a few cuttings to increase your chances of success.
Conclusion
Growing hydrangeas from cuttings is a simple and fulfilling way to propagate new plants. With the right steps and a bit of patience, you can successfully grow your own hydrangeas from cuttings and enjoy their beautiful blooms for years to come. Whether you’re looking to expand your garden or share plants with others, propagating hydrangeas from cuttings is a fun, rewarding project that can lead to a garden full of vibrant color.
#HydrangeaPropagation #GardeningTips #PlantLovers #GrowHydrangeas #DIYGardening #FlowerLovers #PropagationSuccess