
Incorporating greenery into your home or garden adds vibrancy and life to any space. One innovative and low-maintenance way to achieve this is by growing grass in a hanging ball. This method not only serves as a unique decorative element but also requires minimal upkeep, making it perfect for busy individuals who still want to enjoy a touch of nature. In this article, we will explore the step-by-step process to create a stunning hanging grass ball and provide tips to ensure its success.
Introduction
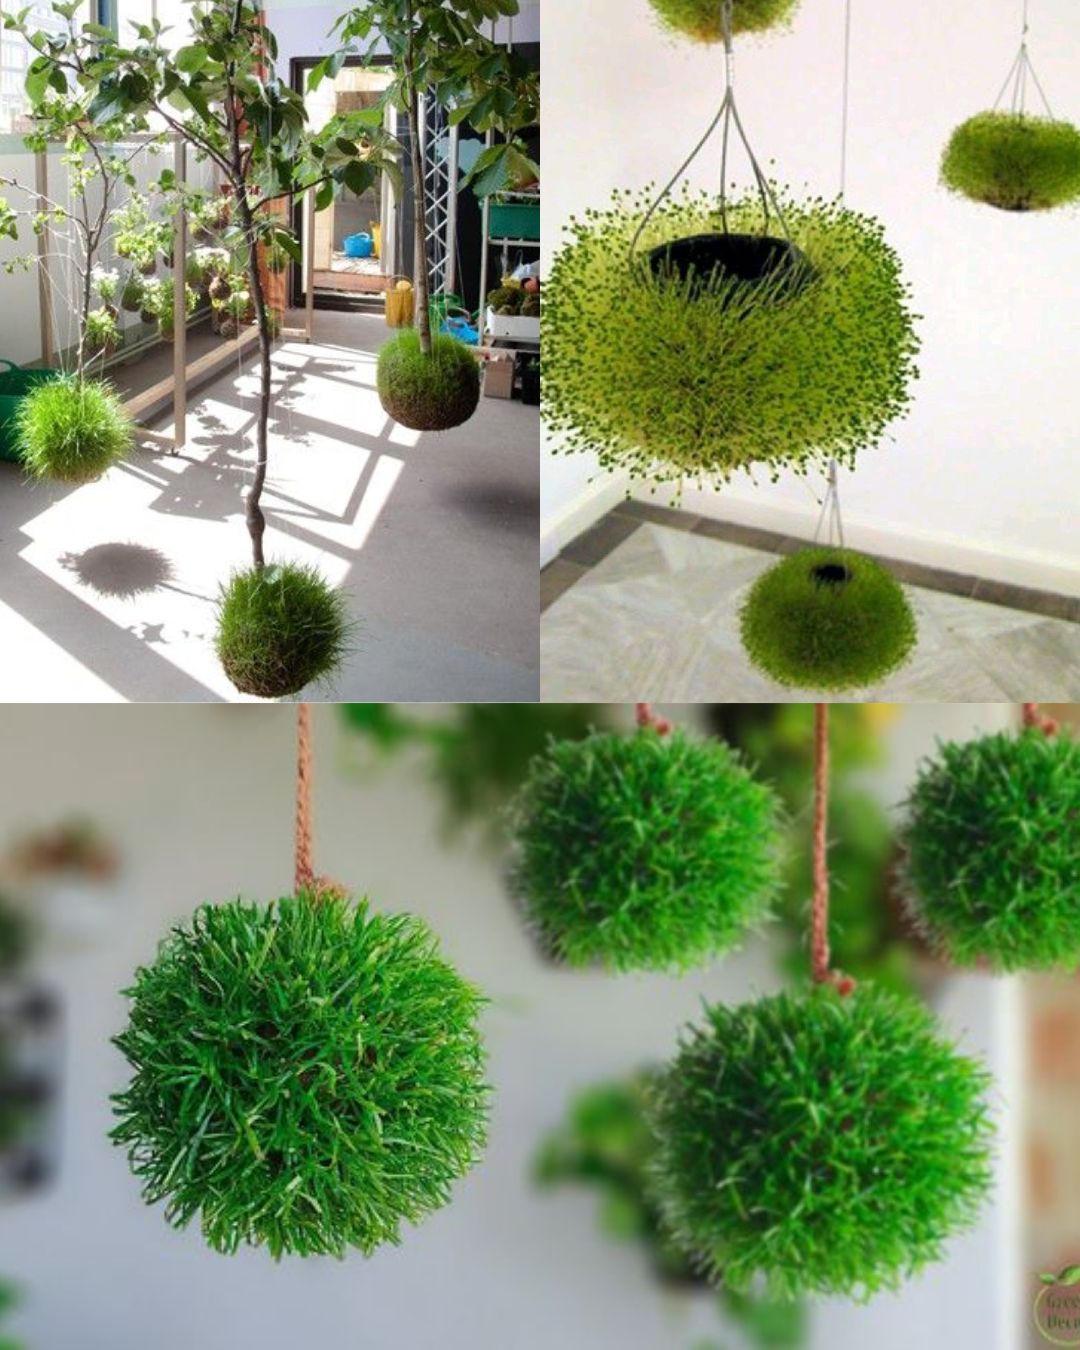
Imagine a lush, green ball of grass hanging gracefully in your living space or garden. This eye-catching display offers the beauty of nature with a touch of creativity and minimal maintenance. Whether you want to enhance your interior decor or add an interesting focal point to your garden, growing grass in a hanging ball is a fantastic solution. It combines the beauty of greenery with the convenience of easy care, allowing you to enjoy a lush, vibrant display without the hassle of traditional gardening.
Choosing Your Container
Selecting the Right Frame
The first step in creating your hanging grass ball is to choose the right container. A spherical wire frame or a hanging basket with a wire structure is ideal for this project. The frame should be sturdy enough to support the soil and grass while allowing for good air circulation. You can find these frames at garden centers, craft stores, or online. If using a hanging basket, ensure it has sufficient drainage holes to prevent waterlogging.
Preparing the Container
Once you have your frame or basket, it’s time to prepare it for planting. If using a wire frame, cover it with a layer of burlap or mesh to hold the soil in place. This will help prevent soil from falling out while allowing for drainage. For hanging baskets, ensure the basket is lined with a suitable material that will retain soil but allow excess water to drain.
Preparing the Soil
Choosing the Right Potting Mix
The type of soil you use is crucial for the success of your hanging grass ball. Opt for a lightweight potting mix designed for hanging plants. This mix typically contains a blend of peat moss, vermiculite, and perlite, providing excellent drainage and aeration. A slow-release fertilizer can be added to the soil mix to support healthy grass growth.
Mixing the Soil
In a large container or wheelbarrow, combine the potting mix with the slow-release fertilizer according to the manufacturer’s instructions. Mix thoroughly to ensure even distribution of the nutrients. If you’re using a ready-to-use potting mix with built-in fertilizer, you can skip this step.
Planting the Grass Seeds
Selecting Grass Varieties
Choose grass varieties that are well-suited for your climate and growing conditions. Cool-season grasses like Kentucky bluegrass or perennial ryegrass work well in temperate climates, while warm-season grasses like Bermuda or Zoysia are ideal for hotter regions. Ensure the grass seeds you select are appropriate for the lighting conditions where the hanging ball will be placed.
Sowing the Seeds
Spread the grass seeds evenly over the soil in the container. Gently press the seeds into the soil using your hands or a flat tool to ensure good seed-to-soil contact. Avoid burying the seeds too deep, as this can hinder germination. Follow the recommended seeding rate on the seed package for the best results.
Caring for Your Hanging Grass Ball
Watering
Proper watering is essential for successful germination and growth. Lightly water the soil after planting the seeds to keep it consistently moist. Use a fine mist setting on your watering can or a gentle spray from a hose to avoid washing away the seeds. As the grass begins to grow, continue to water it regularly, ensuring the soil remains moist but not soggy. Overwatering can lead to root rot, so monitor the moisture levels closely.
Providing Light
Place the hanging ball in a location with indirect sunlight. Grass typically requires several hours of light each day to grow well. If natural light is insufficient, consider using grow lights to supplement it. Position the lights a few inches above the grass ball and keep them on for about 12-14 hours a day to mimic natural sunlight.
Minimal Maintenance Tips
Trimming
Once the grass has established itself and starts to grow, it may become necessary to trim it to maintain the desired shape of the hanging ball. Use sharp garden shears or scissors to trim the grass evenly. Regular trimming helps to keep the grass lush and prevents it from becoming overgrown.
Monitoring Health
Regularly check the grass for signs of pests or diseases. Common issues include aphids, spider mites, and fungal infections. If you notice any problems, treat them promptly with appropriate organic or chemical remedies. Ensuring good air circulation around the hanging ball will also help prevent fungal growth.
Refreshing the Soil
Over time, the soil in the hanging ball may become compacted or depleted of nutrients. Refresh the soil by adding a thin layer of compost or additional potting mix to the top. This will help replenish nutrients and improve soil structure. Be sure to gently mix the new soil with the existing layer to avoid disturbing the grass roots.
Conclusion
Creating a hanging grass ball is a creative and low-maintenance way to add greenery to your space. By following the steps outlined—choosing the right container, preparing the soil, planting the seeds, and providing minimal care—you can achieve a stunning and effortless green display. This method not only enhances the aesthetic appeal of your home or garden but also offers a practical solution for those who want to enjoy the beauty of nature without extensive upkeep. Start your project today and enjoy the lush, vibrant results of your hanging grass ball. 🌿✨