
Garlic (Allium sativum) is a versatile and easy-to-grow crop that adds flavor to countless dishes. It is a staple in many kitchens around the world, valued not only for its culinary uses but also for its health benefits. Garlic can be grown in the ground or in containers, and if you’re limited on space or prefer the convenience of container gardening, growing garlic in pots is an excellent choice.
In this comprehensive guide, we’ll walk you through the steps to successfully grow garlic in pots, from choosing the right container and soil to harvesting your garlic at the perfect time. Whether you’re a beginner or an experienced gardener, these tips will ensure that your garlic-growing adventure is a success.
Why Grow Garlic in Pots?
Garlic is traditionally grown in the ground, but growing it in pots offers several benefits. Here’s why you should consider growing garlic in pots:
- Space-Saving: Garlic can be grown in small spaces, making it ideal for people with limited garden space, such as those living in apartments or urban environments.
- Better Drainage: Pots allow you to control the drainage more easily, preventing garlic from sitting in waterlogged soil, which can cause rot.
- Mobility: Growing garlic in containers means you can move them around to optimize sunlight exposure, especially if you’re growing garlic indoors or on a balcony.
- Control Over Soil Quality: Container gardening gives you the ability to choose high-quality, well-draining soil that will ensure healthy garlic growth.
With the right container, soil, and care, you can enjoy homegrown garlic even in the smallest spaces.
Step 1: Choose the Right Pot
The first step in growing garlic in pots is selecting the right container. Here are the key things to consider:
- Size: Garlic needs space for its roots to spread out, so choose a pot that is at least 8 to 12 inches deep and wide enough to accommodate several garlic cloves. Ideally, the pot should be at least 12 inches in diameter to provide enough space for 4-6 garlic cloves to grow comfortably.
- Drainage: Good drainage is essential for garlic. A pot with drainage holes at the bottom will prevent water from accumulating and ensure that the roots don’t rot. If your pot doesn’t have drainage holes, you can drill them yourself or use a container designed for outdoor plants.
- Material: Plastic, ceramic, clay, or fabric pots all work well for growing garlic. Plastic pots are lightweight and retain moisture better, while clay pots are breathable and help with airflow to the roots. Fabric pots provide great drainage and prevent the garlic from becoming root-bound.
Step 2: Select the Right Garlic Variety
Garlic comes in two main varieties: hardneck and softneck. Understanding the difference between them will help you choose the best variety for your climate and growing conditions.
- Hardneck Garlic: Hardneck varieties are better suited for colder climates, as they require a period of cold dormancy (vernalization) to develop properly. They typically produce larger cloves and have a more complex flavor profile. Hardneck garlic is characterized by a stiff central stem or “neck” that extends from the bulb, which is where the name comes from.
- Softneck Garlic: Softneck garlic is ideal for warmer climates because it doesn’t need cold temperatures to thrive. These varieties tend to produce smaller cloves but have a longer shelf life and are easier to braid for storage. Softneck garlic is generally better for container gardening because it grows in tighter spaces and doesn’t produce a central stem.
Both varieties can be grown in pots, but make sure to choose the one that is best suited for your climate and growing conditions.
Step 3: Prepare the Soil
Garlic thrives in loose, well-draining soil that is rich in organic matter. To create the best growing medium for your garlic, follow these soil guidelines:
- Soil Type: Use a high-quality potting mix that is lightweight and well-draining. Avoid using garden soil, as it can be too dense for container gardening and may contain pests or diseases.
- Amendments: Mix compost or well-rotted manure into the potting soil to provide essential nutrients for garlic. Adding a little sand or perlite will improve drainage, preventing the soil from becoming waterlogged.
- pH Level: Garlic prefers slightly acidic to neutral soil, with a pH level between 6.0 and 7.0. You can test your soil’s pH with a soil testing kit and amend it with lime if the soil is too acidic or sulfur if it is too alkaline.
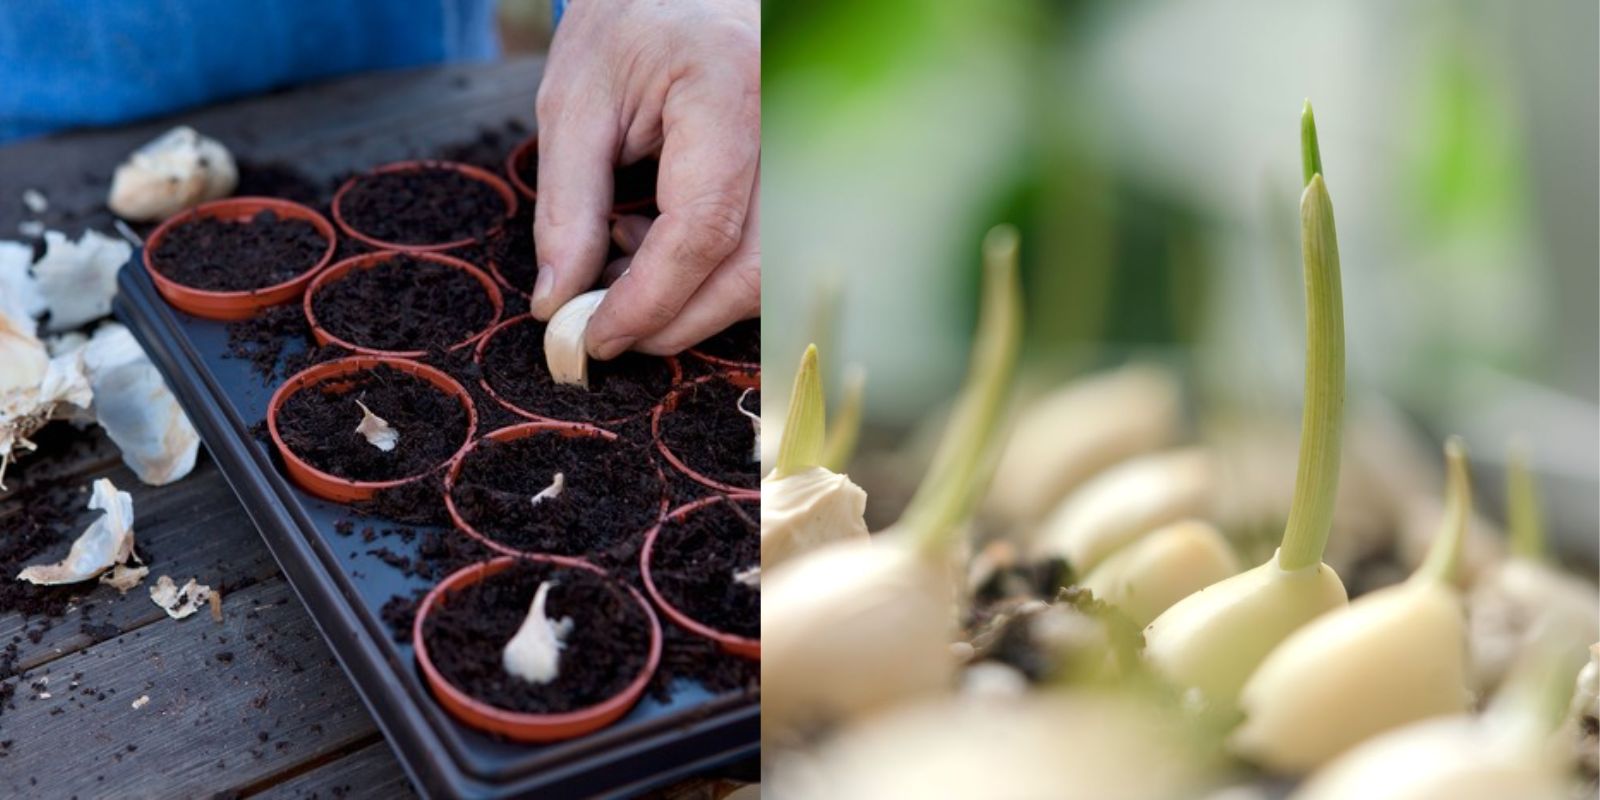
Step 4: Planting Garlic Cloves
Once you’ve selected the right pot and soil, it’s time to plant your garlic. Here’s how to do it properly:
- Separate the Cloves: Garlic bulbs are made up of individual cloves. Separate the cloves from the bulb just before planting, keeping the papery skins intact. Choose the largest, healthiest cloves for planting, as they will produce the biggest bulbs.
- Planting Depth: Plant the garlic cloves 2-3 inches deep, with the pointed end facing up. Space the cloves about 4-6 inches apart. If you’re planting multiple rows in a large pot, space the rows about 6-8 inches apart.
- Orientation: Be sure to plant the cloves with the pointed end facing upwards. This is the end where the shoot will emerge.
- Watering: Water the soil gently after planting to help settle the soil around the cloves. Keep the soil consistently moist but not soggy during the growing season.
Step 5: Provide Proper Care
Garlic is relatively easy to grow, but it does need a few things to thrive:
- Sunlight: Garlic loves the sun! Place your pot in a location that receives at least 6 hours of direct sunlight per day. A sunny windowsill, balcony, or garden bed works well.
- Watering: Garlic needs consistent moisture but does not like to be waterlogged. Water the garlic regularly, but make sure the soil has good drainage to avoid root rot. In general, you should water your garlic when the top inch of soil feels dry.
- Fertilizing: Garlic is a heavy feeder, so it will benefit from occasional fertilization. Use a balanced organic fertilizer or compost tea every 3-4 weeks. Avoid high-nitrogen fertilizers, as they can cause excessive leaf growth and reduce bulb development.
- Mulching: Apply a layer of mulch, such as straw or shredded leaves, to help retain moisture, suppress weeds, and maintain a consistent temperature in the soil.
Step 6: Harvesting Garlic
Garlic requires a long growing period, typically 8-10 months, depending on the variety and climate. Knowing when to harvest your garlic is crucial to getting the best flavor and storage potential. Here’s how to tell when your garlic is ready to harvest:
- Watch for Yellowing Leaves: Garlic leaves will start to turn yellow and dry out as the bulbs mature. When 2-3 of the lower leaves have turned brown or yellow, it’s time to harvest.
- Test for Size: Gently dig around the base of a few plants to check the size of the bulbs. If the bulbs are large and firm, they are ready to be harvested.
- Harvesting: To harvest garlic, gently pull the plants from the soil by their stems. Be careful not to damage the bulbs.
- Curing: After harvesting, allow the garlic bulbs to cure in a dry, well-ventilated area for 2-3 weeks. Hang the garlic in bunches or lay them out on a screen or mesh for proper airflow. Once the garlic is fully cured, trim the stems and roots.
Conclusion
Growing garlic in pots is an easy and rewarding gardening project that allows you to enjoy fresh, flavorful garlic right from your own home. By choosing the right pot, soil, and variety, and following these simple steps, you’ll be able to grow healthy garlic in containers and reap the benefits of homegrown produce. Whether you’re an experienced gardener or a beginner, garlic is a great addition to any garden, and growing it in pots makes it accessible for all. So, roll up your sleeves, grab your pots, and get started on growing your own garlic!
Hashtags: #GarlicInPots #UrbanGardening #HomegrownGarlic #ContainerGardening #GrowYourOwnFood #GardeningTips #OrganicGardening #SustainableLiving #GreenThumb