
Growing pumpkins in raised beds is an increasingly popular technique for home gardeners looking to control soil quality, improve drainage, and make the most of limited space. This method can help you produce large, healthy pumpkins while maintaining ease of access and control over your garden’s conditions. Whether you’re growing pumpkins for fun, decoration, or culinary purposes, raised beds offer a perfect solution to achieve an epic harvest.
In this comprehensive guide, we will walk you through the steps of growing pumpkins in raised beds, from selecting the right variety to preparing your soil, watering, fertilizing, and more. Follow these tips, and you’ll be well on your way to growing pumpkins that will make your garden the talk of the neighborhood.
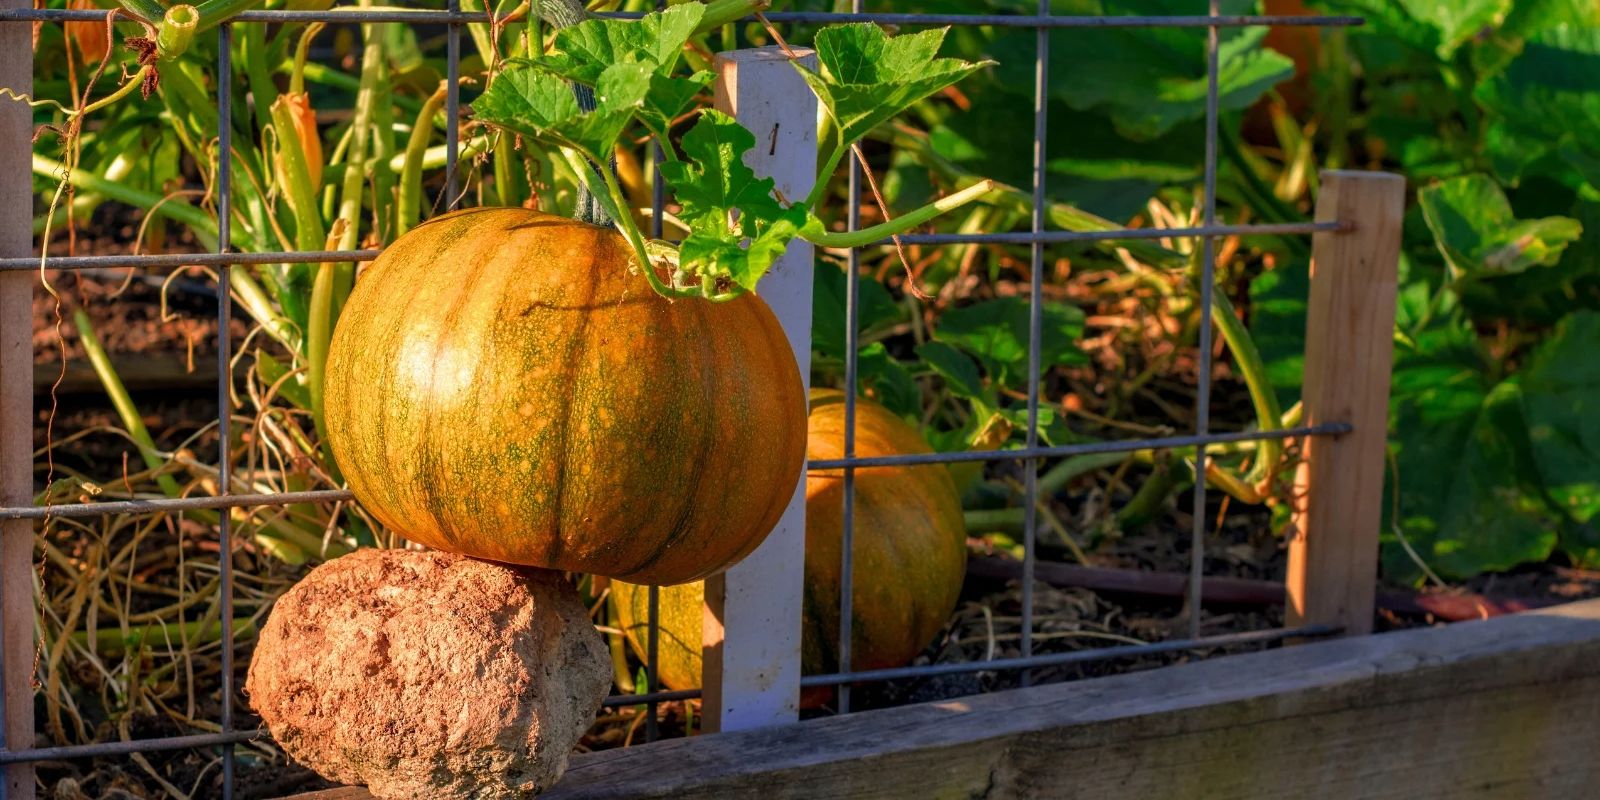
Why Raised Beds Are Ideal for Pumpkins
Raised beds are especially beneficial for growing pumpkins due to their ability to control several key factors that contribute to healthy plant growth. Some advantages include:
- Better Soil Quality: Raised beds allow you to use nutrient-rich soil that is free of weeds, pests, and diseases commonly found in garden soil. This is particularly important for pumpkins, which require well-drained, fertile soil to thrive.
- Improved Drainage: Raised beds offer excellent drainage, which prevents the roots from becoming waterlogged, a condition that can lead to root rot and other issues. Pumpkins are susceptible to soggy soil, so this feature is vital for their success.
- Warmer Soil: The soil in raised beds tends to warm up more quickly in the spring, allowing you to plant pumpkins earlier and extend the growing season.
- Space Management: By containing the vines within a designated area, raised beds help you keep your pumpkin patch organized, preventing the vines from sprawling across your entire garden.
- Ease of Care: Raised beds reduce the need to bend over while tending to your pumpkins, making tasks like weeding, watering, and harvesting easier on your back and knees.
Step-by-Step Guide to Growing Epic Pumpkins in Raised Beds
Step 1: Select the Right Pumpkin Variety
The first step in growing massive pumpkins is choosing the right variety. Different pumpkin varieties serve different purposes, so it’s important to pick one that aligns with your goals. If you’re aiming for size, opt for varieties like:
- Atlantic Giant: Known for producing massive pumpkins that can weigh hundreds of pounds, this is a popular choice for those aiming for size.
- Big Max: Another large variety, Big Max produces pumpkins that can grow up to 100 pounds or more.
- Cinderella (Rouge Vif d’Etampes): These pumpkins are not only large but also have a unique, flattened appearance, making them a beautiful decorative option.
If you’re looking for smaller, more manageable pumpkins for cooking or decorating, varieties like Jack Be Little or Sugar Pie may be better suited to your needs.
Step 2: Prepare Your Raised Bed
Pumpkins are heavy feeders, so preparing your raised bed with the right soil mix is crucial for their growth. Follow these steps for optimal soil preparation:
- Choose the Right Location: Select a sunny spot, as pumpkins need at least 6 to 8 hours of direct sunlight per day. The more sun, the better your pumpkins will grow.
- Fill the Bed with Rich Soil: Pumpkins thrive in loamy, well-drained soil. Fill your raised bed with a mixture of garden soil, compost, and well-rotted manure to provide the nutrients they need. Aim for a soil pH between 6.0 and 6.8.
- Amend the Soil: Before planting, mix in organic matter like compost or leaf mold to improve soil texture and fertility. Pumpkins will benefit from a soil enriched with organic materials that help retain moisture without becoming waterlogged.
Step 3: Planting Pumpkin Seeds
When it’s time to plant, you can either sow seeds directly into the raised bed or start seeds indoors and transplant them later.
- Sowing Seeds Outdoors: Plant pumpkin seeds directly in the raised bed after the last frost date in your area. Sow the seeds 1 inch deep and space them 3 to 4 feet apart to give the vines room to spread.
- Starting Indoors: For an earlier start, plant seeds indoors 2 to 4 weeks before the last frost. Use biodegradable pots to avoid disturbing the roots when transplanting them to the raised bed.
Step 4: Water Consistently
Pumpkins are thirsty plants, especially during the flowering and fruiting stages. Here are some tips to ensure proper watering:
- Keep the Soil Moist: Water the raised bed consistently to keep the soil evenly moist but not waterlogged. Pumpkins typically need about 1 to 2 inches of water per week, depending on the weather.
- Water at the Base: Water the plants at their base rather than from above, as wet leaves can lead to fungal diseases.
- Mulch: Apply a layer of mulch around the plants to help retain moisture, suppress weeds, and regulate soil temperature.
Step 5: Fertilize for Growth
To grow epic pumpkins, you’ll need to provide your plants with the right nutrients at the right time.
- Early Growth: When the plants are young and growing vigorously, use a high-nitrogen fertilizer to promote leafy growth. This will help the vines develop quickly and become strong enough to support the growing pumpkins.
- Flowering and Fruiting Stage: Once the flowers start to form, switch to a fertilizer that is higher in phosphorus and potassium, as these nutrients encourage fruit development and strengthen the pumpkins.
Step 6: Train and Support the Vines
Pumpkin vines can take up a lot of space, but with raised beds, you can train them to grow in a more organized manner.
- Vine Training: As the vines grow, guide them to run along the edges of the raised bed or over the sides to save space. Be careful not to damage the vines when moving them.
- Trellising: If you’re short on space, consider using a trellis to support the vines vertically. However, for larger varieties like Atlantic Giant, it may be better to allow them to spread naturally on the ground, as they can become quite heavy.
Step 7: Hand Pollinate if Needed
While pumpkins are typically pollinated by bees and other insects, you can give nature a helping hand if pollinators are scarce in your garden. To hand pollinate:
- Identify the male and female flowers (male flowers have a slender stem, while female flowers have a small fruit behind the flower).
- Use a small paintbrush or cotton swab to transfer pollen from the male flower to the center of the female flower.
Hand pollination increases the chances of fruit set and can lead to more pumpkins per plant.
Step 8: Monitor for Pests and Diseases
Pumpkins are prone to certain pests and diseases, so regular monitoring is essential to keep your plants healthy.
- Squash Bugs and Vine Borers: Check the undersides of leaves for eggs and remove any you find. You can also use row covers to protect the plants from pests.
- Powdery Mildew: This fungal disease appears as white, powdery spots on the leaves. To prevent it, space the plants properly to improve air circulation and avoid overhead watering.
- Organic Pest Control: Use neem oil or insecticidal soap to control pests without harming beneficial insects.
Step 9: Harvesting Epic Pumpkins
Pumpkins are ready to harvest when they have a deep, rich color and the skin feels hard. To harvest:
- Cut with Care: Use a sharp knife or pruning shears to cut the pumpkin from the vine, leaving a 3 to 4-inch stem attached. This helps the pumpkin store longer.
- Cure the Pumpkins: After harvesting, allow the pumpkins to cure in a warm, sunny spot for about a week. This hardens the skin and improves their storage life.
Step 10: Store Pumpkins Properly
To ensure your pumpkins last through the season, store them in a cool, dry place with good air circulation. Pumpkins that are properly cured and stored can last for several months.
Conclusion
Growing epic pumpkins in raised beds is a rewarding and fun gardening project that can yield impressive results with the right care. By following the steps outlined in this guide—choosing the right variety, preparing nutrient-rich soil, watering and fertilizing consistently, and managing pests—you can grow massive, healthy pumpkins that will make your garden the envy of the neighborhood.
Whether you’re aiming for a record-breaking pumpkin or just a few perfect specimens for fall decor, raised beds give you the control and flexibility needed to grow pumpkins successfully. So, grab your seeds, prepare your bed, and get ready to watch your pumpkin patch flourish!