
Celery (Apium graveolens) is a versatile vegetable that adds a crisp, refreshing texture to salads, soups, and stews. Growing celery at home not only guarantees fresh and organic produce but also offers a rewarding experience for gardeners of all levels. Whether you’re an experienced gardener or a beginner looking for an easy vegetable to grow, celery is a fantastic choice. In this article, we will walk you through the essential steps to grow celery in your garden, from planting and caring for the plants to harvesting the crunchy stalks.
Why Grow Celery?
Celery is an incredibly useful plant to have in your garden for many reasons. It’s packed with essential vitamins and minerals, including vitamin K, potassium, and folate. Growing your own celery allows you to enjoy the freshest, most nutritious stalks, free from pesticides and chemicals. Celery also has a relatively short growing season, making it perfect for both beginner and experienced gardeners alike. By following the steps in this guide, you can grow your own celery in no time.
Step 1: Choosing the Right Location
Celery requires a cool, sunny environment to thrive, but it also benefits from a bit of shade, especially in hot climates. Choose a location in your garden that gets at least 6 hours of sunlight per day. If you live in a hot climate, a spot that receives afternoon shade will help prevent the plants from bolting (going to seed prematurely) due to high temperatures.
Celery prefers to grow in moist soil, so select an area with well-draining soil. It’s important to avoid areas where the soil becomes waterlogged, as celery doesn’t like sitting in water for too long. Raised beds or containers can be ideal choices for growing celery because they provide good drainage and a controlled environment for the plant.
Step 2: Preparing the Soil
Celery is a heavy feeder, which means it requires nutrient-rich soil to grow well. To prepare the soil for celery, you’ll need to improve its fertility by adding organic matter. Compost, well-rotted manure, or leaf mold are excellent options for enriching the soil. Aim for soil with a pH level of 6.0 to 7.0—slightly acidic to neutral is ideal for celery.
If you’re growing celery in a raised bed or container, use a high-quality potting mix that is designed for vegetable gardening. You can mix in some organic compost or slow-release fertilizer to ensure the soil remains nutrient-rich throughout the growing season.
Step 3: Starting Celery from Seed or Stalks
While celery is commonly started from seeds, you can also propagate it from store-bought celery stalks. Let’s go over both methods.
Starting Celery from Seed:
If you’re starting from seeds, begin the process indoors about 10 to 12 weeks before your last expected frost date. Celery seeds are tiny, so you’ll want to sow them on the surface of your seed-starting mix. Gently press them down, but do not cover them with soil, as they require light to germinate.
Place the seed trays in a warm location, around 70°F (21°C), and keep the soil moist. Celery seeds can take 2 to 3 weeks to germinate, so be patient. Once the seedlings have grown large enough to handle, and the danger of frost has passed, you can transplant them outdoors.
Growing Celery from Stalks:
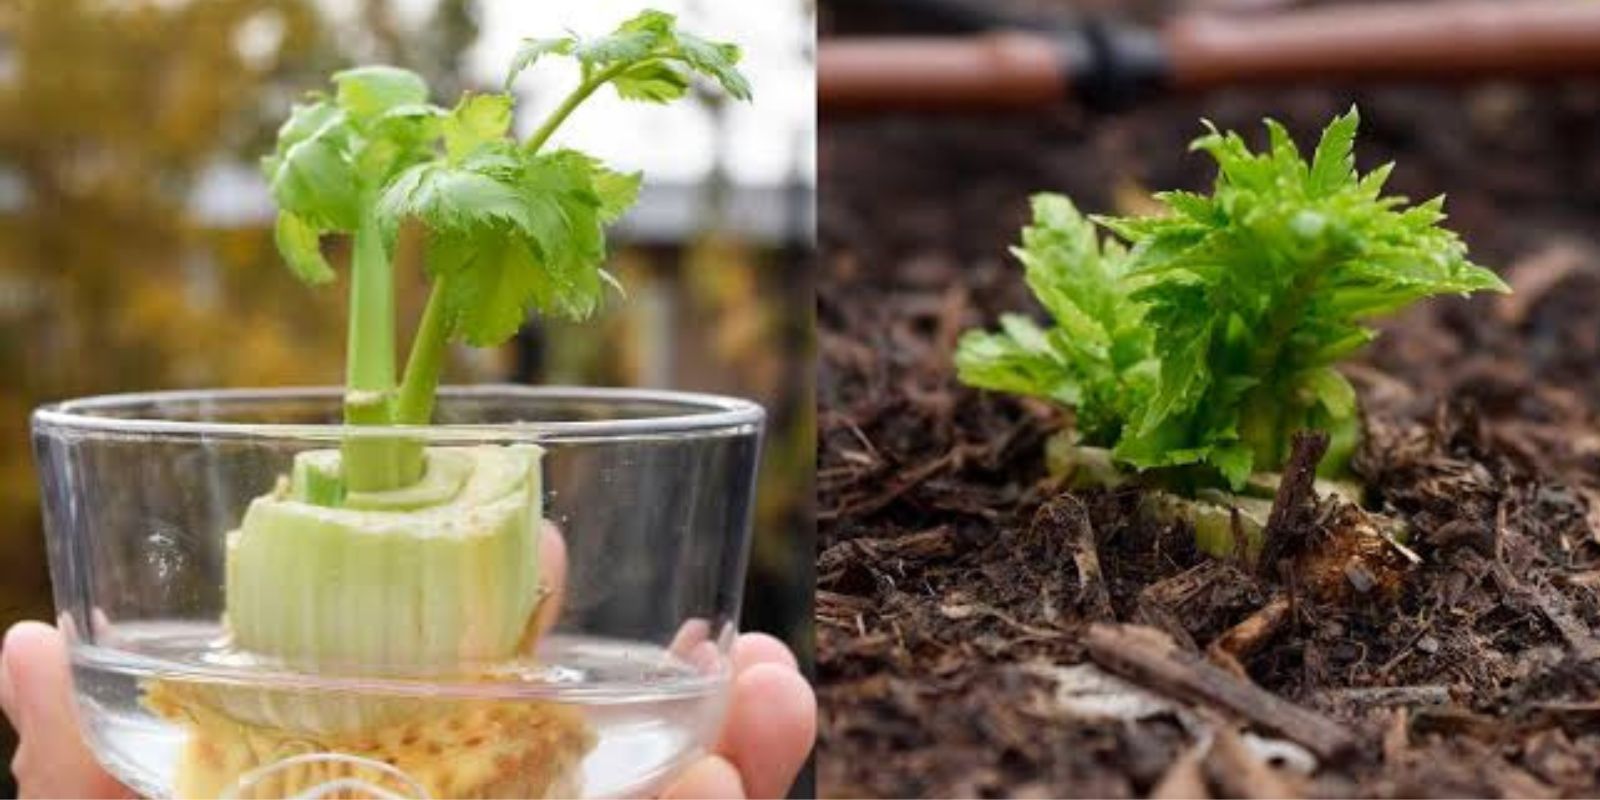
You can also grow celery from the base of store-bought stalks. Simply cut off the bottom of the celery bunch, leaving a few inches of the base. Place the base in a shallow dish with enough water to cover the bottom. Change the water every couple of days, and after about a week, you’ll begin to see roots growing from the base.
Once the roots are established, you can transplant the celery base into the soil outdoors. This method works well for beginners or anyone looking for a quick start.
Step 4: Transplanting Celery into the Garden
Once your celery seedlings are ready for transplanting, it’s time to move them into the garden or containers. Plant your celery plants about 8 to 10 inches apart, allowing each plant ample space to grow. Make sure the root ball is level with the surrounding soil and avoid planting them too deep. Celery grows best when its roots are shallow and close to the surface.
If you’re growing celery in containers, ensure the pots are large enough to accommodate the plants and have good drainage. Containers that are at least 12 to 18 inches deep will give celery enough room to grow its root system properly.
Step 5: Watering and Mulching
Celery is very sensitive to moisture levels and requires consistent watering to prevent the soil from drying out. Keep the soil evenly moist but not soggy. Celery grows best when it receives about 1 to 2 inches of water per week, either from rainfall or supplemental watering.
To help retain moisture, apply a 2- to 3-inch layer of mulch around the base of the plants. Mulch helps keep the soil cool, reduces evaporation, and prevents weeds from competing with your celery for nutrients. Organic mulches such as straw, grass clippings, or shredded leaves work well for this purpose.
Step 6: Fertilizing Celery
Celery is a heavy feeder, meaning it needs plenty of nutrients to grow tall, healthy stalks. Fertilize celery plants regularly to ensure they have the nutrition they need throughout the growing season.
You can use a balanced liquid fertilizer or a slow-release granular fertilizer. Apply the fertilizer every 3 to 4 weeks, but avoid over-fertilizing, as this can lead to excessive leafy growth and poor stalk development. Compost is also a great option to feed your celery plants naturally and steadily.
Step 7: Controlling Pests and Diseases
Celery is susceptible to a variety of pests and diseases, including aphids, cutworms, and leaf spots. Regularly inspect your plants for signs of pests, such as discolored leaves or holes in the foliage. Use organic pest control methods, such as neem oil or insecticidal soap, to combat these issues.
To prevent fungal diseases like blight or rot, ensure your plants are spaced adequately to allow for good air circulation. Avoid overhead watering, as wet foliage can encourage disease. Keeping the area around your celery plants free from weeds will also help reduce the risk of disease.
Step 8: Harvesting Celery
Celery takes around 3 to 4 months to reach full maturity. The plants are ready for harvest when the stalks are firm, thick, and crunchy. You can either harvest the entire plant or cut individual stalks as needed. To harvest the whole plant, use a sharp knife to cut the stalks near the base, leaving the roots intact.
Celery can be harvested at different stages of growth depending on your preference. If you prefer smaller, tender stalks, you can start harvesting when the plants are about half their full size. For larger, more mature stalks, wait until the plant reaches its full height.
Step 9: Storing Celery
Freshly harvested celery can be stored in the refrigerator for up to two weeks. To keep celery fresh, wrap the stalks in a damp paper towel and place them in a plastic bag. Alternatively, you can store celery in a container of water in the fridge, which will help keep the stalks crisp.
If you have an abundance of celery, you can also freeze it. Wash and chop the celery into small pieces, then blanch them in boiling water for 2 minutes. After blanching, transfer the celery to an ice bath to cool quickly. Once cooled, pat the celery dry and store it in freezer bags for up to six months.
Conclusion
Growing celery at home is a simple and rewarding process that provides you with a fresh, healthy vegetable right from your garden. By following the steps outlined in this guide, you can grow your own celery from seed or even from store-bought stalks. With the right care, attention, and patience, you’ll be able to enjoy crunchy, flavorful celery that’s perfect for salads, soups, and more. Happy gardening!
Call to Action:
Have you tried growing celery before, or are you excited to start? Share your experiences or ask any questions you might have in the comments below. Let’s inspire each other to grow our own fresh produce!