
Cauliflower is a delicious, versatile, and nutrient-packed vegetable that can be a rewarding addition to your backyard garden. While it may have a reputation for being somewhat challenging to grow, with the right knowledge and care, you can successfully cultivate cauliflower and enjoy fresh, homegrown produce from your own garden. This step-by-step guide will walk you through everything you need to know about growing cauliflower, from selecting the right variety to harvesting it at the perfect time.
Why Grow Cauliflower in Your Backyard?
Cauliflower is a member of the brassica family, which includes other cool-season crops like broccoli, cabbage, and Brussels sprouts. It’s rich in vitamins C and K, as well as fiber and antioxidants, making it a fantastic choice for a healthy diet. Growing your own cauliflower gives you access to a fresher and tastier vegetable than you’d typically find in stores, and with backyard gardening, you can ensure that it’s grown organically without harmful chemicals.
One of the main challenges gardeners face when growing cauliflower is that it can be sensitive to temperature changes and requires consistent care to develop firm, white heads. However, with a bit of planning and attention to detail, you can enjoy a bountiful harvest of this versatile vegetable.
Step 1: Choose the Right Cauliflower Variety
The first step in growing cauliflower is selecting a variety that suits your climate and growing conditions. Cauliflower comes in several varieties, each with different characteristics:
- Snowball: A popular and reliable variety, Snowball produces large, pure white heads and is relatively easy to grow.
- Purple Cape: For something different, try Purple Cape, which produces vibrant purple heads that are packed with antioxidants.
- Cheddar: This unique variety has bright orange heads that are rich in beta-carotene.
- Romanesco: With its fractal, lime-green appearance, Romanesco cauliflower is as visually striking as it is delicious.
When choosing your variety, keep your local climate in mind. Some varieties are better suited for cooler temperatures, while others are more heat-tolerant. If you live in a warmer region, look for heat-resistant varieties to prevent your cauliflower from bolting (going to seed prematurely) during warmer days.
Step 2: Start Your Cauliflower Indoors
Cauliflower thrives in cool weather, and it’s best to start growing it in early spring or fall when temperatures are mild. If you’re planting in the spring, start your seeds indoors 6-8 weeks before the last expected frost date. This will give your seedlings a head start, allowing them to grow strong and healthy before transplanting them into the garden.
How to Start Cauliflower Seeds Indoors:
- Sow Seeds in Trays: Fill seed trays or small pots with a high-quality seed-starting mix. Sow your cauliflower seeds about ¼ inch deep, keeping them spaced apart to allow for healthy root growth.
- Provide Consistent Moisture: Water the soil lightly but consistently, keeping it moist but not waterlogged.
- Ensure Proper Lighting: Place the trays in a bright, sunny window or under grow lights. Cauliflower seedlings need plenty of light to grow strong and avoid becoming leggy.
- Monitor Temperature: Keep the indoor temperature between 60-70°F (15-21°C). Cauliflower seeds germinate best in cooler temperatures.
- Transplant When Ready: Your seedlings will be ready to transplant when they have 2-3 sets of true leaves, which typically takes 4-6 weeks.
Step 3: Prepare Your Garden for Transplanting
Once your seedlings have grown strong enough, it’s time to prepare your backyard garden for transplanting. Cauliflower needs rich, well-draining soil with a pH level between 6.5 and 7.5. To ensure your plants thrive, take these steps to create the ideal growing environment:
How to Prepare Your Garden Soil:
- Choose a Sunny Spot: Cauliflower requires full sun to develop firm, healthy heads, so choose a location in your garden that gets at least 6 hours of sunlight per day.
- Enrich the Soil: Amend your soil with plenty of organic matter, such as compost or well-rotted manure, to improve fertility and drainage. Cauliflower is a heavy feeder and will benefit from nutrient-rich soil.
- Test the pH Level: Use a soil test kit to check the pH level of your soil. If the pH is too low, you can raise it by adding lime. If it’s too high, sulfur can help lower the pH.
- Add Fertilizer: Before transplanting, mix a balanced fertilizer into the soil to give your cauliflower a nutrient boost.
Step 4: Transplant Cauliflower Seedlings Outdoors
Once the soil is prepared and the seedlings are strong enough, you can transplant them into your garden. It’s important to harden off your seedlings before transplanting them outdoors. This process involves gradually exposing them to outdoor conditions over the course of 7-10 days, helping them acclimate to the cooler temperatures and sunlight.
How to Transplant Cauliflower Seedlings:
- Space the Plants: Space the cauliflower plants about 18-24 inches apart, with rows spaced 24-36 inches apart. Proper spacing allows the plants to grow without competition for nutrients and light.
- Water the Plants Well: After transplanting, water the plants thoroughly to help them establish strong roots.
- Mulch to Retain Moisture: Apply a layer of mulch around the base of the plants to retain moisture and keep the soil cool. This will also help suppress weeds that could compete with your cauliflower for nutrients.
Step 5: Care for Your Cauliflower Plants
Once your cauliflower seedlings are transplanted into the garden, it’s important to provide consistent care to ensure they thrive.
Watering:
Cauliflower needs regular watering to keep the soil consistently moist. Aim to provide about 1-1.5 inches of water per week, either through rainfall or manual watering. Be careful not to let the soil dry out, as this can stress the plants and lead to poor head development.
Fertilizing:
Since cauliflower is a heavy feeder, fertilize your plants with a balanced fertilizer every 3-4 weeks throughout the growing season. A fertilizer high in nitrogen will encourage leafy growth, while one rich in phosphorus and potassium will promote healthy head formation.
Blanching the Heads:
One of the key steps in growing cauliflower is blanching the heads. This process involves covering the developing heads to protect them from sunlight, which helps keep them white and tender.
How to Blanch Cauliflower:
- When the cauliflower heads reach about 2-3 inches in diameter, gather the outer leaves and loosely tie them over the head using string or a rubber band.
- Keep the heads covered for 1-2 weeks until they reach full size, usually around 6-8 inches in diameter.
- Blanching is not necessary for colored varieties like Purple Cape or Romanesco, as they are meant to be exposed to sunlight.
Step 6: Protect Your Cauliflower from Pests and Diseases
Cauliflower can be susceptible to a variety of pests and diseases, so it’s important to take preventive measures to protect your plants.
Common Pests:
- Cabbage worms and aphids are the most common pests that attack cauliflower plants. You can control these pests by hand-picking them or using organic insecticides like neem oil or insecticidal soap.
- Slugs and snails can also be a problem, especially in damp conditions. To deter them, use slug traps or sprinkle diatomaceous earth around the base of the plants.
Common Diseases:
- Clubroot is a fungal disease that can affect brassica plants, including cauliflower. To prevent clubroot, practice crop rotation and avoid planting cauliflower in the same spot year after year.
- Downy mildew and black rot can also affect cauliflower. To reduce the risk of disease, ensure good air circulation around the plants and avoid overhead watering.
Step 7: Harvest Your Cauliflower
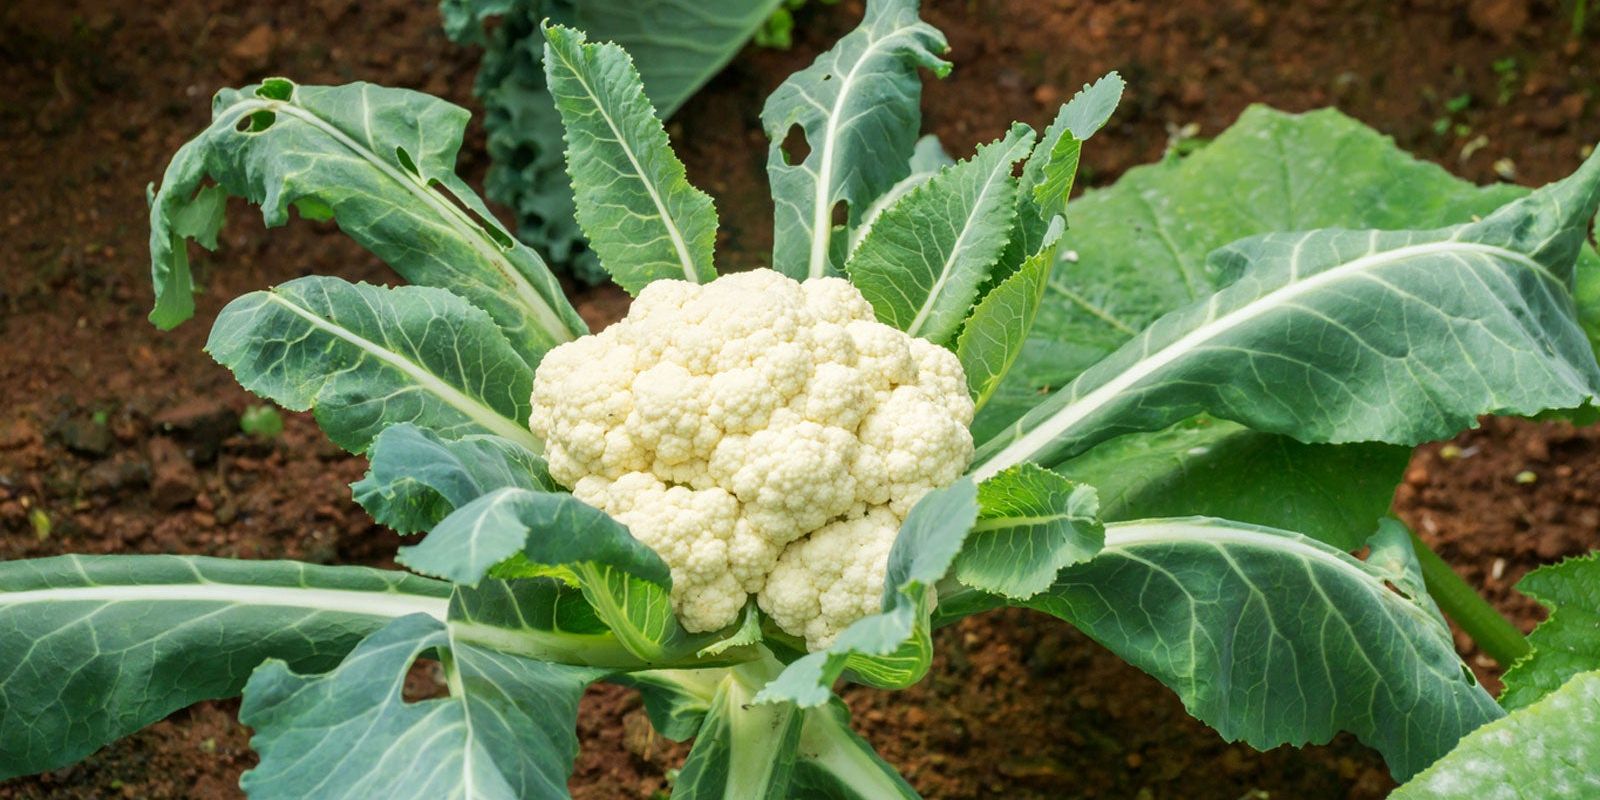
Cauliflower is ready to harvest when the heads are firm, compact, and reach their full size, usually around 6-8 inches in diameter. It’s important to harvest the heads before they begin to loosen or separate into florets.
How to Harvest Cauliflower:
- Use a Sharp Knife: Cut the head off the plant, leaving a few inches of stem attached. Be sure to harvest the heads early in the morning when the plants are hydrated.
- Check for Pests: Inspect the heads for any pests before bringing them indoors.
- Store Properly: Cauliflower can be stored in the refrigerator for up to 2 weeks. If you have an abundant harvest, you can also blanch and freeze the heads for long-term storage.
Final Thoughts
Growing cauliflower in your backyard is a rewarding endeavor that can lead to delicious, nutritious results. While it requires a bit of extra care and attention, the benefits of homegrown cauliflower far outweigh the challenges. By following these steps and providing your plants with the right environment, you’ll be well on your way to enjoying a bountiful cauliflower harvest.
Get started today, and watch your garden thrive! 🌱🥦 #CauliflowerHarvest #BackyardGardening #GrowYourOwnFood #OrganicGardening #GreenThumb