
Cabbage is a versatile and nutritious vegetable that has been a staple in kitchens around the world for centuries. Known for its crisp texture and mild flavor, cabbage can be used in a variety of dishes, from salads and slaws to soups and stews. Growing cabbage at home is a rewarding endeavor that allows you to enjoy fresh, homegrown produce and add a touch of gardening satisfaction to your meals.
Whether you’re a seasoned gardener or a beginner, this comprehensive guide will walk you through the essential steps for growing cabbage successfully. From selecting the right variety to harvesting your cabbage, you’ll learn everything you need to know to cultivate a thriving cabbage patch in your garden.
Introduction to Growing Cabbage
Cabbage belongs to the Brassicaceae family, which also includes broccoli, cauliflower, and kale. It’s a cool-season crop that thrives in the cooler months of spring and fall, making it an ideal choice for extending your gardening season. Cabbage is relatively easy to grow and can be cultivated in a variety of climates, provided you follow the proper care guidelines.
1. Choose the Right Variety
Selecting the right cabbage variety is crucial for a successful harvest. Different varieties of cabbage have unique characteristics, so consider the following factors when choosing:
Climate and Growing Season:
- Early Varieties: Ideal for spring planting and quicker harvests. Examples include ‘Early Jersey Wakefield’ and ‘Golden Acre.’
- Mid-Season Varieties: Take a bit longer to mature but offer a larger head size. Examples include ‘Green Boy’ and ‘Savoy Cabbage.’
- Late Varieties: Best for fall harvests and winter storage. Examples include ‘Brunswick’ and ‘Copenhagen Market.’
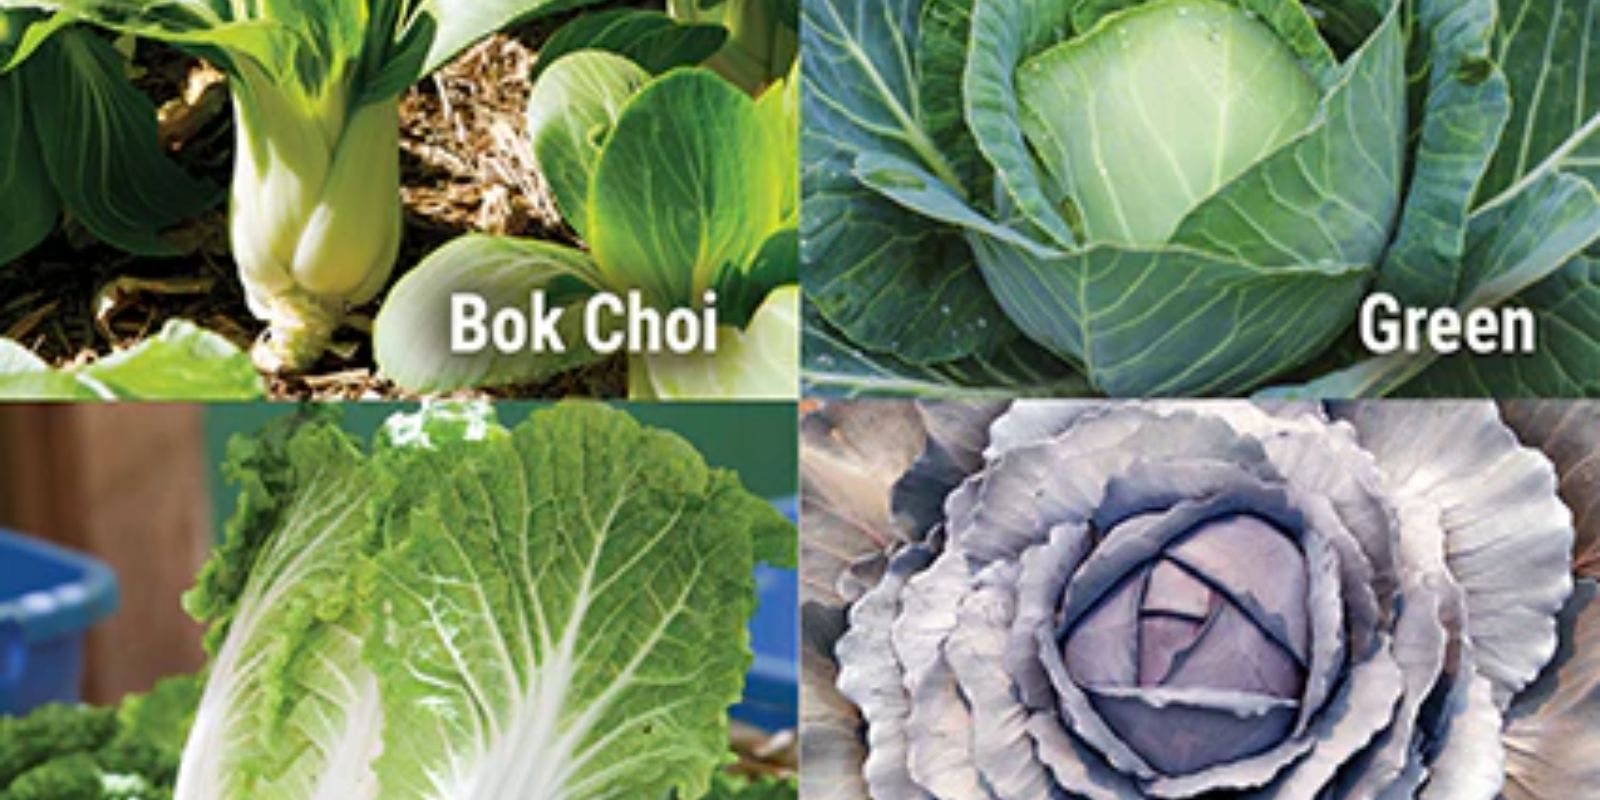
Head Type:
- Green Cabbage: The most common type, used in a variety of recipes.
- Red Cabbage: Adds color and a slightly spicier flavor.
- Savoy Cabbage: Features crinkled leaves and a sweeter taste.
2. Prepare the Soil
Cabbage grows best in rich, well-draining soil with a pH level between 6.0 and 7.0. Preparing your soil properly will set the foundation for healthy cabbage plants.
Soil Preparation Steps:
- Test Soil pH: Use a soil testing kit to determine the pH level. Amend the soil if necessary to reach the ideal pH range.
- Add Organic Matter: Incorporate compost or well-rotted manure into the soil to improve fertility and drainage.
- Ensure Proper Drainage: Cabbage does not tolerate waterlogged soil. Make sure the planting area has good drainage or consider using raised beds.
3. Start Seeds Indoors or Direct Sow
You can either start cabbage seeds indoors or direct sow them in the garden. The method you choose will depend on your local climate and growing season.
Starting Seeds Indoors:
- Timing: Start seeds 6-8 weeks before the last expected frost date.
- Seed Trays: Use seed trays or small pots filled with seed-starting mix.
- Sow Seeds: Plant seeds ¼ inch deep and water gently.
- Provide Light: Place the trays under grow lights or in a sunny window to ensure they receive 12-16 hours of light daily.
Direct Sowing:
- Timing: Sow seeds directly in the garden 2-4 weeks before the last frost date in spring or 6-8 weeks before the first frost date in fall.
- Spacing: Sow seeds ¼ inch deep, spaced about 2 inches apart. Thin seedlings to 12-18 inches apart when they have 2-3 true leaves.
4. Transplant Seedlings
If you started seeds indoors, it’s time to transplant seedlings into your garden when they have 2-3 true leaves and the outdoor soil has warmed.
Transplanting Steps:
- Harden Off Seedlings: Gradually acclimate seedlings to outdoor conditions by placing them outside for a few hours each day for a week before transplanting.
- Planting: Dig holes in the garden spaced 12-18 inches apart. Place each seedling into the hole, ensuring that the soil level is the same as it was in the seed tray.
- Watering: Water the seedlings thoroughly after planting to help them establish roots.
5. Water Regularly
Consistent watering is essential for healthy cabbage growth. Cabbage requires a steady supply of moisture to form firm heads and avoid stress.
Watering Tips:
- Keep Soil Moist: Maintain consistently moist soil, but avoid waterlogging.
- Water at the Base: Water at the base of the plants to prevent wetting the leaves, which can lead to fungal diseases.
- Mulch: Apply mulch around the plants to retain soil moisture and reduce weed competition.
6. Provide Adequate Sunlight
Cabbage plants require plenty of sunlight to thrive. Ensure your cabbage patch receives adequate light throughout the growing season.
Light Requirements:
- Sun Exposure: Cabbage needs at least 6-8 hours of direct sunlight per day. Choose a sunny location in your garden for planting.
- Avoid Shade: Ensure that your cabbage plants are not overshadowed by other plants or structures.
7. Fertilize and Mulch
Proper fertilization and mulching are key to promoting healthy cabbage growth and preventing nutrient deficiencies.
Fertilization:
- Initial Fertilizer: Incorporate a balanced fertilizer (such as 10-10-10) into the soil before planting.
- Side-Dressing: Apply additional fertilizer when plants are about halfway to maturity. Side-dress with a high-nitrogen fertilizer to support leafy growth.
Mulching:
- Application: Apply a layer of organic mulch (such as straw or shredded leaves) around the base of the plants.
- Benefits: Mulch helps retain soil moisture, suppress weeds, and regulate soil temperature.
8. Monitor for Pests
Cabbage plants are susceptible to various pests that can cause damage if not managed properly. Regularly inspect your plants for signs of infestation and take action as needed.
Common Pests:
- Aphids: Small, soft-bodied insects that feed on plant sap. Use insecticidal soap or neem oil to control aphids.
- Cabbage Worms: Green worms that feed on cabbage leaves. Handpick worms or use Bacillus thuringiensis (Bt) to control them.
- Slugs and Snails: Moist environments attract these pests. Use slug bait or copper barriers to deter them.
9. Harvesting Cabbage
Harvesting cabbage at the right time is essential for achieving the best flavor and texture.
Harvesting Tips:
- Check Head Size: Cabbage is ready to harvest when the head feels firm and solid. Typically, this occurs 70-100 days after planting, depending on the variety.
- Cutting: Use a sharp knife to cut the cabbage head from the plant, leaving the outer leaves intact if desired. Remove any damaged or yellowed leaves before storing.
10. Storing and Using Cabbage
Proper storage will extend the shelf life of your cabbage and allow you to enjoy it throughout the year.
Storage:
- Refrigeration: Store harvested cabbage in the refrigerator’s crisper drawer, where it will keep for up to 2-3 weeks.
- Long-Term Storage: For long-term storage, consider freezing or fermenting cabbage to preserve it for months.
Conclusion: Enjoy Your Homegrown Cabbage
Growing cabbage at home is a fulfilling gardening project that offers a fresh and nutritious addition to your meals. By following these steps—choosing the right variety, preparing the soil, starting seeds, transplanting, watering, providing sunlight, fertilizing, monitoring pests, and harvesting—you’ll be well on your way to a successful cabbage harvest.
Whether you’re a seasoned gardener or just starting out, cultivating cabbage is a great way to enhance your gardening skills and enjoy homegrown produce. Start your cabbage-growing journey today and savor the delicious, crisp taste of fresh, homegrown cabbage in your favorite dishes. 🌱🥬