
Growing bell peppers at home is a rewarding experience, and using recycled plastic bottles as planters is a fantastic way to embrace sustainability while cultivating your own fresh produce. By following simple steps, you can grow your own bell peppers from seeds, reducing your carbon footprint and creating a greener environment. In this guide, we will explore how you can repurpose plastic bottles to grow bell peppers, taking you through each step, from planting to harvesting, and giving you tips for successful results.
Why Grow Bell Peppers in Plastic Bottles?
Before diving into the steps, it’s essential to understand why using recycled plastic bottles is an excellent method for growing bell peppers. First and foremost, it’s an environmentally friendly choice. By using plastic bottles that would otherwise end up in a landfill, you’re not only reducing waste but also contributing to a more sustainable way of gardening.
Additionally, plastic bottles are the perfect size for starting small plants like bell peppers. Their transparent walls allow you to monitor the roots’ growth, and they retain moisture while providing excellent drainage once properly prepared. Bell peppers, known for their sweetness and vibrant colors, thrive when provided with consistent watering and good sunlight, which can be achieved using this simple, low-cost method.
Materials You Will Need:
- Recycled plastic bottles (preferably 1-2 liter size)
- Scissors or a utility knife
- Potting soil (preferably a well-draining mix)
- Bell pepper seeds (choose the variety you prefer)
- A small trowel or spoon for planting
- Watering can or spray bottle
- A sunny spot for your plants
- A tray or saucer (optional, to catch excess water)
Step-by-Step Guide to Growing Bell Peppers from Seeds in Recycled Plastic Bottles
Step 1: Prepare the Plastic Bottles
The first step in this process is preparing the plastic bottles. Start by thoroughly cleaning them to remove any leftover liquids or residues. Once clean, use scissors or a utility knife to cut the bottle in half. You can decide how high or low to cut, but leaving around 4-6 inches for the planter is ideal. This height will give the roots enough space to grow while still being manageable.
Step 2: Add Drainage Holes
Bell peppers need proper drainage to thrive, as stagnant water can lead to root rot. Poke a few small holes in the bottom of the bottle using a knife or scissors. If your bottle is wider at the bottom, ensure that the holes are spaced evenly to allow the water to escape freely. Drainage is key to keeping the soil healthy and preventing excess moisture buildup.
Step 3: Fill with Soil
Now that the bottle is prepared, fill it with soil. Use a well-draining potting mix, ideally one formulated for vegetables. Bell peppers require soil that retains moisture while draining excess water. Fill the bottle about three-quarters of the way with soil, leaving space at the top for watering.
Gently pat the soil down to remove any air pockets, but avoid compacting it too much as bell pepper seeds need a bit of loose, airy soil to germinate properly.
Step 4: Plant the Bell Pepper Seeds
Bell pepper seeds need to be planted at a shallow depth—around 1/4 inch deep is perfect. Use your fingers, a small trowel, or a spoon to create small divots in the soil for planting. Place one or two seeds in each divot to give them the best chance to germinate. Press the soil gently over the seeds to cover them, ensuring they’re secure but not buried too deeply.
If you are planting multiple bottles, space out the seeds accordingly. Avoid overcrowding the seeds, as this can lead to weak plants that have to compete for nutrients and light.
Step 5: Water Gently
Once your seeds are planted, water the soil lightly. You don’t want to saturate it completely, just enough to moisten the surface. It’s a good idea to use a watering can or spray bottle for a gentle mist, as it helps prevent disturbing the seeds. Be sure to keep the soil moist but not soaked during the germination process.
Step 6: Place the Bottle in a Sunny Spot
Bell peppers need plenty of sunlight to grow, so place the plastic bottles in a sunny location, such as a south-facing windowsill or a spot on your balcony that gets at least 6-8 hours of sunlight per day. If you don’t have access to outdoor space, a bright indoor window with good natural light will also work.
In cooler climates, or if you’re growing peppers indoors, consider using grow lights to supplement sunlight.
Step 7: Monitor Growth and Water Regularly
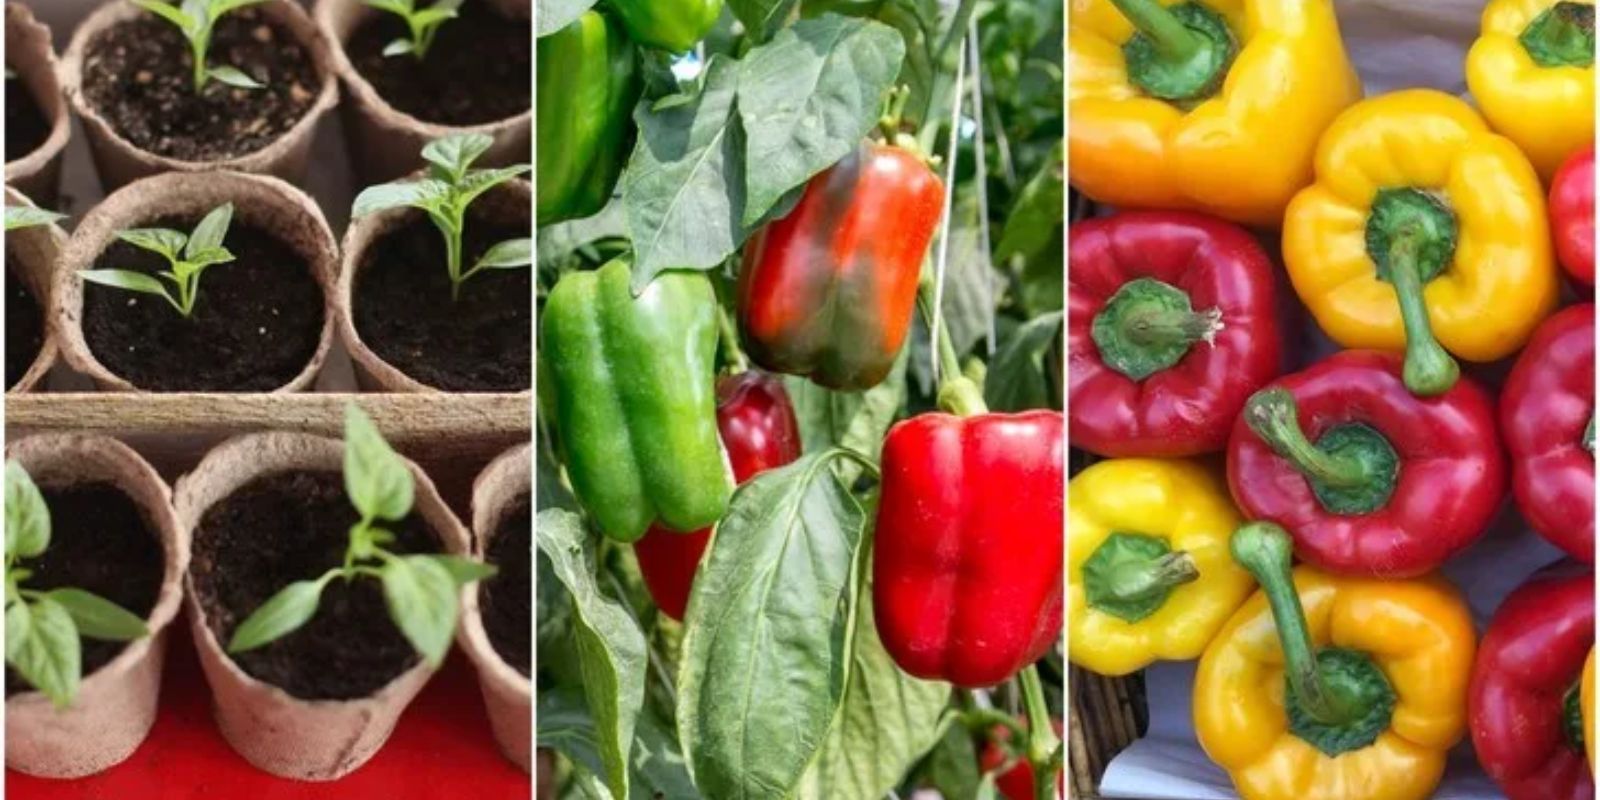
As the seeds begin to sprout, be sure to monitor the growth regularly. You should start seeing tiny green shoots emerge within 7-10 days. As the seedlings grow, ensure they have enough space to expand their roots and get the proper amount of water. Keep the soil moist but never soggy, and check the bottom of the bottle for drainage to ensure water is not accumulating.
If you notice the seedlings becoming leggy or weak, it may be a sign that they are not getting enough light. Adjust their position to ensure they are getting the right amount of sunlight.
Step 8: Transplant When Ready
Once the seedlings have grown large enough and have developed a few sets of true leaves, they are ready to be transplanted into larger containers or directly into your garden (if the weather is warm enough). If you’re growing them in plastic bottles, it’s important to provide enough space for the roots to grow freely. Transplant them into a larger container with well-draining soil, or if you’re growing them outdoors, make sure the garden soil is fertile and well-drained.
Bell peppers are sensitive to cold weather, so transplant them outdoors only once the danger of frost has passed and the soil is warm.
Step 9: Care for the Plants
As your bell pepper plants grow, they will need regular care. Keep the soil moist but not overly wet. Bell peppers are heavy feeders, so make sure to fertilize your plants every few weeks with a balanced fertilizer or organic compost to encourage healthy growth.
If your plants are growing in a pot, ensure the container has enough space for the roots. For garden-grown peppers, give them plenty of room to spread out. You may also want to prune the plants to help them grow more vigorously and produce more peppers.
Step 10: Harvesting the Peppers
Bell peppers typically take about 60-90 days to mature, depending on the variety. When the peppers reach full size and the color is vibrant (green, yellow, red, or purple, depending on the variety), you can harvest them. Use a sharp knife or garden shears to cut the peppers from the plant. Be careful not to damage the plant while harvesting, as it may continue to produce more peppers if taken care of properly.
Tips for Success:
- Temperature: Bell peppers thrive in warm temperatures (70-85°F/21-29°C). If growing indoors, consider using a heat mat to maintain consistent warmth.
- Watering: Consistent watering is key, but avoid overwatering. Ensure proper drainage to prevent root rot.
- Pollination: Bell peppers are self-pollinating, but gentle shaking or using a small brush to move pollen between flowers can help increase fruit production.
- Pests: Watch for pests like aphids or whiteflies. Use organic pest control methods to keep your plants healthy.
Benefits of Growing Bell Peppers in Plastic Bottles:
- Eco-friendly: Using recycled plastic bottles helps reduce waste and is an environmentally responsible gardening choice.
- Cost-effective: Plastic bottles are inexpensive or free, and this method requires minimal investment.
- Space-saving: Growing peppers in plastic bottles allows you to maximize limited space, whether indoors or on a small balcony or patio.
- Creative and Fun: Repurposing plastic bottles for gardening is a creative way to experiment with gardening and learn new techniques.
- Fresh Produce: Growing your own bell peppers ensures that you have access to fresh, organic produce right at your fingertips.
Conclusion
Growing bell peppers from seeds in recycled plastic bottles is a simple, cost-effective, and eco-friendly way to start your own garden. By following these easy steps, you can enjoy fresh, home-grown bell peppers while contributing to a sustainable gardening practice. Whether you’re new to gardening or looking for creative ways to reuse materials, this method offers a fun and rewarding experience for gardeners of all levels. Start growing today and watch your bell peppers flourish!
#EcoFriendlyGardening #PlasticBottleGardening #SustainableLiving #GreenThumb #UrbanGardening #BellPeppersAtHome #DIYGarden #HomeGardening #ZeroWasteLiving #GardenRecycling