
Roses have long been a symbol of love, beauty, and grace, adorning gardens with their vibrant colors and intoxicating fragrance. While buying new rose plants from nurseries or garden centers is a common way to add roses to your garden, growing roses from cuttings is an excellent, cost-effective way to propagate and expand your rose collection. The process of rooting rose cuttings may seem intimidating at first, but with the right steps and care, it can be an easy and rewarding experience.
Whether you’re an experienced gardener or just starting, learning how to propagate roses from cuttings is a great way to enjoy these stunning flowers in your garden without the hefty price tag. In this article, we’ll walk you through the detailed process of growing roses from cuttings, providing tips for success and explaining how to care for your new plants as they grow into beautiful, blooming roses.
Why Grow Roses from Cuttings?
Growing roses from cuttings is a popular method for several reasons. First, it allows you to propagate your favorite rose varieties without the need for seeds or buying new plants. Cuttings allow you to replicate the exact characteristics of the parent plant, such as its color, fragrance, and growth habit. This makes it a great choice for gardeners who want to share or multiply their favorite roses.
Additionally, growing roses from cuttings is cost-effective. Instead of spending money on new rose bushes, you can use cuttings from existing plants. It’s also an eco-friendly way to propagate, reducing the need for mass-produced plants while also giving you more control over the growing process.
Materials Needed
Before you begin propagating your roses from cuttings, it’s important to gather all the materials you’ll need for the process. Here’s a list of the essential tools and supplies:
- Healthy Rose Cuttings
Choose a healthy, disease-free rose bush from which to take your cuttings. Ideal cuttings are young, healthy stems that are not too old or too green. - Sharp Pruning Shears or Clean Scissors
Make sure your tools are sharp and clean to avoid damaging the plant or introducing infection to the cutting. - Rooting Hormone (Optional)
Rooting hormone helps encourage the growth of roots on the cutting. It’s optional but can improve your success rate, especially for difficult-to-root varieties. - Small Pots or Containers
Use small, clean pots to plant your cuttings. Ensure they have drainage holes. - Well-Draining Potting Mix
Roses require a light, well-draining mix to root successfully. Consider a mix of peat, perlite, and vermiculite for optimal results. - Clear Plastic Bags or Propagation Domes
These will create a humid environment for the cuttings to thrive in. - Spray Bottle or Watering Can
This is used to keep the cuttings moist during the rooting process. - Transplanting Soil (Optional)
Once the roots have developed, you’ll need a rich, well-drained soil for transplanting the rooted cuttings into larger pots or your garden.
Step-by-Step Guide to Propagating Roses from Cuttings
Now that you’ve gathered your materials, let’s walk through the detailed steps of propagating roses from cuttings.
1. Select and Prepare the Cuttings
Start by choosing healthy, disease-free rose stems from a plant that you want to propagate. The best time to take cuttings is during the growing season, typically in the spring or early summer when the plant is actively growing.
- Cut the Stem: Using sharp pruning shears or clean scissors, cut a 6-8 inch piece of stem just below a leaf node (where leaves grow from the stem). You want the cutting to have at least 2-3 leaf nodes, which will help with root formation. Avoid cutting from flowers or buds, as these are less likely to root successfully.
- Remove Lower Leaves: Strip the lower leaves from the bottom half of the cutting, leaving the top 2-3 leaves intact. This prevents the leaves from rotting in the soil and ensures the cutting’s energy goes into producing roots.
- Optional: Apply Rooting Hormone: To give your cutting the best chance of rooting, dip the cut end into a rooting hormone powder or gel. This step is optional, but it can significantly speed up the rooting process, especially for certain rose varieties that are more difficult to propagate.
2. Prepare the Planting Medium
Next, you need to prepare the potting mix that will hold your rose cutting as it develops roots.
- Choose the Right Potting Mix: Use a well-draining potting mix for your cuttings. Roses prefer a slightly acidic, light, and airy soil. You can mix peat, perlite, and vermiculite in a ratio that promotes good drainage while retaining moisture. Avoid using heavy garden soil, as it can become compacted and impede root growth.
- Fill Small Pots or Containers: Fill small pots or containers with the prepared potting mix. Make sure the pots have drainage holes to prevent waterlogging, which can lead to rot.
- Water the Potting Mix: Lightly water the soil to moisten it, but avoid over-saturating it. The soil should be damp but not soaking wet.
3. Insert the Cutting into the Soil
Once your pot and soil are ready, it’s time to insert the cutting.
- Make a Hole in the Soil: Use a pencil or a stick to make a small hole in the soil, deep enough to insert the cutting.
- Insert the Cutting: Place the cutting into the hole, ensuring the bottom of the cutting is well-covered with soil. The leaves should be above the soil surface, and the cutting should stand upright.
- Press the Soil Around the Cutting: Gently press the soil around the cutting to ensure it’s secure and that there are no air pockets. This helps promote root formation.
4. Create a Humid Environment
Roses cuttings need a high-humidity environment to encourage root growth. You can achieve this by covering the pot with a plastic bag or a propagation dome.
- Cover with Plastic: Place a clear plastic bag over the cutting or use a plastic propagation dome to trap moisture. This will help create a greenhouse-like effect that maintains the necessary humidity for the cutting to root successfully.
- Ensure Air Circulation: While humidity is crucial, it’s equally important to ensure there’s good airflow to prevent mold or fungal growth. Open the bag or dome periodically to allow fresh air to circulate.
5. Care for the Cutting
Place the pot with the cutting in a location with bright, indirect light. Avoid direct sunlight, as this can overheat the cutting and cause it to dry out.
- Keep the Soil Moist: Keep the soil moist, but not soggy. You can use a spray bottle or a watering can with a gentle spout to water the cutting regularly.
- Maintain Temperature: Roses thrive in a warm environment, so place the pot in a warm area with temperatures between 70°F and 75°F (21°C to 24°C).
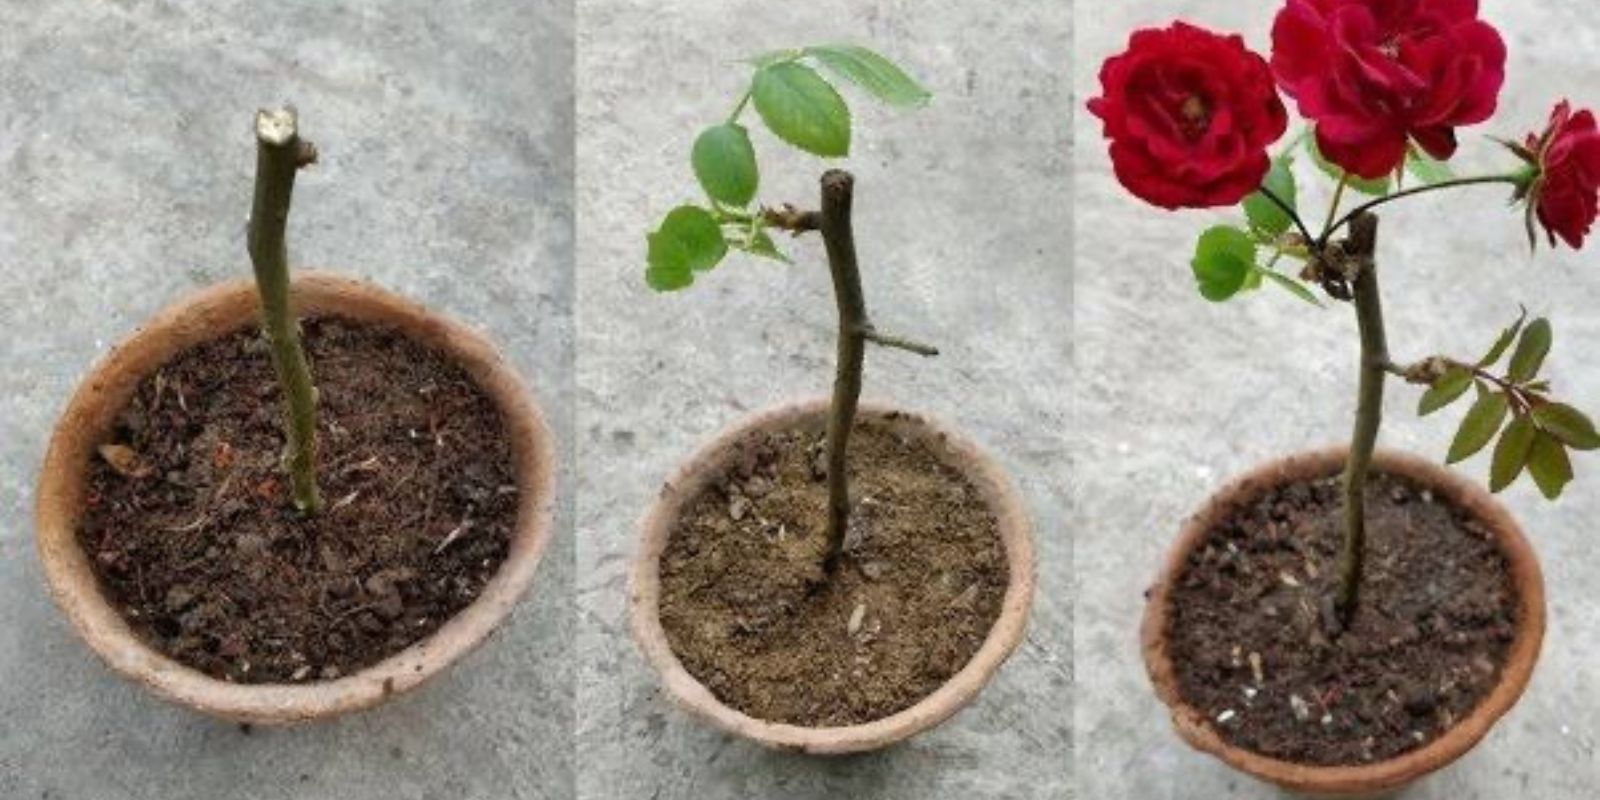
6. Monitor Rooting and Growth
Over the next 4-6 weeks, keep an eye on the cutting for new growth, such as leaves and stems. This is a sign that the cutting is rooting and beginning to grow.
- Roots Will Appear: After several weeks, check the cutting by gently pulling on it. If you feel resistance, this means that roots have begun to form. It’s time to consider transplanting the cutting.
7. Transplant the Rooted Cutting
Once the cutting has developed a strong root system, it’s time to transplant it to a larger pot or directly into your garden.
- Choose the Right Soil for Transplanting: For best results, use nutrient-rich, well-draining soil. If transplanting to a garden, enrich the soil with compost.
- Plant the Cutting: Gently remove the cutting from its pot and place it in its new home. Water it thoroughly to help settle the soil around the roots.
8. Ongoing Care for Your New Rose Plant
Once transplanted, continue to care for your new rose plant as you would for any other rose bush.
- Watering: Water regularly to keep the soil moist, especially during dry spells. Roses like to be watered at the base rather than overhead to avoid disease.
- Sunlight: Provide your rose plant with 6-8 hours of direct sunlight each day for optimal growth and flowering.
- Pruning: Prune dead or diseased wood to encourage healthy growth. Regularly deadhead spent flowers to promote continuous blooming.
Conclusion
Growing roses from cuttings is an excellent way to propagate your favorite varieties while saving money and creating new plants for your garden. With patience and proper care, you can enjoy a flourishing rose garden full of vibrant blooms. By following these step-by-step instructions, you’ll be well on your way to growing your own beautiful roses from cuttings.
Happy gardening, and don’t forget to share your success stories! Let’s spread the love for roses together!