
Orchids are among the most elegant and exotic flowers, admired for their beauty and variety. While they are typically propagated through division or cuttings, many gardeners wonder if it’s possible to grow an orchid from a leaf. While this method is not the most common, it is an exciting and challenging process that requires patience, the right conditions, and careful nurturing.
In this comprehensive guide, we will explore the step-by-step process of growing an orchid from a leaf, the best practices to follow, and tips to maximize success. Whether you are a beginner or an experienced gardener, this method can be a rewarding way to propagate your orchids.
Can You Really Grow an Orchid from a Leaf?
Unlike many other plants that can easily root from a leaf cutting, orchids do not naturally regenerate from a detached leaf alone. Most orchids require a node or a portion of the stem with active growth points to successfully develop new roots. However, with the right technique and patience, some gardeners have managed to encourage root development from a leaf under highly controlled conditions.
While the chances of success are lower than with keiki propagation (baby orchids that grow naturally on the mother plant), it is still worth trying if you enjoy experimenting with plant propagation.
Step-by-Step Guide to Growing an Orchid from a Leaf
1. Selecting a Healthy Leaf
The first step is choosing the right leaf for propagation. Here’s what to look for:
✅ A fresh, mature, and healthy leaf from a thriving orchid plant
✅ No signs of disease, pests, or yellowing
✅ A leaf that is firm and fleshy, indicating good hydration and nutrients
Using a sterile pair of scissors or pruning shears, carefully cut the leaf as close to the base as possible. If possible, include a small portion of the stem to increase your chances of success.
2. Letting the Leaf Dry
After cutting the leaf, it’s essential to let the cut end dry for a few hours. This helps:
✔️ Prevent moisture-related rot
✔️ Seal off the wound and allow the plant’s natural healing process
Place the leaf in a shaded area with good airflow and allow the cut to callous over.
3. Applying Rooting Hormone
To stimulate root development, dip the cut end of the leaf in a rooting hormone powder or gel. This provides essential nutrients and encourages the formation of new roots. If you prefer a natural alternative, you can use:
🌿 Cinnamon powder (a natural antifungal agent)
🌿 Honey or aloe vera (acts as a mild rooting stimulant)
Apply a small amount and shake off any excess before planting.
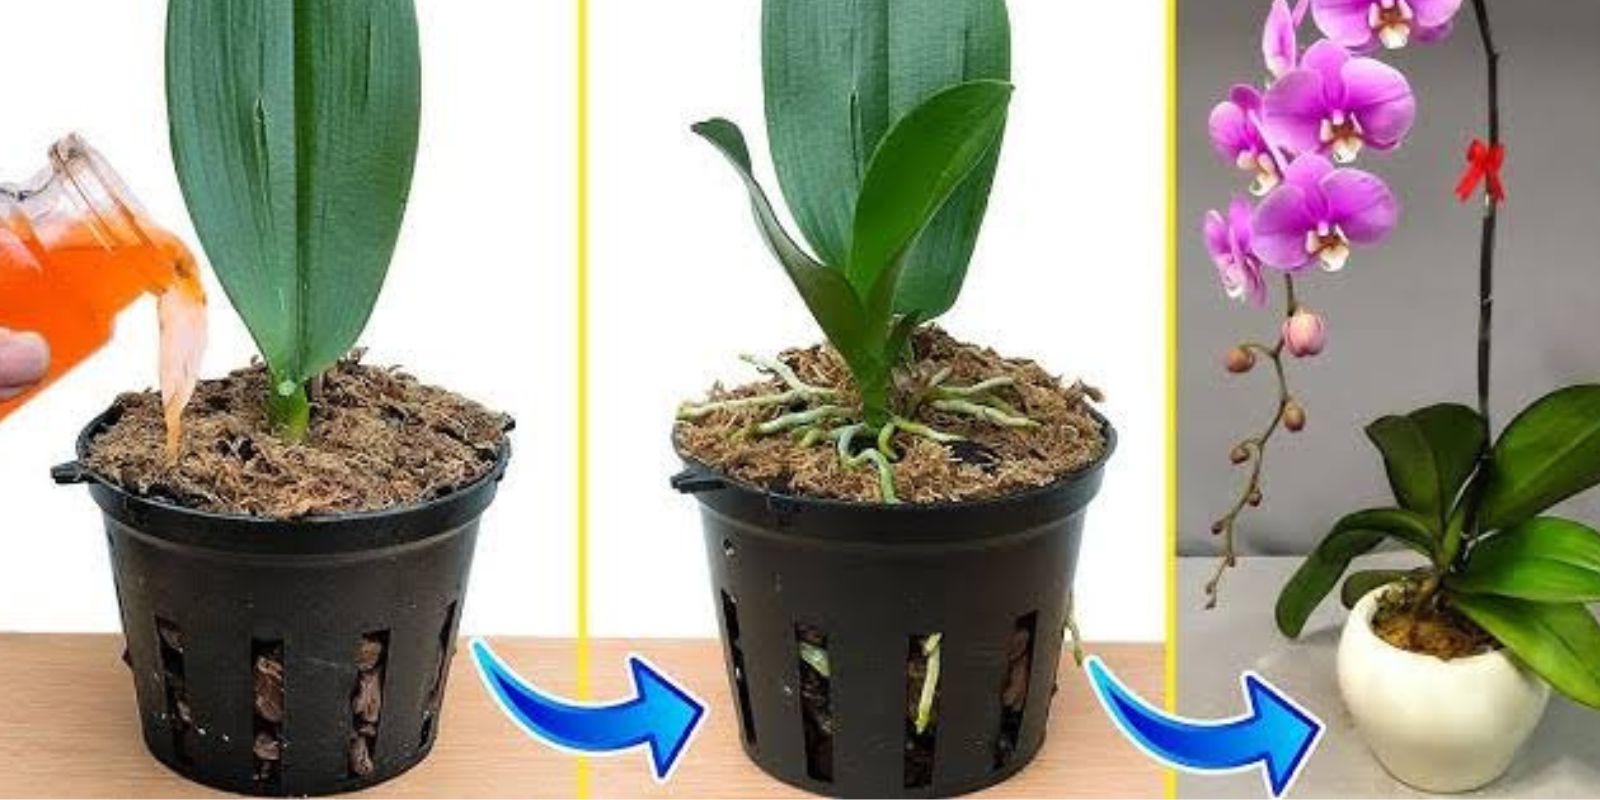
4. Choosing the Right Growing Medium
Orchids are epiphytic plants, meaning they don’t grow in regular soil. Instead, they thrive in a loose, well-draining medium that mimics their natural environment. The best options for propagation include:
🌱 Sphagnum moss – Retains moisture and encourages root growth
🌱 Orchid bark mix – Provides aeration and mimics their natural habitat
🌱 Perlite and coconut husk blend – Improves drainage and prevents rot
Fill a small container or pot with your chosen medium, making sure it is moist but not soaking wet.
5. Planting the Leaf Cutting
Now it’s time to plant your orchid leaf cutting. Follow these steps:
✔️ Insert the cut end of the leaf slightly into the growing medium
✔️ Press the medium gently around it for support
✔️ Do not bury the entire leaf—just enough to hold it upright
If you are using sphagnum moss, ensure it is lightly packed to allow air circulation around the cutting.
6. Maintaining Optimal Conditions
Orchids are sensitive plants, and proper care is crucial for successful propagation. Here’s what you need to do:
🌡️ Temperature: Maintain a warm environment of 70-80°F (21-27°C)
💦 Humidity: Orchids thrive in 50-70% humidity—use a humidity tray if necessary
☀️ Light: Place the leaf in indirect sunlight, avoiding direct exposure to prevent drying out
💧 Watering: Mist the cutting lightly every 2-3 days to keep it hydrated
A mini greenhouse setup (using a plastic dome or a clear plastic bag) can help retain humidity and improve success rates.
7. Monitoring Growth and Patience
Growing an orchid from a leaf requires patience. You may not see any visible changes for weeks or even months. Keep an eye on:
✔️ Changes in color – A healthy green color indicates good hydration
✔️ Signs of mold or rot – Remove any affected parts immediately
✔️ Root development – Tiny roots should start emerging after several weeks to months
If you notice the leaf wilting or turning yellow, it may not be viable. However, if roots appear, continue caring for it until a small shoot emerges.
8. Transplanting into a Larger Pot
Once the cutting has established roots and shows new growth, it’s time to transfer it into a larger orchid pot. Use an orchid-specific container with good drainage and continue providing regular care.
💡 Tip: If your orchid cutting has difficulty rooting, try using a keiki paste—a special hormone that stimulates orchid growth.
Common Mistakes to Avoid
🚫 Overwatering: Too much moisture can cause rot—keep the medium damp, not soggy.
🚫 Direct Sunlight: Orchids need bright but indirect light—too much sun can scorch the leaf.
🚫 Poor Air Circulation: A stuffy environment promotes fungal growth—ensure good airflow around the plant.
🚫 Wrong Medium: Regular soil won’t work—use orchid bark or sphagnum moss for best results.
Final Thoughts
Growing an orchid from a single leaf is a challenging but rewarding experiment. While success rates are lower than with other propagation methods, with patience, proper care, and the right conditions, it’s possible to encourage root growth and nurture a beautiful orchid from a leaf.
🌸 Would you try this method? Let us know your thoughts in the comments!👇