
Orchids are among the most elegant and exotic flowering plants, known for their captivating blooms and delicate forms. While growing orchids from seeds or division is a more conventional approach, propagating an orchid from a leaf offers a unique and rewarding challenge. This method may seem tricky, but with the right techniques, patience, and care, it’s entirely possible to cultivate a thriving orchid plant from just a leaf. In this article, we’ll walk you through the entire process, from selecting the right leaf to nurturing your new orchid plant.
Why Grow Orchids from Leaves?
Propagation is one of the best ways to expand your orchid collection without purchasing new plants. Growing orchids from a leaf has several advantages:
- Cost-effective: You don’t need to buy new orchids; just use what you already have.
- Preservation: If your orchid plant is showing signs of decline, propagating it can help preserve its genetic material.
- Satisfaction: Watching a new plant grow from a single leaf is a gratifying experience for any gardener.
Understanding Orchid Structure
Before we dive into the process of growing orchids from a leaf, it’s important to understand a little about orchid anatomy. Orchids typically have several key parts, including roots, leaves, pseudobulbs (in some species), and flowers. In most cases, orchids are propagated through division of the root system or pseudobulbs, as they are the growth centers. However, with the right conditions, leaves can also stimulate new growth.
Step-by-Step Guide: How to Grow an Orchid from a Leaf
Step 1: Select the Right Orchid Leaf
The first and most crucial step is selecting a healthy and mature leaf. Not every leaf is suitable for propagation. You want to choose one that is:
- Healthy: The leaf should be green, firm, and free from any signs of disease, yellowing, or wilting.
- Mature: Select a leaf that is fully grown and well-established on the plant. Avoid using new or baby leaves as they are not strong enough for propagation.
- Undamaged: Make sure the leaf is free from physical damage, such as tears or insect bites, as this can hinder its ability to generate new growth.
Step 2: Sterilize Your Tools
To avoid infecting your orchid leaf with bacteria or fungi, it’s important to sterilize any tools you’ll be using. This includes scissors, knives, or any gardening shears that will come in contact with the plant. You can do this by:
- Rubbing alcohol: Wipe the blades of your tools with rubbing alcohol.
- Flame: Alternatively, you can heat the blades over an open flame to sterilize them, but be sure to let them cool before use.
Step 3: Cut the Leaf Properly
Once your tools are sterilized, carefully cut the selected leaf at its base, close to where it attaches to the stem. Make sure to use a clean and precise cut to avoid causing any damage to the plant or the leaf.
Step 4: Let the Leaf Dry and Callous
After cutting the leaf, it’s important to allow it to dry and form a callous over the cut end. This step helps prevent the leaf from rotting when planted. Simply place the leaf on a clean surface in a shaded area for about 24 hours. The cut end should begin to harden and dry out.
Step 5: Prepare the Growing Medium
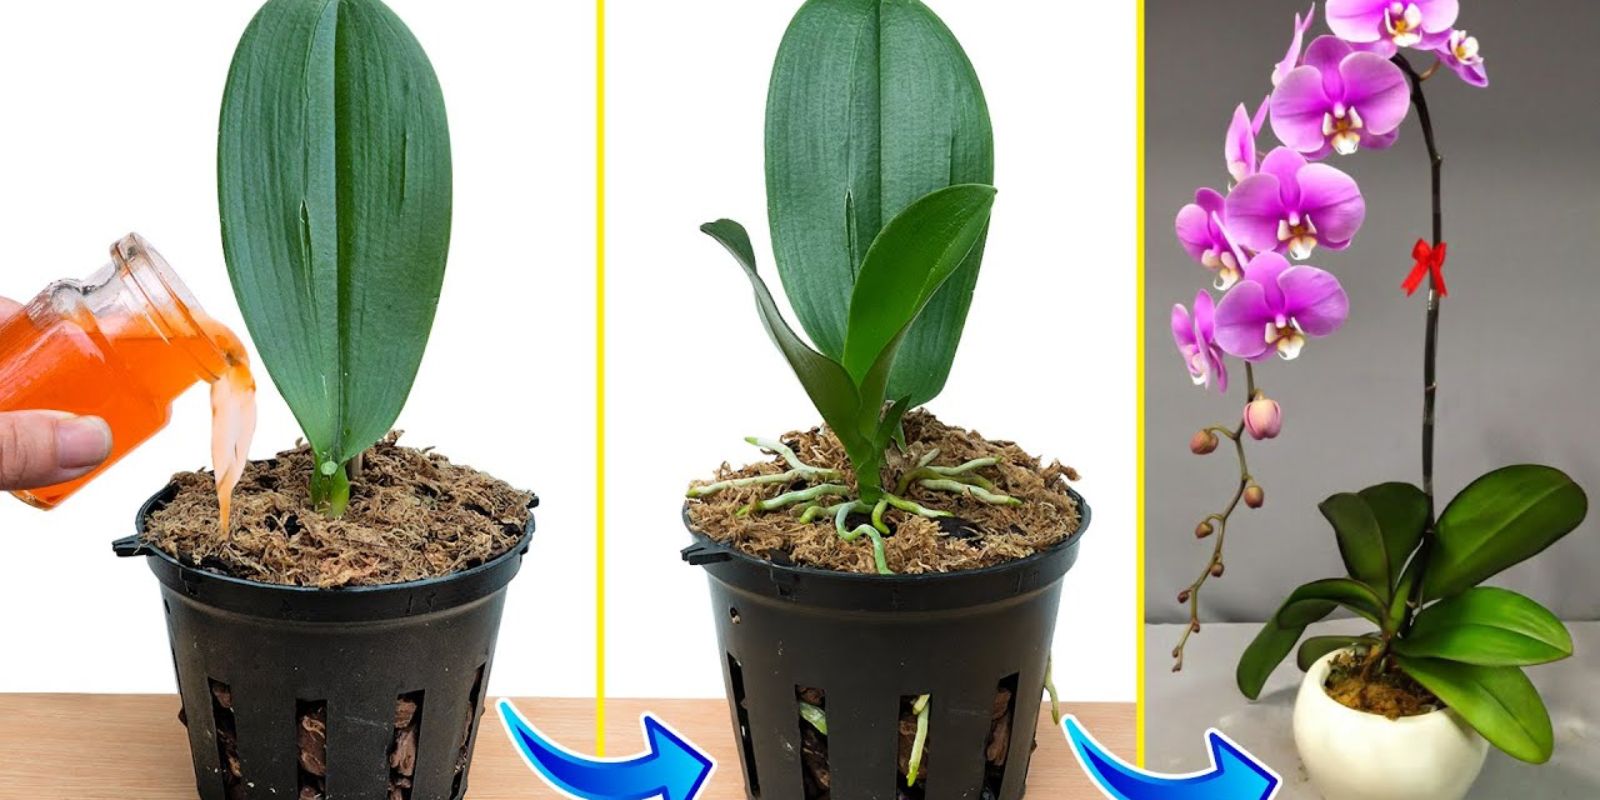
Orchids require a special growing medium, as they are epiphytic plants, meaning they grow on other plants in nature, rather than in soil. The ideal growing medium for propagating an orchid leaf is a mixture of sphagnum moss and orchid bark. Sphagnum moss retains moisture while orchid bark provides aeration to the roots.
- Mixing ratio: Use 60% sphagnum moss and 40% orchid bark to create a well-drained, airy medium.
- Pot selection: Use a small pot or container with drainage holes to prevent waterlogging.
Step 6: Plant the Orchid Leaf
Once the leaf is calloused, it’s time to plant it. Follow these steps:
- Moisten the medium: Lightly mist the sphagnum moss and orchid bark mixture to make it slightly damp.
- Insert the leaf: Place the calloused end of the leaf into the medium, ensuring that it’s stable and secure.
- Support the leaf: You may need to use a small stick or stake to hold the leaf upright until it starts developing new roots.
- Positioning: Ensure the leaf is not planted too deep; only about 1-2 inches of the base should be submerged in the growing medium.
Step 7: Create the Right Environment
Orchids are sensitive to their environment, so it’s crucial to provide the right conditions to encourage growth from the leaf.
- Temperature: Orchids thrive in temperatures between 65-80°F (18-27°C). Keep your propagated leaf in a warm, consistent environment.
- Humidity: Orchids love high humidity, so aim for a humidity level of 50-70%. You can use a humidity tray or mist the leaf and surrounding air regularly.
- Light: Place the pot in a location with bright, indirect light. Avoid direct sunlight, as it can scorch the leaf and hinder growth.
- Watering: Mist the growing medium lightly to keep it moist, but do not overwater. The medium should be damp but not soggy, as this can cause rot.
Step 8: Patience and Observation
Growing an orchid from a leaf is a slow process, so patience is key. Over the next few weeks to months, watch for signs of new growth, particularly at the base of the leaf. Once new roots or shoots appear, it’s a good indication that your propagation is successful.
- New roots: You may notice tiny roots forming at the base of the leaf. This is the first step in the plant’s growth.
- New shoots: Eventually, small shoots will emerge, which will develop into stems and leaves.
Step 9: Transplanting Your Orchid
After the new plant has developed strong roots and shoots, it’s time to transplant it into a larger pot with more space to grow. Follow these steps:
- Choose a larger pot: Use a pot with good drainage and ample space for the developing orchid.
- Use the right medium: Fill the new pot with orchid bark and sphagnum moss to ensure proper drainage and aeration.
- Carefully transplant: Gently remove the young orchid from its original pot and transfer it into the new pot without damaging the roots.
Step 10: Care for Your New Orchid Plant
Once your orchid has been successfully transplanted, continue caring for it as you would with any other orchid plant:
- Watering: Water the plant weekly, allowing the growing medium to dry out slightly between waterings.
- Fertilizing: Use a balanced orchid fertilizer once a month during the growing season to encourage healthy growth.
- Pruning: Remove any dead or damaged leaves to promote better airflow and prevent disease.
Common Problems and Solutions
Propagating orchids from a leaf isn’t always smooth sailing. Here are a few common issues and how to address them:
- Rotting leaf: If the leaf starts to rot, it’s likely due to too much moisture. Ensure your growing medium isn’t waterlogged and that you’re not overwatering.
- No growth: If there’s no sign of growth after several months, the leaf may not have been mature or healthy enough for propagation. Be patient, and try again with another leaf.
Conclusion
Growing an orchid from a leaf is a rewarding but challenging endeavor. While it requires time, care, and patience, the result—a beautiful orchid plant grown from a single leaf—makes the effort worthwhile. By following the steps outlined in this guide and maintaining the right environment, you can successfully propagate your own orchids at home.
So why not give it a try? Start propagating your own orchids today and experience the beauty of nurturing a plant from its earliest stages.
#OrchidLove #OrchidCare #PlantPropagation #GardeningTips #IndoorGardening #OrchidPropagation #GardeningGoals #GreenThumb #HomeGarden #OrchidGrowing