
Ginger is a versatile plant known for its culinary, medicinal, and ornamental benefits. Whether you’re a seasoned gardener or just starting, growing ginger at home is an incredibly rewarding experience. This guide will walk you through every step to cultivate ginger successfully, ensure it flourishes, and even produce beautiful flowers.
Why Grow Ginger at Home?
Ginger is not only a staple in many kitchens but also a powerhouse of health benefits. By growing your own, you ensure a constant supply of fresh, organic ginger free from chemicals. It’s surprisingly low-maintenance, making it an excellent choice for gardeners of all skill levels. Additionally, ginger plants add an exotic touch to any space, and their flowers are a bonus reward for proper care.
Step 1: Choosing the Right Ginger
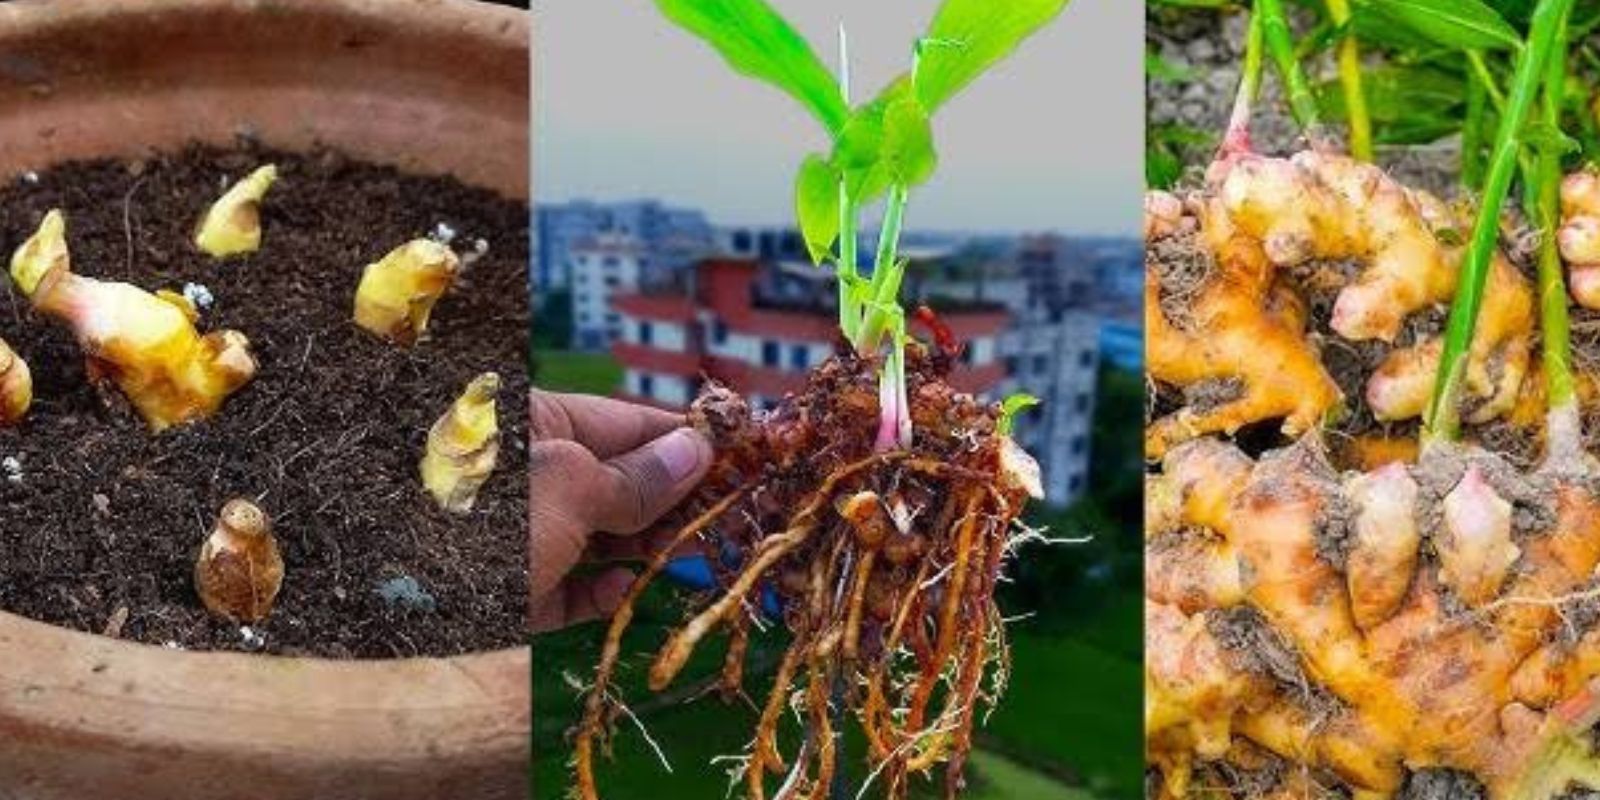
The first step to growing ginger is selecting the perfect rhizome. A rhizome is the underground part of the plant that looks like a root.
- Look for Healthy Rhizomes: Select pieces that are plump, firm, and have well-developed “eyes” or buds.
- Avoid Damaged Rhizomes: Skip those that appear shriveled, moldy, or discolored, as they are less likely to sprout.
- Pro Tip: Purchase organic ginger from a garden center or grocery store to avoid growth inhibitors often used in non-organic varieties.
Step 2: Preparing the Rhizome
Before planting, you need to prepare the ginger rhizome for optimal growth:
- Hydrate: Soak the rhizome in warm water overnight to encourage sprouting and eliminate any growth retardants.
- Cut into Sections: Using a sharp, clean knife, divide the rhizome into smaller pieces, ensuring each section has at least one or two “eyes.” Allow the cut surfaces to dry for a day or two to prevent rotting.
Step 3: Choosing the Right Container
Ginger grows horizontally, so a wide and shallow container is ideal.
- Drainage is Key: Ensure the pot has drainage holes to prevent waterlogging.
- Soil Requirements: Use a rich, well-draining potting mix with organic matter. A combination of loam, sand, and compost works well.
Step 4: Planting and Initial Watering
Planting ginger is straightforward:
- Position the Rhizome: Place the rhizome pieces on the soil surface, with the eyes facing up. Cover them lightly with about 2–3 cm of soil.
- Water Thoroughly: After planting, water generously but avoid soaking the soil. Keep it moist without being soggy.
Step 5: Creating the Ideal Environment
Ginger thrives in warm and humid conditions.
- Temperature Range: Maintain a consistent temperature of 24–29°C.
- Humidity: If your home is dry, use a humidity tray or mist the plant occasionally.
- Light Conditions: Place the pot in a spot with indirect sunlight or partial shade, as direct sunlight can scorch the leaves.
Step 6: Regular Watering and Fertilizing
Consistency is vital for ginger care:
- Watering: Keep the soil evenly moist but not waterlogged. Overwatering can lead to root rot.
- Fertilizing: Feed your ginger plant with a balanced liquid fertilizer every 2–4 weeks during the growing season. Use an organic fertilizer or compost tea for best results.
Step 7: Encouraging Flowering
Ginger plants can bloom under the right conditions:
- Patience is Essential: Flowers typically appear in mature plants, around 2–3 years old.
- Boosting Flowering: Provide ample light, maintain warmth and humidity, and avoid unnecessary disturbances to the plant.
Step 8: Harvesting Ginger
After 8–10 months, your ginger will be ready to harvest. Here’s how:
- Check for Maturity: Look for well-developed rhizomes beneath the soil.
- Harvest Carefully: Dig around the plant and gently remove the rhizomes you need. Leave some behind to allow the plant to continue growing.
- Storage: Store excess ginger in a cool, dry place or freeze it for long-term use.
Common Challenges and Solutions
- Yellowing Leaves: This often indicates overwatering or poor drainage. Adjust watering habits and ensure the pot has proper drainage.
- Pest Problems: Ginger is relatively pest-resistant, but occasional issues with aphids or spider mites can occur. Use natural insecticidal soap to address infestations.
- Slow Growth: Ensure the plant receives adequate warmth and nutrition.
Uses of Homegrown Ginger
Growing ginger at home provides endless opportunities:
- Culinary Delights: Use it in teas, curries, smoothies, and baked goods.
- Medicinal Benefits: Ginger is known to alleviate nausea, improve digestion, and reduce inflammation.
- Ornamental Beauty: Ginger plants can enhance the aesthetic of your indoor or outdoor spaces.
Conclusion: A Rewarding Journey
Cultivating ginger at home is a simple yet rewarding process that offers a sustainable supply of fresh rhizomes, the possibility of beautiful flowers, and a sense of accomplishment. With minimal effort, you can enjoy the many culinary, medicinal, and aesthetic benefits of this incredible plant.
💬 What’s your favorite way to use ginger? Share your tips and experiences in the comments!
📌 #GrowYourOwn #HomeGardening #GingerLover #SustainableLiving #GardeningTips