
Growing an avocado tree in a small pot at home can be a rewarding and enjoyable experience. Not only do you get to enjoy the satisfaction of nurturing a plant from seed to fruit-bearing tree, but you also gain access to fresh avocados right from your garden. This guide will provide you with all the information you need to successfully grow your own avocado tree in a small pot, from selecting the right avocado to caring for your plant and harvesting the fruit.
Introduction
Avocados are beloved for their creamy texture and nutritional benefits. They are rich in healthy fats, vitamins, and minerals, making them a popular addition to salads, sandwiches, and smoothies. While many people buy avocados from the store, growing your own can be a fulfilling project that enhances your gardening skills. Plus, nothing beats the taste of a home-grown avocado!
In this article, we will explore the step-by-step process of growing an avocado tree in a small pot, including tips for successful germination, planting, care, and harvesting. Whether you’re a seasoned gardener or a beginner, you can cultivate your own avocado tree with a little patience and dedication.
Step 1: Selecting the Right Avocado
The first step to growing an avocado tree is choosing the right avocado. Look for ripe avocados that are firm yet slightly soft to the touch. Hass avocados are a popular choice due to their rich flavor and creamy texture, but other varieties such as Bacon or Fuerte can also be grown successfully.
Tips for Selecting an Avocado:
- Choose organic avocados when possible to avoid chemical residues.
- Look for avocados without blemishes or soft spots.
- Ensure the avocado is fully ripe for the best chance of germination.
Step 2: Preparing the Pit
Once you’ve selected your avocado, it’s time to prepare the pit for germination. The pit is the seed inside the fruit, and it’s essential to clean it properly.
Steps for Preparing the Pit:
- Cut the Avocado: Slice the avocado in half and gently remove the pit.
- Rinse the Pit: Rinse the pit under warm running water to remove any fruit residue. Be careful not to remove the brown skin, as this protects the seed.
- Dry the Pit: Pat the pit dry with a paper towel and let it sit for a few hours to dry out completely.
Step 3: Rooting the Pit
The next step is to root the avocado pit. This process usually takes about two to six weeks and requires a few simple materials.
Materials Needed:
- Toothpicks
- A glass of water
Steps for Rooting:
- Insert Toothpicks: Take the pit and insert three or four toothpicks into the bottom half, ensuring they are evenly spaced around the pit.
- Suspend in Water: Place the pit in a glass of water with the pointed end facing up, and the bottom half submerged.
- Find a Sunny Spot: Position the glass in a warm, sunny location, such as a windowsill.
- Change Water Regularly: Replace the water every few days to keep it fresh and prevent mold.
Step 4: Watching for Roots
As the weeks pass, keep an eye on your avocado pit for signs of growth. Roots will begin to sprout from the bottom of the pit, followed by the emergence of a stem from the top.
Tips for Successful Rooting:
- Maintain a consistent temperature of around 70°F (21°C) for optimal growth.
- If the pit does not sprout roots within six weeks, you may need to start over with a new pit.
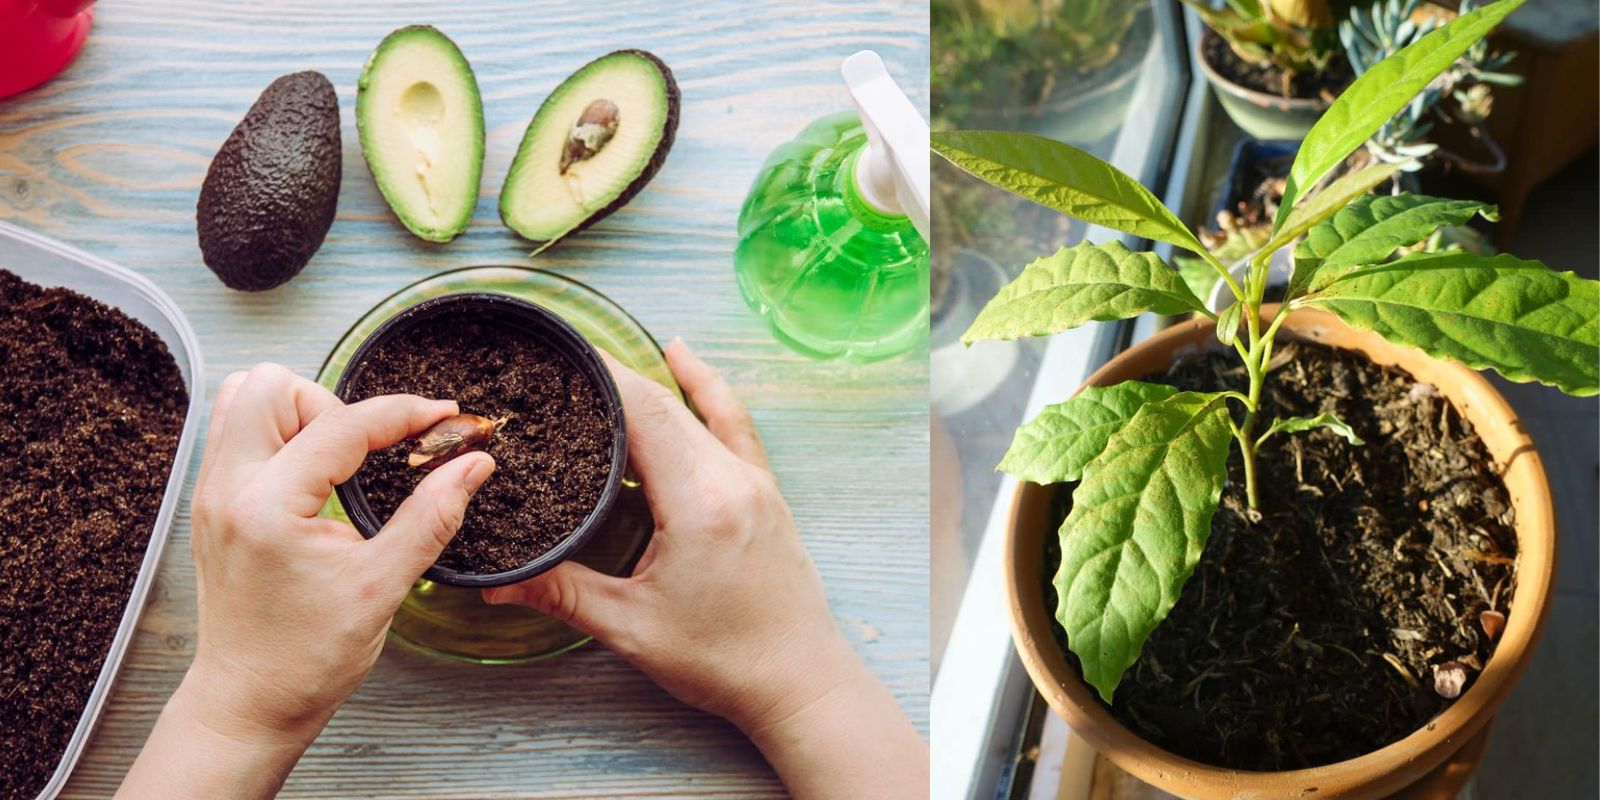
Step 5: Planting the Avocado Pit
Once the roots are a few inches long and a stem has emerged, it’s time to plant your avocado pit in a small pot.
Materials Needed:
- A small pot (6-8 inches in diameter)
- Well-draining potting soil
Steps for Planting:
- Choose a Pot: Select a small pot with drainage holes at the bottom to prevent waterlogging.
- Fill with Soil: Fill the pot with well-draining potting soil, leaving about an inch of space at the top.
- Plant the Pit: Carefully plant the pit, ensuring the top half remains above the soil. The roots should be buried in the soil, while the top portion is exposed.
- Water the Plant: Water the soil thoroughly until it is evenly moist but not soggy.
Step 6: Caring for Your Avocado Tree
With your avocado pit now planted, it’s important to provide proper care to ensure healthy growth.
Watering:
- Frequency: Water your avocado tree when the top inch of soil feels dry. Typically, this will be every 1-2 weeks.
- Method: Water deeply until you see drainage from the bottom of the pot. Ensure the pot drains well to avoid root rot.
Sunlight:
- Light Requirements: Place your avocado tree in a location where it will receive plenty of sunlight, ideally 6 hours a day.
- Rotate the Pot: Rotate the pot occasionally to ensure even growth and exposure to sunlight.
Fertilization:
- Type of Fertilizer: Use a balanced liquid fertilizer diluted to half strength every four to six weeks during the growing season (spring and summer).
- Organic Options: Consider using organic fertilizers, such as compost or worm castings, to enrich the soil.
Step 7: Pruning for Growth
Once your avocado tree reaches about 6 inches tall, it’s time to encourage bushier growth by pruning.
Pruning Steps:
- Pinch Off the Top: Use your fingers or clean scissors to pinch off the top leaves of the tree. This encourages lateral branching.
- Remove Dead Leaves: Regularly check for and remove any yellow or dead leaves to maintain plant health.
Step 8: Repotting as Needed
As your avocado tree grows, it may outgrow its pot. Repotting provides more space for the roots and encourages continued growth.
Signs That It’s Time to Repot:
- Roots are growing out of the drainage holes.
- The plant appears to be stunted in growth.
- The soil dries out quickly after watering.
Repotting Steps:
- Choose a Larger Pot: Select a pot that is one size larger than the current one.
- Remove the Plant: Gently remove the avocado tree from its current pot, being careful not to damage the roots.
- Add New Soil: Fill the new pot with fresh potting soil and place the tree in the center. Fill in around the sides and water thoroughly.
Step 9: Patience and Observation
Growing an avocado tree from seed requires patience. It may take several years for the tree to mature and produce fruit, but the process is well worth the wait.
Observational Tips:
- Keep an eye out for any signs of pests or disease, such as discoloration or spots on the leaves.
- Maintain a consistent care routine to ensure the health of your plant.
Step 10: Harvesting Avocados
After a few years of care and dedication, your avocado tree may finally produce fruit. Harvesting is a rewarding experience that marks the culmination of your efforts.
Signs That Avocados Are Ready to Harvest:
- Color Change: Depending on the variety, the fruit will change color as it ripens. For Hass avocados, look for a dark, pebbly skin.
- Slight Softness: Gently squeeze the avocado; it should yield slightly to pressure when ripe.
- Time: Avocados typically take 6-12 months after flowering to mature.
Harvesting Steps:
- Use Pruning Shears: Cut the avocado from the tree using clean pruning shears, leaving a short stem attached.
- Ripen at Home: Place harvested avocados in a paper bag at room temperature to ripen further if needed.
Conclusion
Growing an avocado tree in a small pot at home is a fun and gratifying project that can yield delicious results. By following the steps outlined in this guide, you can cultivate your own avocado tree from seed to fruit-bearing plant. Enjoy the journey of nurturing your avocado tree and savor the fresh avocados you’ll reap from your efforts.
Call to Action
Start your avocado-growing adventure today! Share your experiences and tips with fellow gardening enthusiasts, and don’t forget to tag your gardening posts with hashtags like #AvocadoTree #HomeGardening #GrowYourOwnFood #PlantParenting #SustainableLiving. Happy gardening!