
Imagine stepping outside your home and picking fresh, crispy greens straight from your garden to make a delicious, nutritious salad. Growing a salad garden in a raised bed is one of the easiest and most rewarding ways to enjoy fresh produce. Not only does it offer you control over what goes into your food, but it also provides a sustainable way to eat healthily. Plus, raised bed gardening makes it easier to manage soil, weeds, and pests while offering an ideal growing environment for your plants.
This guide will walk you through everything you need to know about growing a successful salad garden in a raised bed, from choosing the right location to harvesting your greens. Whether you’re new to gardening or a seasoned pro, you’ll find helpful tips to ensure a bountiful and continuous supply of salad ingredients right in your backyard.
Why Grow a Salad Garden in a Raised Bed?
Raised bed gardening has become increasingly popular due to its numerous benefits. Unlike traditional in-ground gardening, raised beds allow you to have better control over soil quality, drainage, and weeds. They also offer the convenience of gardening at a higher level, reducing the need to bend over, which can be especially helpful for those with limited mobility.
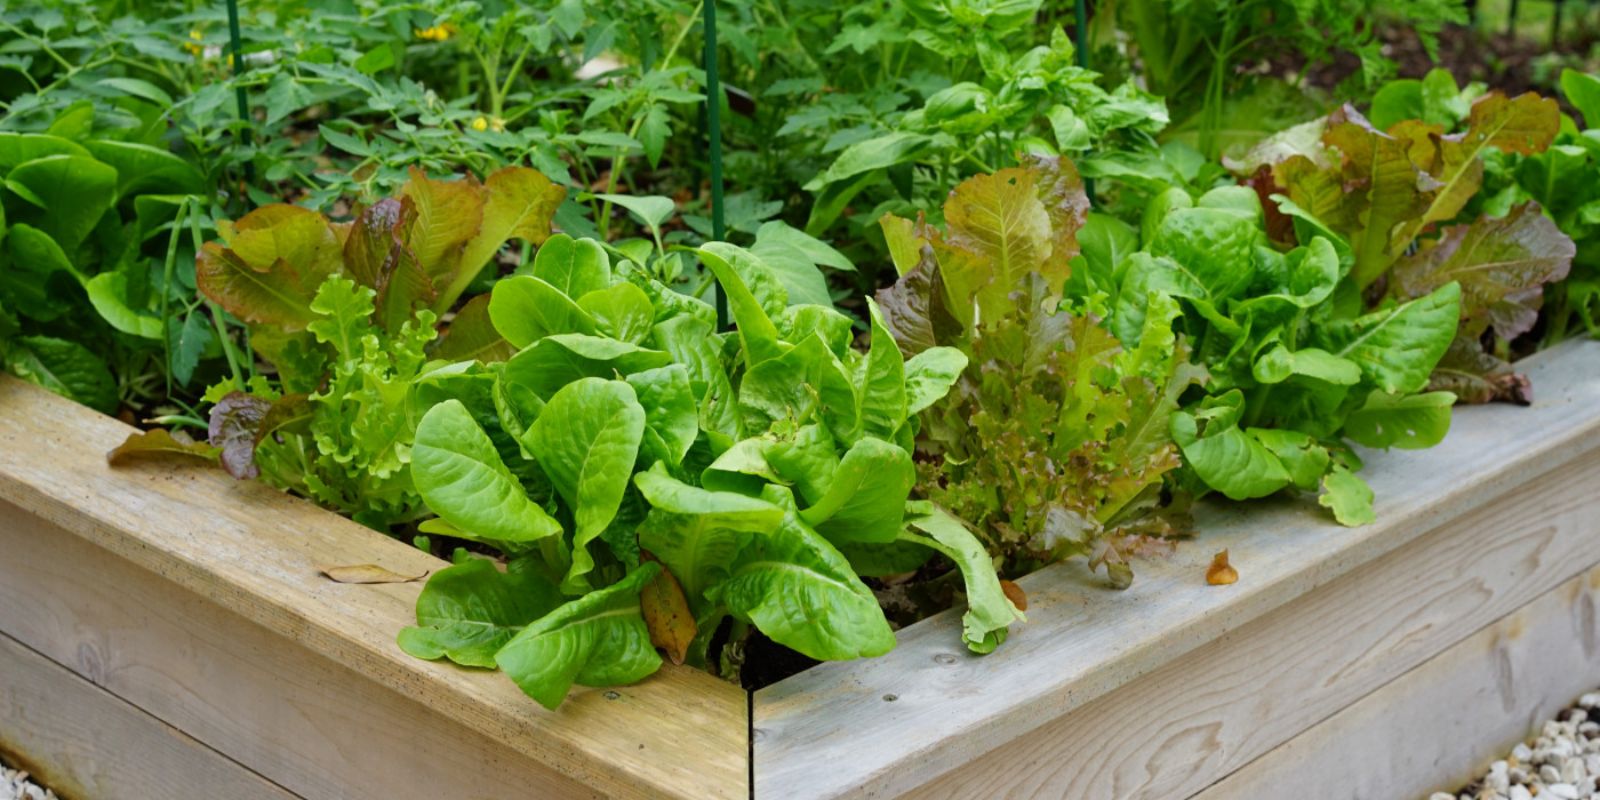
When it comes to growing salad greens, raised beds provide an optimal environment. Salad greens like lettuce, spinach, arugula, and kale thrive in well-drained, nutrient-rich soil, and raised beds allow you to create the perfect growing medium. Additionally, you can maximize space and enjoy a continuous harvest by planting a variety of greens with staggered planting times.
Step 1: Choose the Right Location for Your Raised Bed
The success of your salad garden starts with choosing the right location for your raised bed. Salad greens are sun-loving plants that require plenty of sunlight to grow and develop their best flavors. Ideally, your raised bed should receive at least 6-8 hours of sunlight daily.
If you live in a particularly hot climate, you may want to choose a spot with some afternoon shade to prevent the greens from wilting or becoming bitter due to heat stress. If your garden area doesn’t get full sun, you can still grow greens, but focus on leafy varieties that tolerate partial shade, like spinach and arugula.
Pro tip: If you don’t have enough space in your backyard, raised beds can be placed on patios, decks, or even balconies as long as they receive adequate sunlight.
Step 2: Build or Buy Your Raised Bed
Once you’ve selected the perfect spot, it’s time to set up your raised bed. You have two main options: you can either build your own raised bed or purchase a pre-made one.
DIY Raised Beds:
Building your own raised bed can be a fun and rewarding project. You can use materials like untreated wood, bricks, or even repurposed materials to construct the bed. The size of your raised bed will depend on your available space, but a common size is 4 feet by 8 feet, with a height of at least 10-12 inches. This size allows for easy access to all parts of the bed without having to step into it, which helps prevent soil compaction.
Pre-Made Raised Beds:
If DIY projects aren’t your thing, you can easily find pre-made raised bed kits at garden centers or online. These kits come in a variety of sizes, and many are made from durable materials like cedar or composite wood that will last for several seasons.
Step 3: Fill the Raised Bed with Quality Soil
One of the biggest advantages of raised bed gardening is that you have full control over the soil. Salad greens need well-draining, nutrient-rich soil to thrive, so filling your raised bed with the right soil mix is crucial for a successful harvest.
How to Create the Ideal Soil Mix:
- Start with a Base: Use a high-quality garden soil or potting mix as the base. This will provide a good structure for your greens.
- Add Organic Matter: Mix in plenty of compost or well-rotted manure. This organic matter will enrich the soil with essential nutrients and improve water retention.
- Ensure Good Drainage: Greens don’t like waterlogged soil, so adding materials like perlite or coarse sand can help improve drainage.
- Consider a Soil Test: If you’re unsure about the quality of your soil, perform a soil test to determine its pH and nutrient content. Greens prefer slightly acidic to neutral soil with a pH between 6.0 and 7.0.
Once you’ve filled your raised bed, give the soil a light watering to settle it in place and ensure it’s ready for planting.
Step 4: Choose Your Salad Greens
One of the great joys of growing a salad garden is the variety of greens you can plant. From crisp lettuce to spicy arugula, you can customize your garden to suit your taste preferences. Here are some popular salad greens you can consider planting in your raised bed:
- Lettuce (Romaine, Butterhead, Leaf): Lettuce is the backbone of any salad garden. It comes in various textures and flavors, from crunchy romaine to tender butterhead.
- Spinach: Spinach is packed with nutrients and grows quickly, making it a great addition to your garden.
- Arugula: Known for its peppery flavor, arugula adds a spicy kick to salads.
- Kale: This nutrient-dense green is hardy and can be harvested for months, providing a continuous supply of fresh leaves.
- Swiss Chard: With its colorful stems and tender leaves, Swiss chard adds both beauty and flavor to your salad garden.
- Radicchio: If you enjoy a slightly bitter flavor, radicchio is a great choice for salads.
To keep your salad garden productive throughout the season, choose a mix of fast-growing greens and those that mature more slowly. This will ensure that you always have fresh greens to harvest.
Step 5: Plant Your Salad Garden
Now that your raised bed is filled with rich soil and you’ve chosen your greens, it’s time to plant your garden. Salad greens can be planted from either seeds or seedlings. If you’re starting from seeds, be sure to follow the packet’s instructions for planting depth and spacing.
How to Plant Salad Greens:
- Direct Sowing: If you’re starting from seeds, sow them directly into the soil in rows or broadcast them evenly across the bed. Lightly cover the seeds with soil and water gently.
- Transplanting Seedlings: If you prefer a head start, purchase seedlings from a garden center or start your own indoors. When transplanting, space the seedlings about 6-12 inches apart to give them room to grow.
- Succession Planting: To ensure a continuous harvest, practice succession planting. Every 2-3 weeks, sow a new batch of seeds to keep your garden productive.
Step 6: Water and Mulch Your Raised Bed
Watering is essential for a healthy salad garden. Greens have shallow roots and need consistent moisture to thrive. Water your raised bed regularly, keeping the soil evenly moist but not waterlogged.
Mulching for Moisture Retention:
Adding a layer of mulch around your plants can help retain moisture, regulate soil temperature, and suppress weeds. Use organic mulch like straw or shredded leaves, which will also break down over time and enrich the soil.
Step 7: Maintain Your Salad Garden
Once your salad garden is established, it requires regular maintenance to keep it healthy and productive.
- Weed Regularly: Raised beds tend to have fewer weeds than in-ground gardens, but you’ll still need to keep an eye out for weeds. Pull them out as soon as you see them to prevent competition for nutrients and water.
- Fertilize: Salad greens are fast growers and may need additional nutrients to support their rapid growth. Every 3-4 weeks, apply an organic fertilizer or compost tea to keep the soil rich.
- Monitor for Pests: Common pests like aphids, slugs, and caterpillars may target your salad greens. Use organic pest control methods like handpicking, neem oil, or insecticidal soap to keep them in check.
Step 8: Harvest Your Salad Greens
One of the best parts of growing a salad garden is the joy of harvesting fresh greens. Most salad greens can be harvested when they are young and tender, making them perfect for salads.
How to Harvest Greens:
- Cut and Come Again: For leafy greens like lettuce, spinach, and kale, use the “cut and come again” method. Cut the outer leaves about 1 inch above the base, allowing the plant to regrow for multiple harvests.
- Whole Head Harvesting: For head-forming greens like butterhead lettuce, harvest the entire head when it reaches full size by cutting it at the base.
By harvesting regularly, you’ll encourage your plants to continue producing new leaves, giving you a continuous supply of fresh greens.
Step 9: Extend Your Growing Season
If you want to extend your salad garden’s growing season, consider adding a simple cold frame or row cover to your raised bed. This will help protect your greens from frost and allow you to enjoy fresh salads even in cooler months.
Final Thoughts
Growing a salad garden in a raised bed is a rewarding and sustainable way to enjoy fresh, homegrown greens. With proper planning, soil preparation, and care, you can create a thriving garden that supplies you with delicious salad ingredients throughout the season. Start your salad garden today and enjoy the health benefits and satisfaction of growing your own food.
Happy gardening! 🥗🌱 #SaladGarden #RaisedBedGardening #HomegrownGreens #GrowYourOwnFood #OrganicGardening #FreshSalads