
Growing a peach tree from seeds is an incredibly rewarding gardening project that allows you to enjoy fresh, homegrown peaches right from your backyard. Whether you have a spacious garden or a small balcony, cultivating a peach tree can be a fulfilling experience. In this comprehensive guide, we’ll take you through the steps required to grow a peach tree from seeds, discuss the care and maintenance needed, and offer tips for ensuring a fruitful harvest.
Introduction
Peach trees (Prunus persica) are not only cherished for their delicious fruits but also admired for their beautiful blossoms in the spring. They are relatively easy to grow, making them a great choice for both novice and experienced gardeners. While many people purchase nursery-grown peach trees, growing your own from seeds can be a fun and educational endeavor.
In this article, we will cover everything you need to know about growing peach trees from seeds, from selecting the right fruit to nurturing your seedlings into healthy, productive trees. Let’s get started!
1. Selecting the Right Peach
The first step in growing a peach tree from seeds is selecting the right peach. Here are a few tips to keep in mind:
- Choose Organic Peaches: Opt for organic peaches to ensure that the seeds are free from pesticides and chemicals. This will increase the likelihood of successful germination.
- Pick Ripe Fruit: Select ripe, fresh peaches as the seeds will be more viable. The fruit should have a strong aroma and a slightly soft texture.
- Variety Matters: Different peach varieties may produce different flavors and growth characteristics. Some popular varieties to consider are Elberta, Redhaven, and Georgia Belle.
2. Preparing the Seeds
Once you have chosen your peaches, it’s time to extract and prepare the seeds. Follow these steps:
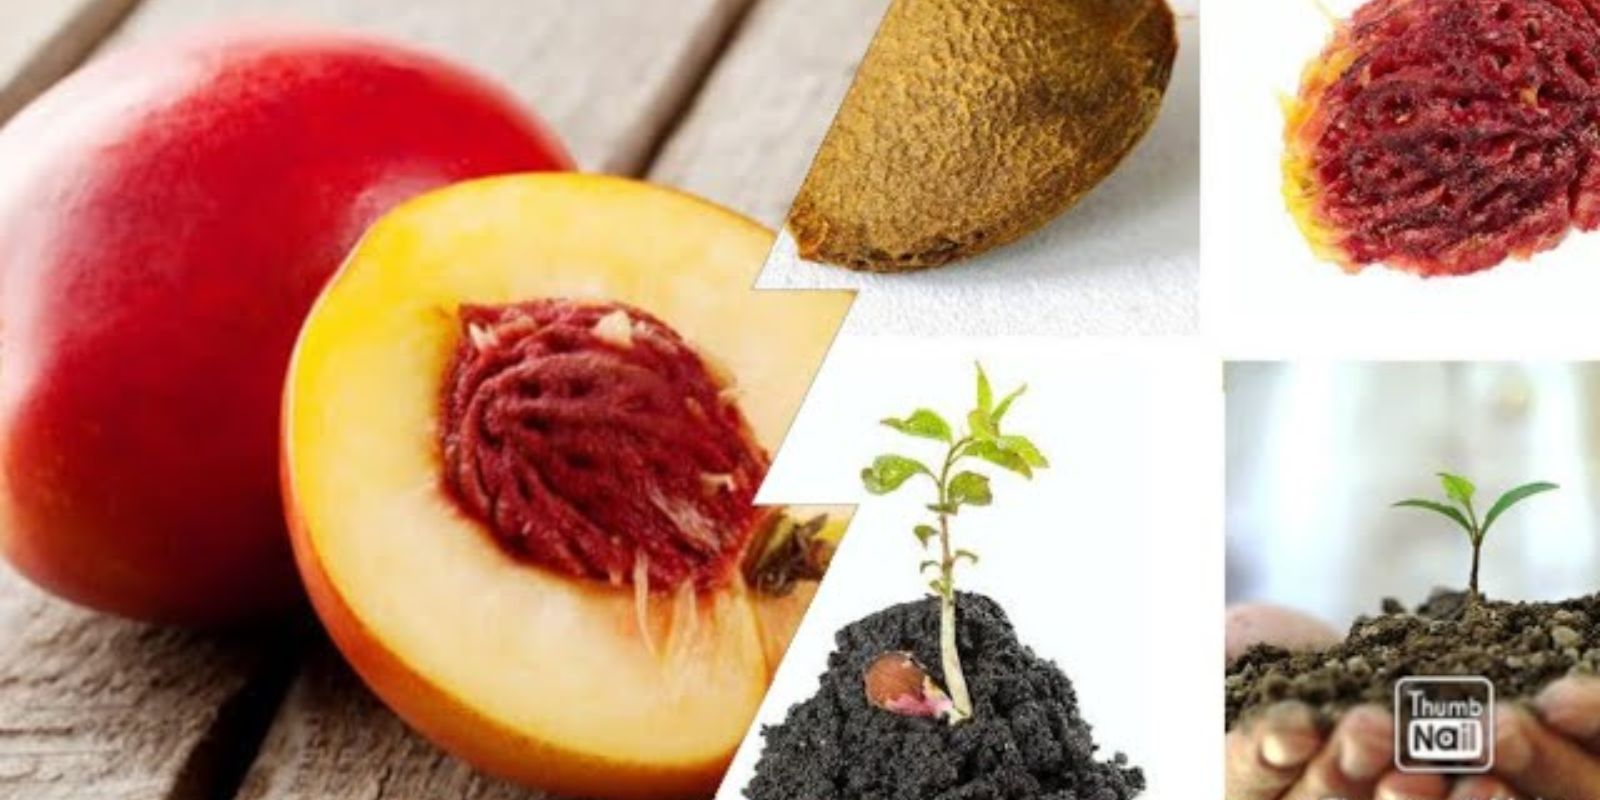
Step 1: Remove the Seed
- Cut the peach in half and carefully remove the pit (the hard shell surrounding the seed).
- Rinse the pit under running water to remove any fruit residue.
Step 2: Clean the Seed
- Allow the pit to dry for a few hours.
- Once dry, gently crack open the pit using a nutcracker or hammer to extract the seed inside. Be cautious not to damage the seed.
Step 3: Stratify the Seeds
Stratification is a process that mimics winter conditions to help the seeds germinate:
- Place the cleaned seeds in a damp paper towel.
- Seal them in a plastic bag to maintain moisture.
- Refrigerate the seeds for about 6-8 weeks. This chilling period is crucial for successful germination.
3. Preparing the Soil
While the seeds are stratifying, you can prepare the soil for planting:
Step 1: Choose the Right Pot
- Select a pot that is at least 6-8 inches deep with drainage holes at the bottom to prevent waterlogging.
Step 2: Use Quality Potting Mix
- Fill the pot with a well-draining potting mix. You can also create your own mix by combining equal parts of peat moss, vermiculite, and perlite.
4. Planting the Seeds
Once the stratification period is over, it’s time to plant the seeds:
Step 1: Plant the Seeds
- Take the stratified seeds out of the refrigerator.
- Plant the seeds about 1-2 inches deep in the prepared soil.
- Space the seeds at least 3-4 inches apart if you’re planting multiple seeds in the same pot.
Step 2: Water the Seeds
- Water the soil lightly to moisten it without making it soggy. Ensure that the water drains well.
Step 3: Cover the Pot
- Cover the pot with plastic wrap or a plastic dome to create a greenhouse effect. This helps maintain humidity and warmth.
5. Germination and Care for Seedlings
Step 1: Provide Warmth and Light
- Place the pot in a warm location with plenty of indirect sunlight. A temperature of around 70°F (21°C) is ideal for germination.
- Remove the plastic cover once the seedlings emerge, which usually takes 2-3 weeks.
Step 2: Watering and Fertilizing
- Water the seedlings regularly to keep the soil slightly moist but not waterlogged.
- Once the seedlings are about 2-3 inches tall, you can start fertilizing them with a diluted liquid fertilizer every 4-6 weeks.
Step 3: Thin the Seedlings
- If multiple seedlings sprout in the same pot, thin them out to leave the healthiest one or two per pot, ensuring they have enough space to grow.
6. Transplanting Your Peach Seedlings
After the seedlings have developed a few sets of leaves and are about 6 inches tall, it’s time to transplant them:
Step 1: Choose a Location
- Select a sunny spot in your garden with well-draining soil. Peach trees thrive in full sun, so aim for at least 6-8 hours of direct sunlight daily.
Step 2: Prepare the Planting Hole
- Dig a hole that is twice as wide as the root ball of the seedling and deep enough to accommodate the roots.
Step 3: Transplant the Seedlings
- Gently remove the seedling from the pot, being careful not to damage the roots.
- Place the seedling in the hole and backfill with soil, ensuring that the graft union (if present) is above soil level.
Step 4: Water Thoroughly
- Water the newly transplanted seedling thoroughly to help settle the soil and reduce transplant shock.
7. Caring for Your Peach Tree
Once your peach tree is planted, ongoing care is crucial for its growth and productivity:
Step 1: Watering
- Water the tree regularly, especially during dry spells. Young trees need consistent moisture, while established trees require less frequent watering.
Step 2: Fertilization
- Fertilize your peach tree with a balanced fertilizer in early spring and again in late spring, following the package instructions for application rates.
Step 3: Pruning
- Prune your peach tree annually to encourage healthy growth and fruit production. Remove any dead or diseased branches and thin out crowded areas.
Step 4: Pest and Disease Management
- Keep an eye out for common pests such as aphids, spider mites, and peach tree borers. Implement organic pest control methods or insecticidal soaps as needed.
- Monitor for diseases like peach leaf curl and brown rot, and take preventive measures, such as proper spacing and pruning for good air circulation.
8. Harvesting Your Peaches
Step 1: Know When to Harvest
- Peaches are typically ready for harvest when they have a sweet aroma, a slight give when gently squeezed, and have turned a uniform color.
Step 2: Harvest Carefully
- Use scissors or pruning shears to cut the fruit from the tree, leaving a short stem attached to avoid damaging the fruit.
Step 3: Enjoy Your Homegrown Peaches
- Enjoy your homegrown peaches fresh, in desserts, or canned for later use!
Conclusion
Growing a peach tree from seeds is a fulfilling journey that requires patience and care. With the right preparation and attention, you can enjoy the sweet rewards of your labor in a few years. Not only will you have fresh peaches to savor, but you’ll also take pride in having grown them from seed to fruit-bearing tree. So gather your seeds, follow the steps outlined in this guide, and embark on your peach-growing adventure today!
Share your progress and peach-growing stories with us! 🌳🍑 #PeachTree #Gardening #Homegrown #SeedToFruit #UrbanGardening #GrowYourOwnFood