
Coleus plants, renowned for their vibrant and diverse foliage, are a favorite among gardeners and plant enthusiasts. With their bright, colorful leaves and low-maintenance requirements, they are perfect for adding a splash of color to any garden or indoor space. One of the easiest and most rewarding ways to expand your Coleus collection is by propagating new plants from water cuttings. This method is straightforward and ideal for beginners. In this comprehensive guide, we’ll walk you through the process of growing a Coleus plant from a water cutting, ensuring your new plant thrives beautifully.
Why Choose Water Propagation?
Water propagation is a popular method for growing new plants from cuttings because it is simple and requires minimal supplies. For Coleus, this method is particularly effective due to the plant’s ability to quickly develop roots in water. Here are a few reasons why water propagation is a great choice:
- Ease of Monitoring: You can easily see the root development in water, allowing you to monitor progress without disturbing the cutting.
- Minimal Equipment: All you need is a container of water and a cutting, making it accessible and cost-effective.
- Promotes Healthy Growth: Water propagation encourages strong, healthy roots, leading to a robust and vigorous plant once transferred to soil.
Materials Needed
Before you begin, gather the following materials:
- A Healthy Coleus Plant: Choose a mature, disease-free plant to take cuttings from.
- Sharp Scissors or Pruning Shears: For clean cuts.
- Glass Jar or Container: To hold the water and cutting.
- Water: Room temperature is best for the cutting.
Step-by-Step Guide to Growing Coleus from a Water Cutting
- Select a Healthy Cutting The first step is to select a healthy Coleus plant from which you will take cuttings. Look for a plant with vibrant, healthy leaves and avoid any that show signs of disease or pests. Using sharp scissors or pruning shears, cut a 4-6 inch stem just below a leaf node (the point where a leaf attaches to the stem). Make sure the cutting includes at least one node, as this is where the roots will develop.
- Prepare the Cutting After taking the cutting, remove the lower leaves from the stem, leaving only a few leaves at the top. This helps prevent rot and ensures that the cutting focuses its energy on root development rather than maintaining unnecessary foliage. Trim any excess leaf stems that could interfere with the rooting process.
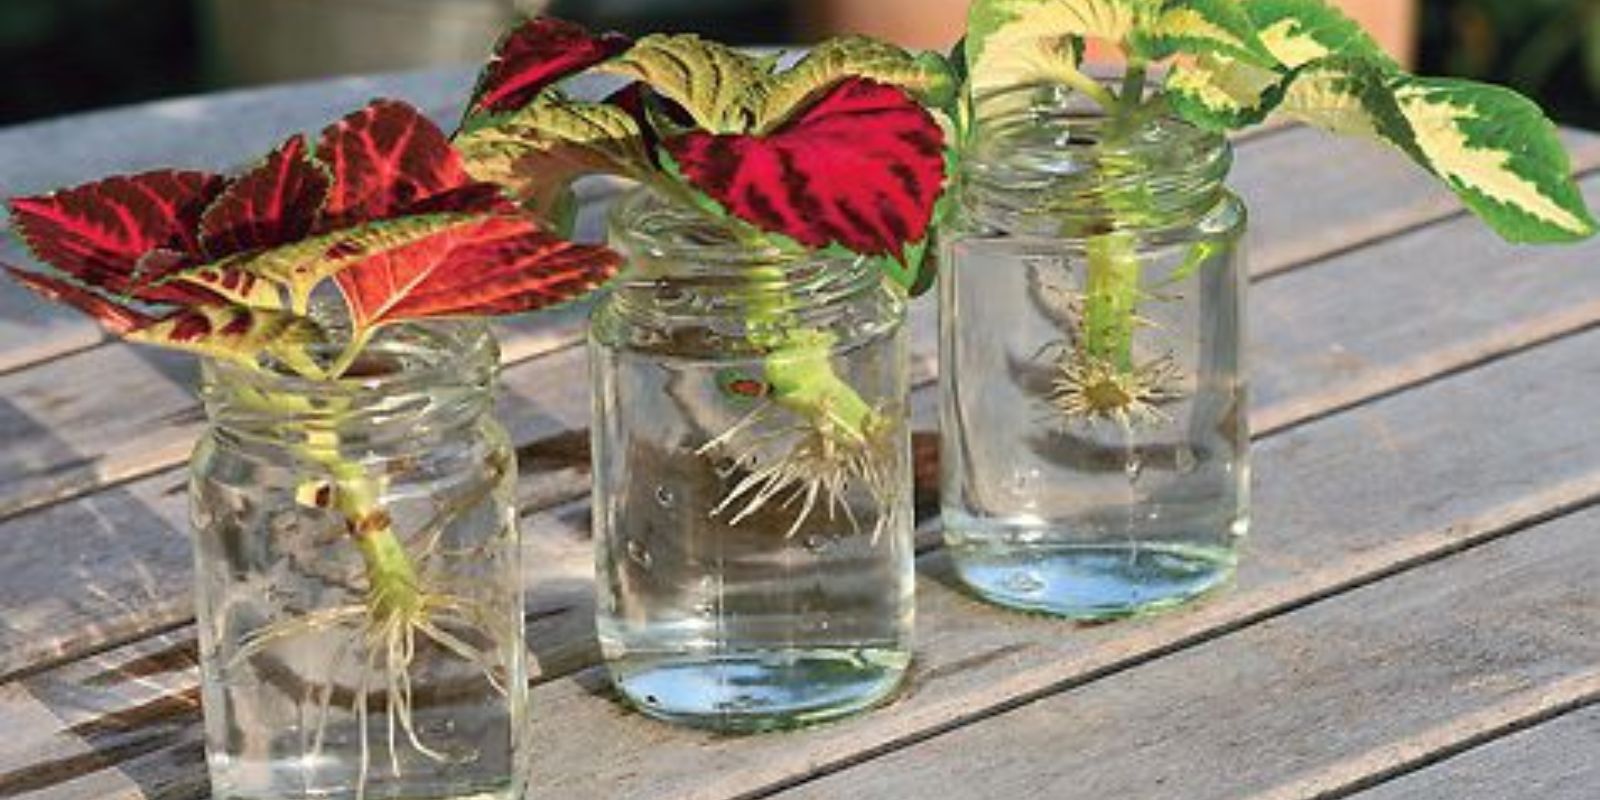
- Place in Water Fill a glass jar or container with room-temperature water. Place the prepared cutting into the container, ensuring that the node is submerged in the water. The node is crucial for root development, so make sure it remains consistently underwater. The top of the cutting, including the remaining leaves, should remain above the water level.
- Provide Adequate Light Position the jar in a location that receives bright, indirect light. Direct sunlight can cause algae growth and may be too harsh for the cutting. A spot with filtered light or near a window with morning sunlight is ideal. This lighting helps the cutting develop roots while preventing the growth of mold or algae in the water.
- Change Water Regularly To keep the water clean and free of pathogens, change it every few days. This prevents the growth of harmful bacteria and algae that can hinder root development. Simply remove the cutting, rinse the container, refill it with fresh water, and place the cutting back into the jar.
- Wait for Roots to Develop Over the next few weeks, you’ll begin to see roots developing from the submerged node. The roots will start as small, white threads and gradually grow longer. Once the roots are approximately 1-2 inches in length, the cutting is ready to be potted in soil.
- Transfer to Soil Prepare a small pot with well-draining potting soil. Gently remove the cutting from the water and plant it in the soil, making a small hole to accommodate the roots. Firm the soil around the cutting to ensure good contact and provide stability. Water the newly potted Coleus lightly to help it settle into its new home.
- Care for Your New Coleus Plant After transplanting, place the pot in a location with bright, indirect light. Keep the soil consistently moist but not waterlogged. Coleus plants prefer high humidity, so consider misting the leaves or using a humidity tray if you live in a dry climate. Fertilize the plant with a balanced, water-soluble fertilizer every 4-6 weeks to encourage healthy growth.
- Monitor and Adjust Regularly check the plant for signs of stress, such as wilting or yellowing leaves. Adjust watering and light conditions as needed to keep the plant healthy. As the Coleus grows, you may need to repot it into a larger container to accommodate its expanding root system.
- Enjoy Your Coleus Plant With proper care, your Coleus plant will thrive and add a burst of color to your garden or home. Whether you’re growing it indoors or outdoors, the vibrant foliage of Coleus is sure to brighten any space.
Conclusion
Growing a Coleus plant from a water cutting is an easy and satisfying way to propagate this beautiful plant. By following these simple steps, you can enjoy the process of creating new Coleus plants and expand your collection with vibrant colors and patterns. This method not only provides a fun gardening activity but also offers a cost-effective way to grow multiple plants from a single source. So, grab your cutting, place it in water, and watch as your new Coleus plant begins to grow and flourish! 🌿🌟