
Growing your own apple tree from seed can be a fulfilling and educational experience. While traditional methods often involve a lengthy stratification process to mimic winter conditions, there are faster and simpler ways to germinate apple seeds—especially in warmer climates like the Philippines. In this article, we’ll guide you through the step-by-step process of germinating apple seeds in just two days, exploring the benefits of home gardening, and sharing tips to ensure your seedlings thrive.
The Beauty of Growing Apple Trees
Apple trees are not only aesthetically pleasing with their beautiful blossoms and luscious fruit, but they also provide numerous benefits. Whether you’re looking for fresh fruit, shade, or an addition to your landscape, an apple tree can meet those needs. Growing your own trees gives you control over the cultivation process, allowing you to choose organic practices and heirloom varieties.
The Science Behind Germination
Understanding the basics of seed germination can help you appreciate the process more. Seeds contain a dormant embryo that requires specific conditions to wake up. These conditions typically include:
- Moisture: Seeds need to absorb water to activate enzymes that kickstart growth.
- Temperature: Each plant species has an ideal temperature range for germination. For apples, this is usually between 70-80°F (21-27°C).
- Oxygen: Seeds need oxygen for respiration during germination.
- Light: Some seeds require light to germinate, while others prefer darkness.
By providing the right conditions, you can encourage the rapid germination of apple seeds.
Step-by-Step Guide to Germinating Apple Seeds
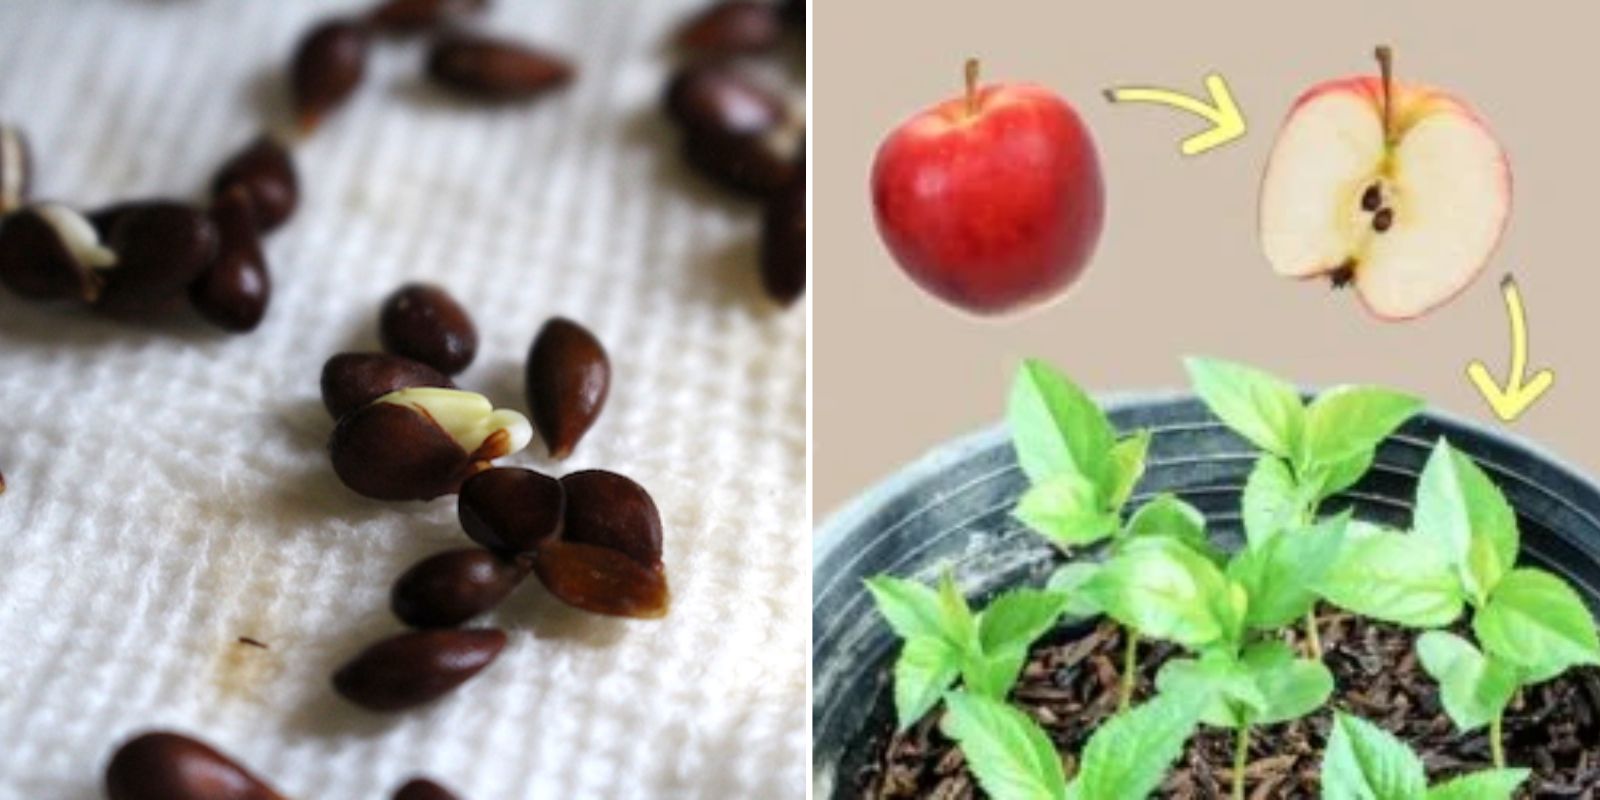
Step 1: Selecting Quality Seeds
The first step is choosing the right seeds. You can obtain apple seeds from a variety of sources:
- Store-Bought Apples: Choose a ripe, healthy apple from a local market. Organic apples are preferable as they are less likely to have been treated with chemicals.
- Heirloom Varieties: If you’re looking for unique flavors or characteristics, consider heirloom varieties. These seeds will grow into trees that bear fruit similar to the parent apple.
Once you have your seeds, rinse them to remove any fruit residue and allow them to dry.
Step 2: Soaking the Seeds
Soaking apple seeds helps soften the tough seed coat, making it easier for them to germinate. Here’s how to do it:
- Place the seeds in a bowl of water.
- Let them soak for approximately 24 hours. You can gently stir the seeds occasionally to ensure even soaking.
- After soaking, drain the seeds and prepare them for the next step.
Step 3: Preparing the Germination Medium
The medium you use for germination is crucial. You can choose between a damp paper towel or a seed-starting mix. Here’s how to prepare each option:
- Damp Paper Towel:
- Take a paper towel and moisten it with water. It should be damp but not dripping wet.
- Place the soaked seeds evenly spaced on one half of the towel.
- Fold the towel over the seeds to cover them completely.
- Seed-Starting Mix:
- If using a seed-starting mix, fill small pots or trays with the mix.
- Make small indentations in the soil for the seeds.
- Place the seeds in the indentations and cover them lightly with more soil.
Step 4: Planting the Seeds
If you’re using the paper towel method, place the folded towel in a plastic bag to retain moisture. If you’ve used soil, ensure the pots are adequately watered but not soggy.
Step 5: Providing Warmth
Temperature is key for germination. Since you’re in the Philippines, find a warm, sunny spot in your home. Aim for a temperature between 70-80°F (21-27°C). Here are a few tips:
- Indoors: A windowsill that receives direct sunlight can be an ideal location.
- Outdoors: If you choose to place them outside, ensure they are protected from direct, harsh sunlight and sudden rain.
Step 6: Checking Regularly
Open the bag or check the soil daily. Make sure it stays moist but not overly wet. In just 2 days, you should start seeing tiny roots emerging from the seeds!
Step 7: Transplanting Seedlings
Once the roots are about 1-2 inches long, it’s time to transplant your seedlings into larger pots. Here’s how:
- Prepare Pots: Use a well-draining potting mix to fill small pots.
- Planting: Carefully transplant each seedling, making sure to plant them at the same depth they were in the paper towel or soil.
- Watering: Water them gently after planting to help settle the soil around the roots.
Caring for Your Young Apple Trees
After transplanting, your apple seedlings will need care to thrive:
Light and Temperature
- Ensure they get plenty of sunlight, ideally 6-8 hours a day.
- Keep them in a warm environment; they can be moved outdoors once they are a few inches tall and after the risk of frost has passed.
Watering
- Water the seedlings regularly, allowing the top inch of soil to dry out between waterings.
- Avoid waterlogging, as this can lead to root rot.
Fertilizing
- After a few weeks, you can start fertilizing your seedlings with a diluted balanced fertilizer to promote growth.
Pests and Diseases
- Keep an eye out for common pests like aphids or spider mites. Use organic pest control methods to address any issues.
The Rewards of Home Gardening
Growing apple trees from seeds is not only satisfying, but it can also provide fresh fruit for your family for years to come. Each tree may take several years to bear fruit, but the wait is well worth it. Additionally, growing your own trees contributes to local biodiversity and can help create a more sustainable living environment.
Conclusion
Germinating apple seeds in just two days without refrigeration is an accessible and exciting project for gardeners of all levels. By following these steps, you can enjoy the journey of nurturing your own apple tree from seed to fruit-bearing plant. So gather your materials and start your gardening adventure today!
Ready to grow your own apple trees? Share your progress using #AppleSeeds #GardeningInThePhilippines #GrowYourOwnFruit #HomeGardening!