
Bleeding Heart (Dicentra spectabilis) is a perennial flowering plant known for its stunning, heart-shaped blooms that dangle like delicate teardrops. These flowers, typically pink or white, add elegance and charm to any garden, making Bleeding Heart a favorite among gardeners. While Bleeding Heart can be propagated by seeds or division, one of the easiest and most reliable methods is by taking cuttings. In this comprehensive guide, we will walk you through the process of growing Bleeding Heart from cuttings, ensuring that you can successfully propagate this beautiful plant for your garden or share it with friends and family.
Introduction to Bleeding Heart
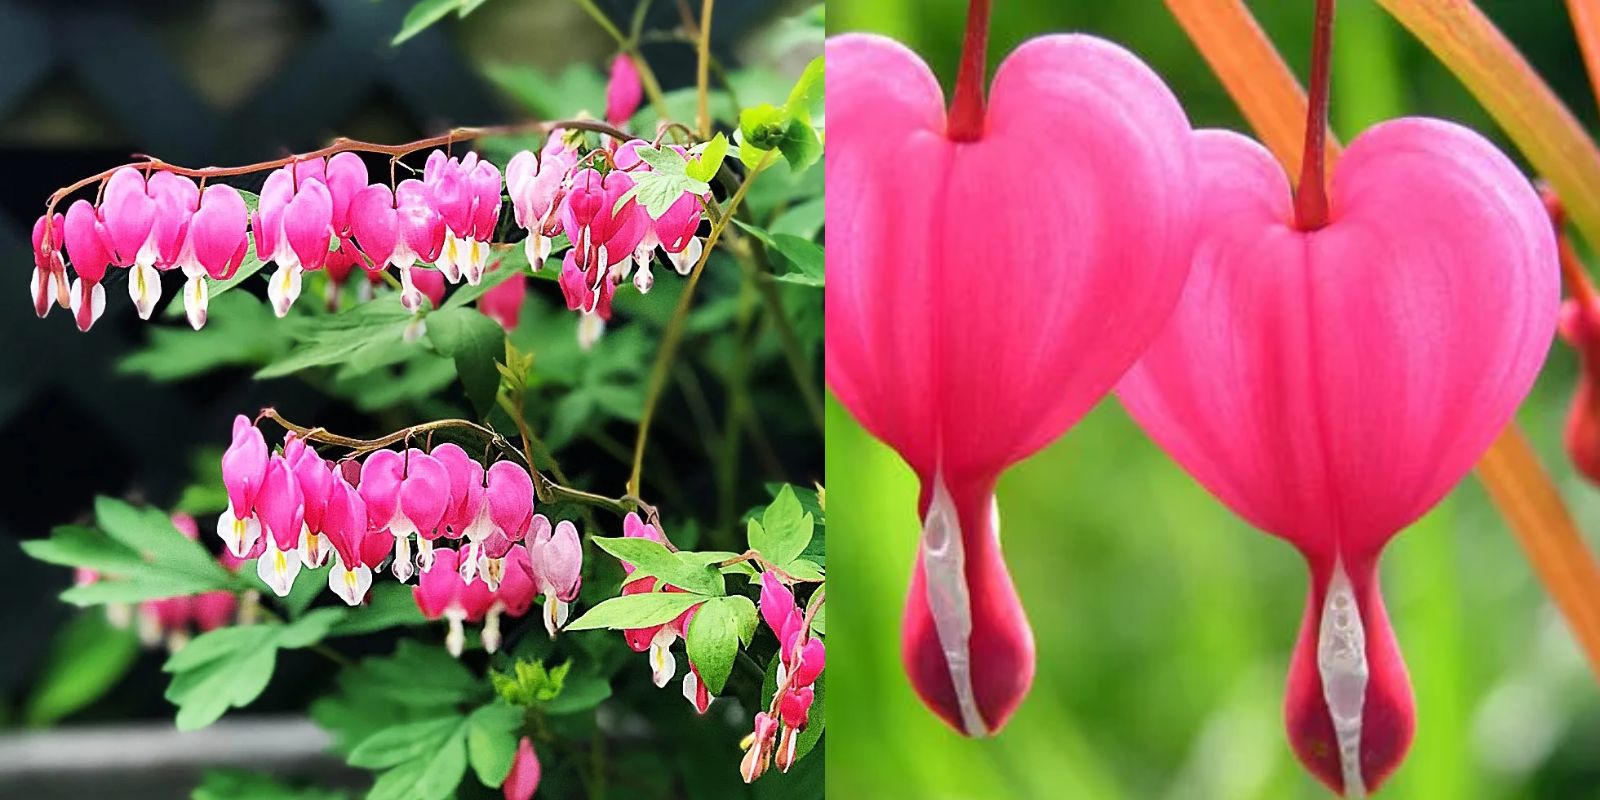
Before we delve into the process of propagating Bleeding Heart from cuttings, let’s take a moment to understand the plant itself. Bleeding Heart is a perennial that grows from rhizomes, producing feathery, fern-like foliage and spectacular flowers that bloom in late spring to early summer. The flowers have an almost otherworldly appearance, with a shape reminiscent of a heart, hence the name “Bleeding Heart.”
Bleeding Hearts thrive in partially shaded locations and well-draining, moist soil, making them perfect for woodland gardens or shaded garden beds. They are also relatively low-maintenance, making them an excellent choice for gardeners who want beautiful blooms without too much effort.
Why Propagate Bleeding Heart from Cuttings?
There are several methods to propagate Bleeding Heart, but growing it from cuttings is the most straightforward and rewarding option for beginners. When you propagate a plant from cuttings, you create a clone of the parent plant. This ensures that the new plant will have the same beautiful characteristics and traits, such as flower color and growth habit, as the original plant.
Additionally, growing Bleeding Heart from cuttings can help you create more plants for your own garden, or you can gift them to others. It’s an eco-friendly way to expand your collection without spending money on new plants from the nursery.
Materials Needed for Growing Bleeding Heart from Cuttings
Before you begin the propagation process, gather the following materials to ensure a successful attempt at rooting Bleeding Heart cuttings:
- Healthy Bleeding Heart Plant: Select a mature, healthy plant that has not yet flowered. Flowering stems are not ideal for cuttings because they may not root as successfully.
- Sharp, Clean Scissors or Pruning Shears: Use clean, sharp scissors or pruning shears to avoid damaging the plant.
- Rooting Hormone (Optional): Rooting hormone can help stimulate the growth of roots. While it’s not essential, it can increase the chances of successful rooting.
- Well-Draining Potting Mix: Bleeding Heart cuttings need a soil mix that drains well to avoid root rot. A general-purpose potting mix with added perlite or sand works well.
- Small Pots or Containers: Use small pots or containers to plant the cuttings. Ensure that the pots have drainage holes.
- Plastic Bag or Dome: A clear plastic bag or propagation dome helps create a humid environment for the cutting to root.
- Watering Can or Spray Bottle: Keep the soil moist but not waterlogged, using a watering can or spray bottle to gently mist the cuttings.
Step-by-Step Guide to Growing Bleeding Heart from Cuttings
Now that you have your materials ready, it’s time to get started. Follow these easy steps to propagate Bleeding Heart from cuttings:
Step 1: Choose the Right Time
The best time to take cuttings from a Bleeding Heart plant is in the early spring or late summer, during the plant’s active growing phase. Avoid cutting during the plant’s dormant winter period, as it may not root successfully.
Step 2: Select a Healthy Stem
Pick a healthy, non-flowering stem from the Bleeding Heart plant. The ideal cutting should be about 4 to 6 inches long and free from pests or diseases. Avoid using stems that are too woody or too young, as these may not root well. Look for a stem that has several sets of leaves, as this will provide the cutting with the energy it needs to grow roots.
Step 3: Cut the Stem
Using sharp, clean scissors or pruning shears, cut the stem just below a set of leaves. Make sure the cut is clean to minimize stress on the plant and reduce the risk of disease. If desired, dip the cut end of the stem in rooting hormone to encourage faster root growth. Although not necessary, rooting hormone can increase the chances of successful propagation.
Step 4: Remove Excess Leaves
Trim away any leaves from the bottom 2 inches of the cutting. This will help the cutting focus its energy on developing roots rather than maintaining leaves. Leave a few sets of leaves at the top of the cutting.
Step 5: Plant the Cutting
Fill a small pot with a well-draining potting mix. Make a small hole in the center of the pot using a pencil or stick, and insert the cutting into the hole. Ensure that at least 2 inches of the cutting are buried in the soil. Gently press the soil around the base of the cutting to secure it in place. Water the cutting lightly to settle the soil around the stem.
Step 6: Create a Humid Environment
To encourage root growth, it’s essential to keep the cutting in a humid environment. Cover the pot with a clear plastic bag or use a propagation dome to trap moisture around the cutting. Place the pot in a warm, bright location with indirect sunlight. Avoid direct sunlight, as it can scorch the cutting and dry out the soil.
Step 7: Water and Maintain Humidity
Check the soil moisture daily and water lightly when it feels dry. The cutting should be kept moist, but not soggy, to prevent root rot. If you notice condensation on the inside of the plastic bag or dome, this is a sign that the humidity level is ideal.
Step 8: Monitor Root Development
After 3 to 4 weeks, check the cutting for signs of root growth. Gently tug on the cutting to see if it resists being pulled out of the soil. If it does, this is a sign that roots have formed. You can also carefully remove the cutting from the pot and inspect the roots. Once the roots are well-developed, the cutting is ready to be transplanted.
Step 9: Transplant the Cutting
Once the Bleeding Heart cutting has established a strong root system, you can transplant it into a larger pot or directly into your garden. Choose a location that provides partial shade and well-draining, moist soil. If transplanting into the garden, ensure the area is not too sunny or dry, as Bleeding Heart plants thrive in shaded or woodland conditions.
Caring for Your New Bleeding Heart Plant
After transplanting, continue to care for your new Bleeding Heart plant by providing it with adequate water and shade. Keep the soil consistently moist, but avoid waterlogging. As the plant grows, you may need to stake it to support its tall, arching stems. Regularly check for pests, and remove any dead or yellowing leaves to keep the plant healthy.
Common Problems When Growing Bleeding Heart from Cuttings
While propagating Bleeding Heart from cuttings is relatively straightforward, there are a few common challenges you may encounter. Here are some solutions to address them:
- Rotting Cuttings: If the cutting is exposed to too much moisture or poor drainage, it may rot. Ensure that the cutting is planted in well-draining soil, and avoid overwatering.
- Slow Rooting: If the cutting is not developing roots, it may be too early in the season or the cutting might be too young. Be patient and keep the cutting in a warm, humid environment.
- Wilting or Yellowing Leaves: If the leaves are wilting or turning yellow, this may be a sign of stress from too much direct sunlight, too much moisture, or insufficient humidity. Adjust the conditions accordingly.
Conclusion
Growing Bleeding Heart from cuttings is a rewarding and simple way to propagate this beautiful plant and share it with others. With the right care and patience, you’ll soon have a new Bleeding Heart thriving in your garden, showcasing its unique and graceful flowers. By following the steps outlined in this guide, you can enjoy the satisfaction of growing your own plants from cuttings, while adding a touch of elegance to your home or garden.
Now, it’s time to get started—try propagating your own Bleeding Heart from cuttings today and watch as it grows into a beautiful addition to your garden! 🌿💖
#BleedingHeart #PlantPropagation #GardeningTips #DIYGarden #GardeningCommunity #FlowerLovers #HomeGardening #PerennialFlowers #GreenThumb #GrowYourOwn