
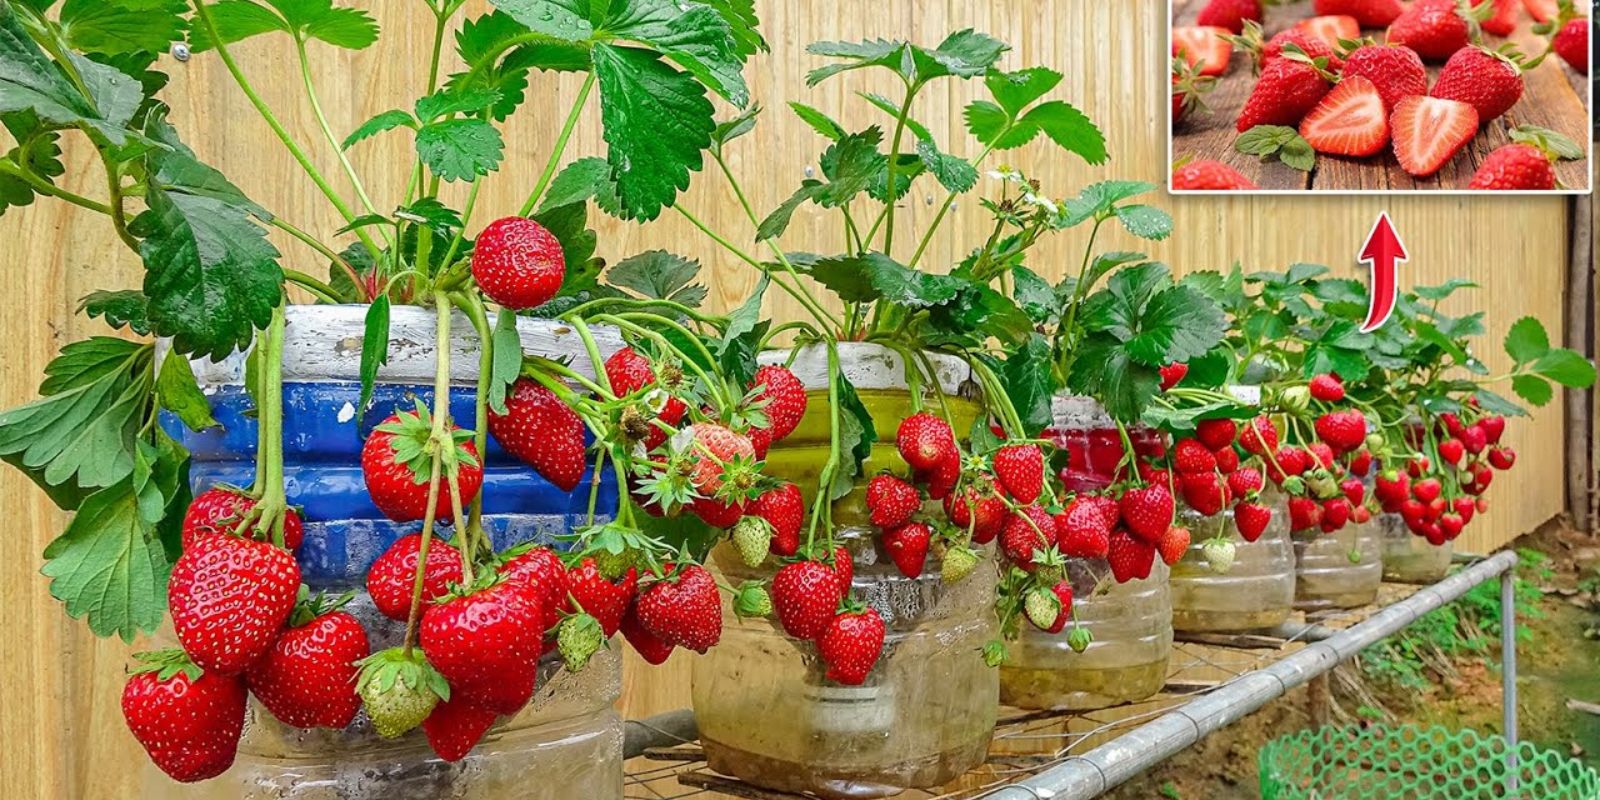
Growing strawberries can be a rewarding and delicious endeavor, especially when you cultivate them in innovative ways that save space and resources. One such method is using 5-liter plastic bottles as containers for your strawberry plants. This eco-friendly approach not only provides an excellent growing environment but also helps reduce waste. In this comprehensive guide, we will explore everything you need to know about growing strawberries in plastic bottle containers, from preparation to harvesting, ensuring a fruitful and flavorful yield.
Introduction to Growing Strawberries
Strawberries are a favorite among home gardeners for their sweet, juicy flavor and versatility in the kitchen. They can be enjoyed fresh, in desserts, or even as a vibrant addition to salads. While traditional gardening methods require significant space, growing strawberries in 5L plastic bottles is an efficient and creative way to maximize your gardening potential, particularly in urban settings or limited spaces.
Why Use Plastic Bottles?
Utilizing plastic bottles for gardening offers several benefits:
- Space Efficiency: Vertical gardening allows you to grow more plants in a smaller area.
- Cost-Effective: Recycling bottles reduces waste and saves money on gardening supplies.
- Better Drainage: Bottles provide excellent drainage, preventing root rot and promoting healthy growth.
- Mobility: Containers can be easily moved to optimize sunlight exposure or protect plants from harsh weather.
Materials Needed
Before you begin your strawberry cultivation journey, gather the following materials:
- 5L Plastic Bottles: Clean and dry, these will serve as your containers.
- Potting Soil: A quality, nutrient-rich potting mix ensures optimal growth.
- Strawberry Plants or Seeds: Choose varieties suited for container gardening, such as June-bearing or everbearing strawberries.
- Scissors or a Utility Knife: For cutting the bottles.
- Watering Can: To keep your plants hydrated.
- Fertilizer: A balanced fertilizer for flowering plants to enhance growth and fruiting.
Step-by-Step Guide to Growing Strawberries in Plastic Bottles
Step 1: Prepare the Plastic Bottles
- Rinse the Bottles: Clean the plastic bottles thoroughly to remove any residue.
- Cut the Bottles: Use scissors or a utility knife to cut the bottles in half. You’ll be using the bottom half for planting, so ensure the cut is clean and even.
- Create Drainage Holes: Use a sharp object to poke several holes in the bottom half of the bottle. This step is crucial to prevent water from pooling at the bottom and causing root rot.
Step 2: Add Potting Soil
- Fill the Bottles: Add a nutrient-rich potting mix to the bottom half of the bottle, filling it about three-quarters full. Choose a soil mix designed for container gardening, as it typically contains the right blend of nutrients, moisture-retaining components, and good drainage properties.
- Moisten the Soil: Lightly water the soil until it is evenly moist but not soggy. This step will help settle the soil and prepare it for planting.
Step 3: Planting Strawberries
- Choose Your Plants or Seeds: Decide whether you want to use strawberry plants or seeds. If using seeds, you can sprinkle them on the surface of the soil and lightly cover them with more potting mix.
- Plant the Strawberry Plants: If using nursery plants, gently remove them from their containers and place them in the soil. Ensure the crown of the plant (where the roots meet the stem) is level with the soil surface. This positioning is vital for the plant’s health and growth.
Step 4: Watering and Care
- Initial Watering: After planting, water the plants thoroughly. Ensure that the water drains through the holes you created in the bottom.
- Consistent Moisture: Keep the soil consistently moist but not overly saturated. Strawberries prefer well-drained soil, so it’s essential to strike a balance.
- Positioning: Place your containers in a location that receives at least 6-8 hours of direct sunlight daily. If possible, position them where they can get morning sunlight, as this helps dry the leaves and reduces the risk of disease.
Step 5: Fertilizing Your Strawberry Plants
- Choose the Right Fertilizer: Select a balanced fertilizer designed for flowering plants. This type will provide the necessary nutrients for healthy growth and fruit production.
- Application: Follow the instructions on the fertilizer package for application rates and frequency. Typically, fertilizing every 4-6 weeks during the growing season is beneficial.
Step 6: Pest and Disease Management
- Monitor for Pests: Keep an eye out for common pests like aphids, spider mites, and slugs. You can manage these pests with insecticidal soap or by introducing beneficial insects like ladybugs.
- Prevent Diseases: Ensure good air circulation around the plants to minimize the risk of fungal diseases. Avoid overhead watering, as wet foliage can encourage disease.
Step 7: Harvesting Strawberries
- Timing: Strawberries are typically ready for harvest 4-6 weeks after blooming. You’ll know they are ripe when they turn a bright red color and are plump.
- Harvesting Technique: Gently twist or cut the stem above the berry to avoid damaging the plant. It’s best to harvest in the morning when temperatures are cooler, as this helps maintain the berries’ freshness.
Step 8: Post-Harvest Care
- Replenish Nutrients: After harvesting, continue to care for your plants by adding a light layer of compost or organic fertilizer to the soil.
- Pruning: If you’re growing everbearing varieties, prune the plants lightly to encourage new growth and fruit production.
Tips for Successful Strawberry Cultivation
- Choose the Right Varieties: Look for strawberry varieties that thrive in your climate and are suitable for container gardening, such as ‘Alba’, ‘Seascape’, or ‘Honeoye’.
- Use Quality Soil: Always choose a high-quality potting mix to ensure your plants receive the nutrients they need.
- Consider Companion Planting: Strawberries grow well alongside plants like basil and lettuce, which can help deter pests and enhance growth.
- Rotate Containers: If possible, rotate the position of your containers to ensure all sides receive equal sunlight exposure.
Conclusion
Growing strawberries in 5-liter plastic bottle containers is a sustainable and rewarding gardening method that anyone can try at home. By following these simple steps, you can cultivate your very own juicy strawberries, even in limited spaces. Not only does this method reduce plastic waste, but it also provides an excellent opportunity to enjoy fresh fruit straight from your garden. So, roll up your sleeves and get started on your berry-growing adventure!
Get Started Today!
With this guide, you’re well-equipped to embark on your journey to growing delicious strawberries at home. Share your progress with friends and family, and inspire them to join in on the fun of container gardening!
#StrawberryGardening #ContainerGardening #UrbanFarming #EcoFriendly #GrowYourOwn #HomeGarden #GardeningTips #SustainableLiving