
In today’s fast-paced world, maintaining a garden can often feel overwhelming. Between work, family commitments, and social activities, it’s easy for our plants to suffer from neglect. However, there’s a simple and sustainable solution to ensure your plants receive the hydration they need: an auto-watering system made from waste plastic bottles. Not only does this DIY project conserve water, but it also helps reduce plastic waste while providing your plants with a consistent water supply. In this article, we will explore the benefits of auto-watering systems, the materials needed, and a detailed step-by-step guide on how to create one using plastic bottles.
Why Use an Auto-Watering System?
Auto-watering systems are designed to provide a slow and steady supply of moisture to plants, mimicking natural rainfall. Here are some reasons why you should consider setting up an auto-watering system in your garden or for your houseplants:
- Consistency in Watering: Plants thrive on regular moisture. An auto-watering system ensures that they receive a consistent amount of water, reducing the risk of overwatering or underwatering.
- Time-Saving: If you have a busy schedule or travel often, an auto-watering system can alleviate the stress of worrying about your plants. With this setup, you can enjoy a more carefree gardening experience.
- Water Conservation: Using a plastic bottle for your watering system is an eco-friendly way to conserve water. Instead of using a hose or watering can, which may lead to water runoff and wastage, this system delivers water directly to the plant’s roots.
- Cost-Effective: Creating an auto-watering system with plastic bottles is inexpensive and sustainable. By repurposing items you already have at home, you can save money while being environmentally friendly.
- Easy to Set Up: This project is suitable for gardeners of all skill levels. You don’t need advanced tools or knowledge to create an effective watering system.
Materials Needed
Before we dive into the step-by-step process of making your auto-watering system, let’s gather the necessary materials:
- Plastic Bottles: The size of the bottle will depend on the size of your plants. Two-liter soda bottles work well for larger plants, while smaller bottles are suitable for herbs or small houseplants.
- Scissors: To cut the bottles.
- Drill or Nail: To create holes in the bottle cap.
- Water: For filling the bottles.
- Cloth or Sponge (optional): To help regulate the flow of water, particularly for smaller plants.
Step-by-Step Guide
Now that you have your materials ready, follow these steps to create your auto-watering system:
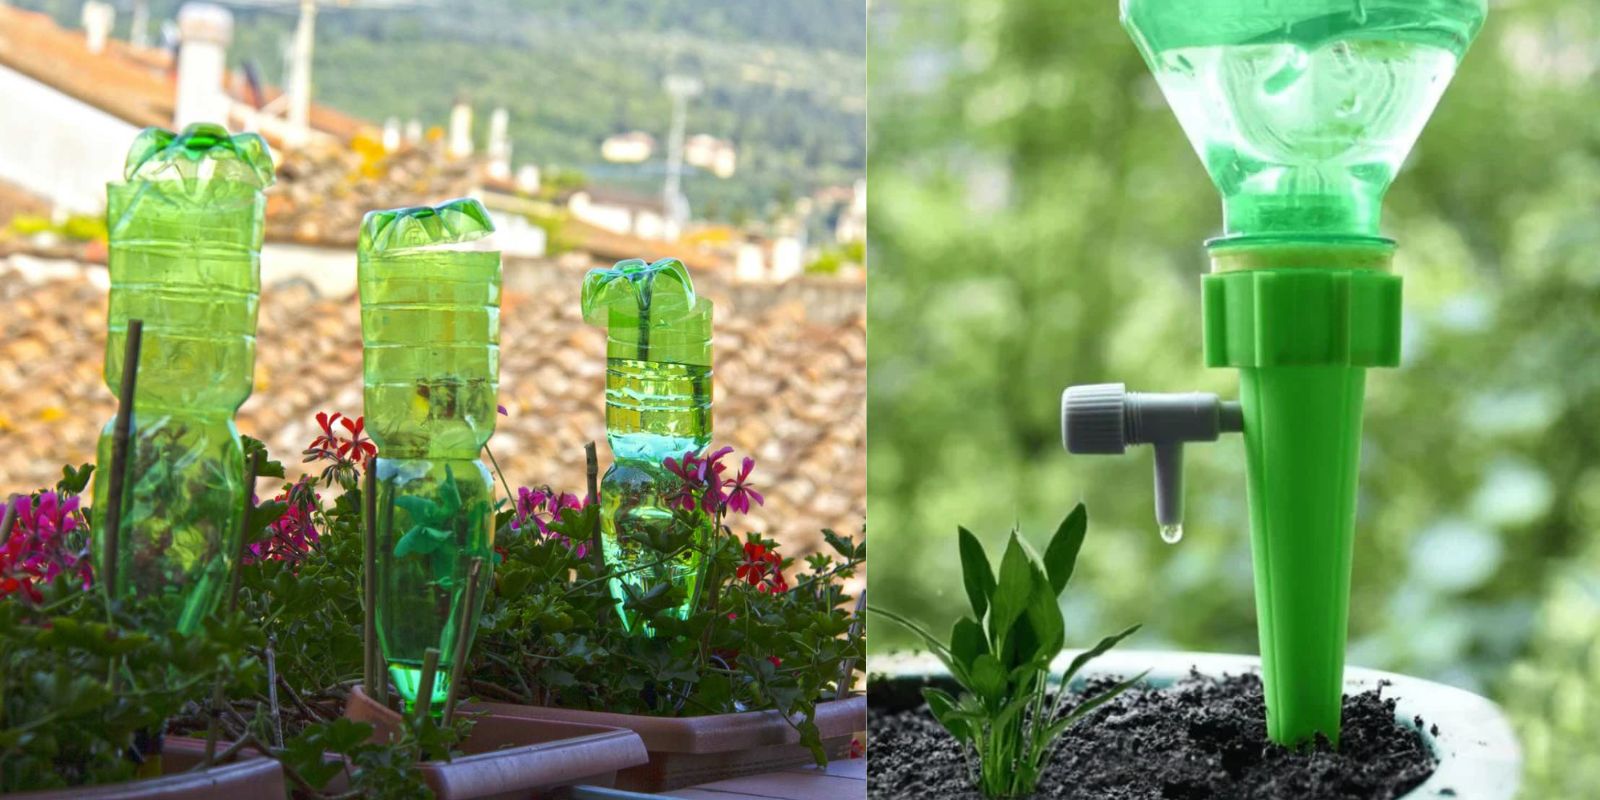
Step 1: Prepare the Bottles
- Clean the Bottles: Start by removing the labels from the plastic bottles. Rinse them out thoroughly to ensure they are free from any residue that might harm your plants.
- Cut the Bottle: Using scissors, cut the bottom of the plastic bottle off. This will create a funnel shape that will allow water to flow out more easily.
Step 2: Make Holes in the Cap
- Create Watering Holes: Take the cap of the bottle and use a drill or a heated nail to make several small holes in it. The number and size of the holes will determine how quickly water will be dispensed. For slower release, make fewer and smaller holes.
Step 3: Fill the Bottle with Water
- Fill with Water: After making the holes, fill the bottle with water. You can also add a bit of fertilizer to the water to provide nutrients to your plants. Make sure to replace the cap tightly to avoid spills.
Step 4: Insert the Bottle into the Soil
- Choose the Right Spot: Decide where you want to place the auto-watering system in relation to your plants. It’s best to place it close to the root zone.
- Dig a Hole: Use a small garden trowel to dig a hole in the soil of your potted plant. The hole should be deep enough to accommodate the bottle while leaving the neck of the bottle exposed.
- Bury the Bottle: Turn the bottle upside down and place it into the hole so that the cap side is facing downwards. Ensure that the holes you made in the cap are buried in the soil to allow water to seep out gradually.
Step 5: Monitor and Adjust
- Check the Soil Moisture: After setting up the system, check the moisture level of the soil. It’s important to monitor how quickly the water is dispensed. If the soil remains too dry, consider increasing the number or size of the holes in the cap. Conversely, if the soil is too soggy, reduce the number of holes.
- Refill as Needed: Depending on the size of your plant and the weather conditions, you may need to refill the bottles every few days or weeks. Check regularly to ensure your plants are receiving adequate moisture.
Step 6: Experiment with Different Setups
- Try Different Bottle Sizes: For different plants, you might want to experiment with varying bottle sizes. Larger plants might benefit from a two-liter bottle, while smaller pots may only need a smaller bottle.
- Use Multiple Bottles: If you have a larger garden or multiple pots, you can set up several auto-watering systems to accommodate all your plants. Just ensure they are spaced out evenly and filled as needed.
Tips for Success
- Choose the Right Location: Make sure your plants receive adequate sunlight, but also consider their need for consistent moisture. Avoid placing the bottles directly in full sun, as this may cause the water to evaporate quickly.
- Combine with Mulching: To further retain moisture in the soil, consider adding a layer of mulch on top of the soil. This helps prevent evaporation and keeps the roots cooler during hot weather.
- Keep an Eye on Your Plants: Regularly check on your plants to ensure they’re thriving. While the auto-watering system is a great tool, each plant’s needs may vary, so observe their growth and make adjustments as necessary.
Conclusion
Creating an auto-watering system for your plants using waste plastic bottles is a rewarding and eco-friendly project that benefits both you and your plants. By repurposing plastic waste, you can conserve water, save time, and ensure that your plants thrive, even when life gets busy. This simple DIY solution is an excellent way to incorporate sustainability into your gardening routine while enjoying the fruits of your labor.
So, why not get started on your auto-watering system today? Not only will your plants thank you, but you’ll also be contributing to a healthier planet by reducing plastic waste. Happy gardening!
#GardeningHacks #SustainableLiving #EcoFriendly #DIYWateringSystem #PlantCare #GreenThumb #WasteNotWantNot #HomeGardening