
Gardening is an enriching hobby that not only beautifies your surroundings but also offers the satisfaction of growing your own food. One of the most effective ways to maximize your garden’s potential is by incorporating a trellis. A trellis provides structural support for climbing plants, enhances the aesthetic appeal of your garden, and optimizes space, making it a crucial element for both novice and experienced gardeners. In this article, we will guide you through the process of creating a productive and beautiful garden using an easy DIY trellis.
The Benefits of Using a Trellis
Before diving into the construction process, let’s explore the numerous benefits of using a trellis in your garden:
- Maximizes Space: Trellises allow you to grow vertical crops, saving precious ground space. This is particularly beneficial for smaller gardens or urban settings.
- Increases Airflow: By lifting plants off the ground, trellises improve air circulation around the foliage, reducing the risk of fungal diseases.
- Enhances Sun Exposure: Climbing plants can capture more sunlight when trained vertically, leading to better growth and yields.
- Improves Aesthetics: A trellis adds vertical interest to your garden, making it more visually appealing. You can also use decorative trellises as garden art.
- Easier Maintenance: With plants raised off the ground, it becomes easier to monitor their health, water them, and harvest the produce.
Materials Needed
To build your DIY trellis, you will need a few basic materials:
- Wooden Stakes or Bamboo Poles: These will serve as the vertical supports for your trellis.
- Strong Twine or Wire: This will create the horizontal supports and crisscross pattern for climbing plants.
- Hammer or Drill: For securing the stakes into the ground.
- Paint or Stain (optional): For decorative purposes.
- Measuring Tape: To ensure accurate measurements.
- Pruning Shears: For trimming plants as needed.
Choosing the Right Location
Selecting the right location for your trellis is crucial for the success of your climbing plants. Consider the following factors:
- Sunlight: Choose a spot that receives at least 6-8 hours of sunlight per day. Most climbing plants thrive in full sun.
- Accessibility: Ensure the location is easy to access for planting, watering, and harvesting.
- Space: Make sure there is enough room for the plants to grow and spread without crowding other plants.
Designing Your Trellis
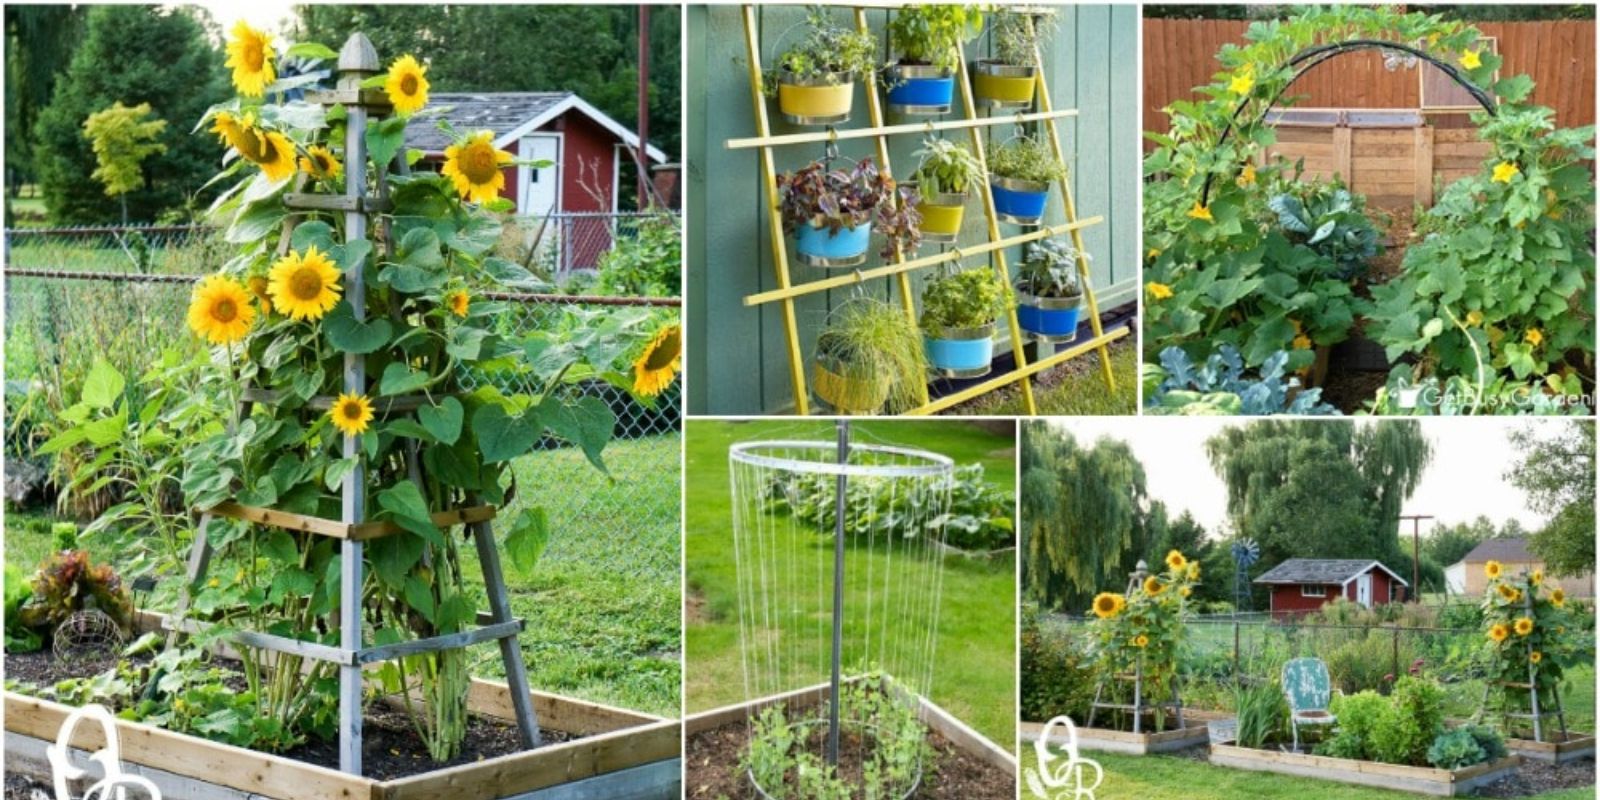
The design of your trellis can vary based on the available space and the plants you intend to grow. Here are a few popular trellis designs:
- A-Frame Trellis: This design is great for beans and peas. It is simple to construct and provides ample support.
- Vertical Panel Trellis: A flat panel trellis can be attached to a fence or wall, ideal for vining plants like cucumbers and tomatoes.
- Arch Trellis: An arched design can create a stunning entryway in your garden while supporting climbing flowers like clematis and morning glories.
- Grid Trellis: This design consists of a series of horizontal and vertical lines, allowing for multiple plants to grow.
Decide on a design that suits your garden style and the types of plants you want to grow.
Step-by-Step Guide to Building Your Trellis
Step 1: Gather Your Materials
Once you’ve selected your design, gather all the necessary materials. For a basic A-frame trellis, you will need:
- 4 wooden stakes (about 6-8 feet tall)
- Twine or wire
- A hammer or drill
- Optional: paint or stain for decoration
Step 2: Measure and Cut the Stakes
Using a measuring tape, determine the height and width of your trellis. Cut the wooden stakes to your desired height if they aren’t already. Ensure that your stakes are sturdy enough to support the weight of the plants as they grow.
Step 3: Prepare the Ground
Choose a suitable spot in your garden and clear any debris. Use a shovel to loosen the soil if necessary. This will make it easier to drive the stakes into the ground.
Step 4: Install the Vertical Stakes
Place two vertical stakes parallel to each other, about 3-4 feet apart, depending on the type of plants you are growing. Drive them into the ground at least 1-2 feet deep for stability. Repeat this process for the other side of the trellis.
Step 5: Create the Cross Support
Using twine or wire, create a crisscross pattern between the vertical stakes. Start by tying one end of the twine to the top of one stake, then diagonally across to the bottom of the opposite stake. Continue this pattern, spacing the lines about 12 inches apart. This provides ample support for climbing plants.
Step 6: Secure the Twine or Wire
Once you’ve completed the crisscross pattern, tie off the twine securely. If using wire, ensure it is taut to prevent sagging. You can add additional horizontal lines at various heights as needed.
Step 7: Plant Your Climbing Plants
At the base of your trellis, plant your chosen climbing plants, such as peas, beans, or cucumbers. Be sure to follow the planting instructions for each type of plant, including spacing and depth.
Step 8: Guide the Plants
As your climbing plants begin to grow, gently guide them toward the trellis. You may need to help them latch onto the twine or wire. This will encourage them to grow upwards and take full advantage of the trellis.
Step 9: Maintain Your Trellis and Plants
Regularly check the stability of your trellis and make adjustments as needed. Keep the plants well-watered and fertilized according to their specific needs. Prune them when necessary to prevent overcrowding and promote healthy growth.
Step 10: Enjoy the Results
As your plants grow, you’ll begin to see the fruits of your labor. Whether it’s a bountiful harvest of beans or an abundance of colorful flowers, the effort you put into creating your trellis will pay off.
Enhancing Your Garden’s Aesthetic
To make your garden even more visually appealing, consider adding decorative touches to your trellis. You can paint or stain the wooden stakes to match your garden theme, or plant colorful flowers at the base. String lights can also be added for a whimsical touch in the evenings.
Conclusion
Building a DIY trellis is a rewarding project that can transform your garden into a productive and beautiful space. With just a few materials and a little creativity, you can create a structure that supports your plants while enhancing your garden’s aesthetics. Whether you’re growing vegetables or flowers, a trellis is a fantastic way to maximize your garden’s potential.
Call to Action
Are you ready to elevate your gardening game with a DIY trellis? Share your experiences, tips, and photos on social media using the hashtags #DIYTrellis, #GardeningTips, and #VerticalGarden. Let’s inspire each other to create stunning and productive gardens!