
Marigolds are one of the most beloved and resilient flowers in gardens around the world. Their bright, cheerful blooms not only add color to your garden but also have many benefits, such as attracting beneficial pollinators and deterring pests. What’s even better is that marigolds are easy to grow from seeds, and with a little effort, you can collect your own seeds, saving money while ensuring a never-ending supply of these vibrant flowers. In this guide, we’ll take you through the simple yet effective process of collecting and growing marigold seeds, helping you build a sustainable, self-sufficient garden.
Why Grow Marigolds?
Before diving into the step-by-step guide, let’s take a moment to appreciate why marigolds are so popular. These hardy flowers are known for their resilience and ability to thrive in a wide range of conditions. They come in various colors, from sunny yellows and oranges to deep reds, and bloom throughout the summer, providing a long-lasting display of color in your garden.
Marigolds also serve as excellent companion plants. They help repel harmful insects like aphids and nematodes, making them an ideal addition to vegetable gardens. Furthermore, marigolds are easy to grow, requiring minimal maintenance and being relatively pest-free themselves, which makes them perfect for beginner gardeners.
Step 1: Collecting Marigold Seeds
The first step in growing marigolds from seed is collecting those seeds in the first place. While it may seem like a simple task, collecting seeds properly is key to ensuring that you have viable seeds for the next planting season.
1.1 Timing the Collection
To collect seeds from your marigolds, wait until the flowers have completely faded and dried on the plant. This typically occurs toward the end of the blooming period, when the flowers are no longer vibrant and the petals have fallen off. The seed heads will appear dry and brown, and it’s important to allow them to fully dry on the plant. If you harvest them too early, the seeds may not be fully mature, and you may not get a good germination rate.
1.2 Harvesting the Seed Heads
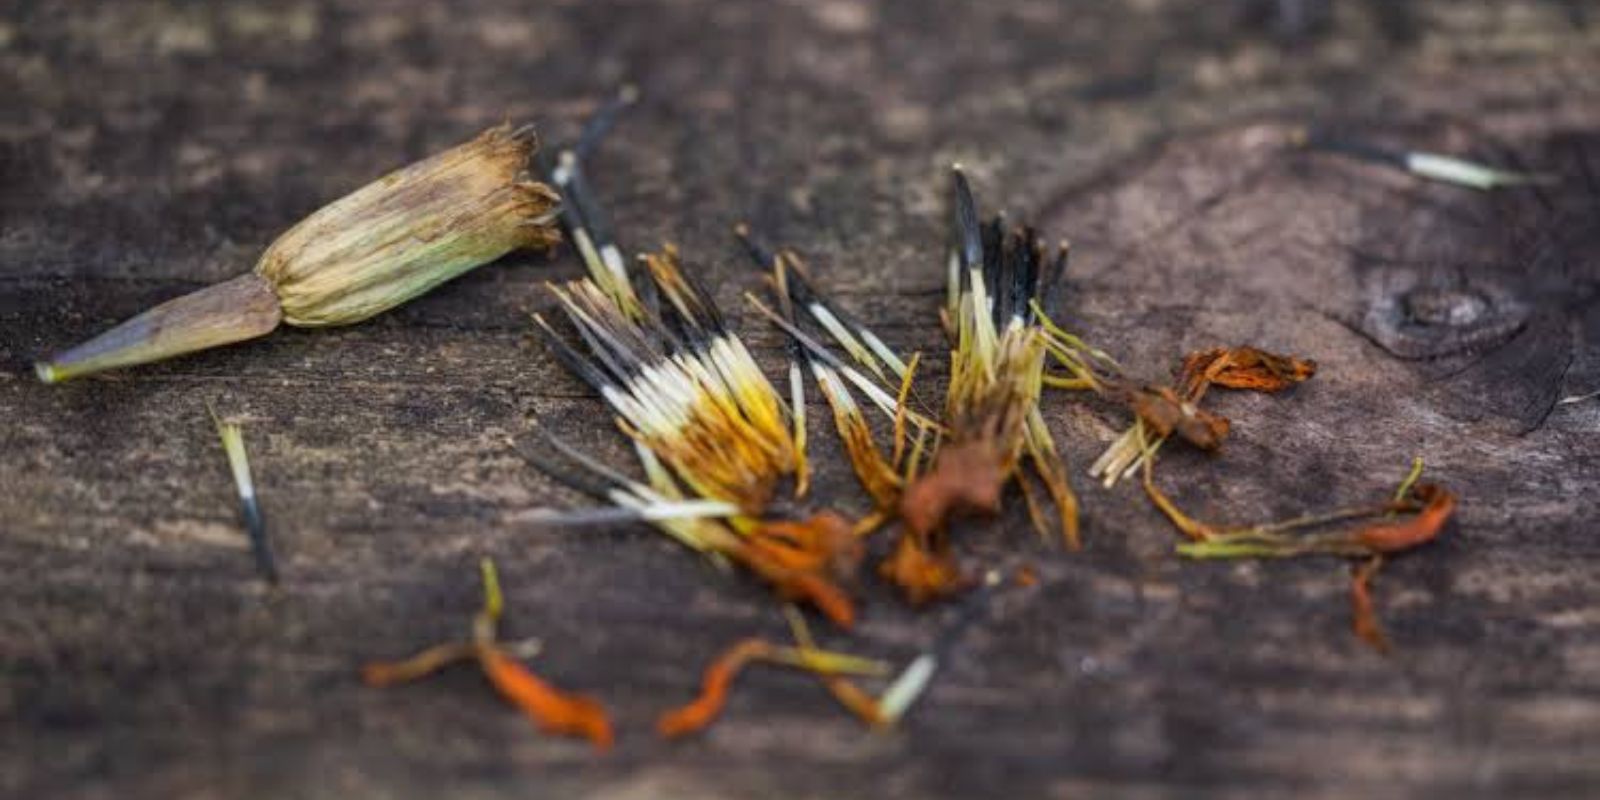
Once the flowers have dried, you can begin harvesting the seeds. Cut the dried flower heads off the stem and place them in a container. Gently squeeze or shake the heads to release the seeds. Marigold seeds are typically small, elongated, and dark in color, and they are attached to the base of the flower head.
It’s a good idea to wear gloves during this process, as some varieties of marigolds have a strong, sometimes irritating sap in their stems and flowers.
1.3 Sorting the Seeds
After harvesting, it’s important to sort out any debris or flower bits from the seeds. You can do this by gently blowing on the collected material or by using a fine mesh sieve to separate the seeds from the flower heads. This ensures that only clean, usable seeds are stored for future planting.
Step 2: Drying Marigold Seeds
Proper drying is crucial to ensure your marigold seeds are ready for storage and successful germination. If the seeds are not fully dried, they may mold or rot during storage, rendering them unusable for the next planting season.
2.1 Preparing the Seeds for Drying
Place the collected seeds on a clean, dry surface such as a tray, a piece of parchment paper, or a shallow dish. Ensure that the seeds are spread out evenly so that air can circulate around them, promoting even drying.
2.2 The Drying Process
Allow the seeds to dry in a well-ventilated area for about 7 to 10 days. A dry, warm space with low humidity is ideal. You can also use a dehydrator if you have one, setting it to the lowest possible temperature to avoid damaging the seeds.
It’s essential to check the seeds regularly to ensure they are drying evenly and are not exposed to any moisture, which could cause them to mold. Once the seeds feel dry and snap easily when bent, they are ready for storage.
2.3 Storing the Seeds
After drying, store the seeds in a cool, dry place until you’re ready to plant them. Use paper envelopes, small glass jars, or seed storage bags to keep the seeds safe. Be sure to label the storage containers with the date of harvest and the type of marigold so you can easily identify them when the next planting season arrives.
Step 3: Preparing for Planting
Now that your marigold seeds are collected, dried, and stored, it’s time to prepare for planting. Whether you choose to plant the seeds in pots indoors or directly in the garden, it’s essential to provide the right environment for germination and growth.
3.1 Choosing the Right Location
Marigolds thrive in full sunlight, so choose a location that receives at least six hours of direct sunlight per day. If you are growing marigolds indoors, place your pots near a south-facing window or use a grow light to ensure they get the light they need.
3.2 Preparing the Soil
Marigolds prefer well-draining soil that is rich in organic matter. If planting directly in the garden, loosen the soil and add compost or other organic material to improve its structure. If planting in containers, use a high-quality potting mix designed for flowers. Ensure that your containers have drainage holes to prevent waterlogging.
3.3 Sowing the Seeds
Plant your marigold seeds in shallow rows or in individual pots. If planting in pots, sow the seeds about 1/4 inch (6 mm) deep. If planting in the garden, scatter the seeds evenly and cover them lightly with soil. Be sure to space the seeds a few inches apart, as marigolds need room to grow.
After planting, water the seeds gently to moisten the soil but avoid overwatering. Keep the soil consistently moist but not soaked, as this can lead to rot.
Step 4: Caring for Your Marigolds
Once your marigold seeds have been planted, it’s time to provide them with the care they need to thrive. Marigolds are relatively low-maintenance plants, but they do require some attention to ensure they grow into strong, healthy flowers.
4.1 Watering
Water your marigolds regularly to keep the soil evenly moist. Marigolds don’t like to dry out completely, so it’s important to keep them hydrated, especially during dry spells. However, avoid overwatering, as this can cause root rot. If growing marigolds in containers, make sure the pots drain well to prevent water from accumulating at the bottom.
4.2 Fertilizing
Marigolds are not heavy feeders, but they will benefit from occasional feeding. Use a balanced, slow-release fertilizer or organic compost to provide the necessary nutrients for healthy growth. Apply the fertilizer once every 4 to 6 weeks during the growing season, following the manufacturer’s instructions.
4.3 Pruning and Deadheading
To encourage continuous blooming, it’s important to deadhead spent flowers regularly. Remove the faded flowers by pinching or cutting them off just above the first set of healthy leaves. This will promote more blooms and help the plant focus its energy on new growth.
Step 5: Enjoying the Marigold Blooms
As your marigolds grow, you’ll be rewarded with beautiful, vibrant flowers. Marigolds typically bloom within 8 to 10 weeks of planting, and they’ll continue to produce flowers throughout the summer and into the fall, depending on the growing conditions.
You can also save seeds from your blooming marigolds to continue the cycle of collecting and planting for years to come. Growing marigolds from your own seeds is a fulfilling experience that connects you with the natural cycles of growth and renewal.
Conclusion: Marigold Seed Collection is a Rewarding Journey
Growing marigolds from seed is not only an affordable way to enjoy these beautiful flowers but also a fun and rewarding gardening project. By collecting, drying, and planting marigold seeds, you can ensure that your garden will continue to flourish with vibrant colors year after year. Whether you’re a seasoned gardener or a beginner, marigolds are an excellent choice for a sustainable and colorful garden. So go ahead, start collecting those seeds, and enjoy the beauty of marigolds for seasons to come!