
Gardening has always been a rewarding hobby, but it can also be challenging. One of the key obstacles many gardeners face is creating the ideal growing environment for their plants. Raised garden beds are a popular solution, offering numerous benefits like improved drainage, better soil structure, and reduced soil compaction. However, the typical wooden or stone-raised beds can be expensive, difficult to build, or may not blend well with the natural environment. For gardeners looking for an affordable, sustainable, and aesthetically pleasing option, the wattle raised garden bed is a perfect solution.
What is a Wattle Raised Garden Bed?
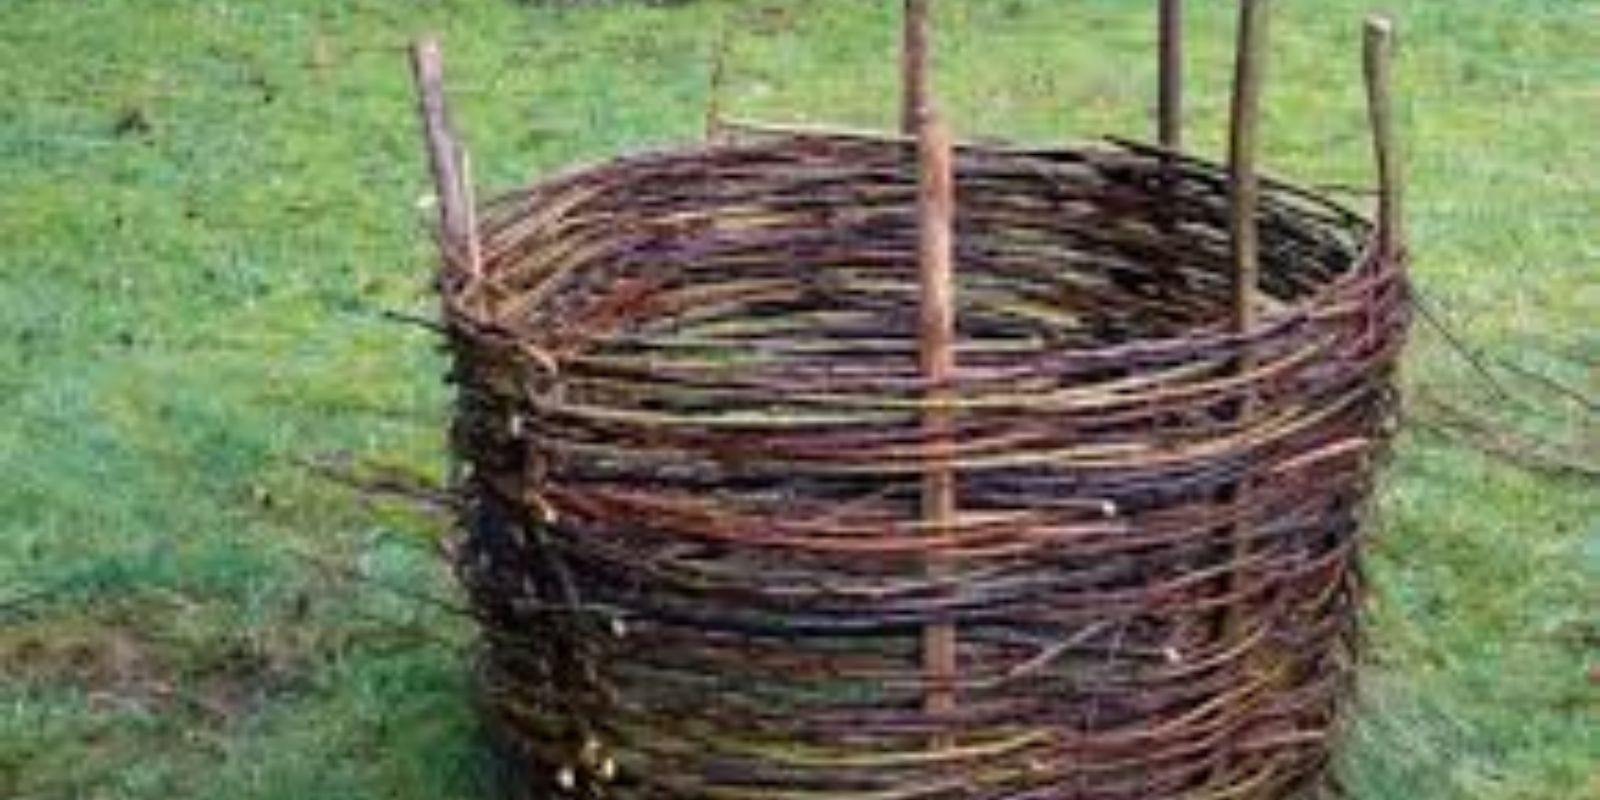
A wattle raised garden bed is a traditional method of creating garden borders by weaving branches, twigs, or flexible wooden stems together. The term “wattle” refers to a weaving technique that has been used for centuries to create fences, walls, and even homes. By applying this technique to garden beds, gardeners can create a rustic, eco-friendly, and practical solution for growing plants.
Wattle garden beds are built using flexible branches (such as willow or hazel), wooden posts to frame the structure, and a weaving method to form the walls of the bed. This type of construction not only looks natural but also allows for excellent drainage and airflow, which can help improve the health of your plants.
Why Choose Wattle Raised Garden Beds?
Before diving into the steps of how to create a wattle raised garden bed, it’s important to understand why this type of bed can be a great choice for your garden. Here are some of the key benefits:
1. Eco-Friendly and Sustainable
Wattle raised garden beds are made from natural, renewable resources. Using flexible branches and twigs reduces the need for processed materials like plastic, metal, or treated lumber, which can have negative environmental impacts. The weaving technique allows you to repurpose fallen branches and twigs from your yard or local woodlands.
2. Cost-Effective
If you already have access to branches and trees around your property, the only expenses you’ll incur are for a few simple tools, such as posts and nails. For gardeners on a budget, a wattle bed is one of the most affordable raised bed options available.
3. Aesthetic Appeal
Wattle garden beds blend beautifully into natural or rustic garden settings. They can be used to create charming focal points in the garden or serve as elegant borders for vegetable, flower, or herb gardens. The organic look of woven branches gives a more earthy and cottage-like aesthetic compared to traditional concrete or metal beds.
4. Durability and Longevity
When constructed correctly, wattle raised garden beds can last for several years. The weaving technique ensures that the structure remains stable, and the natural materials can withstand the elements. Over time, the wood will develop a weathered, natural look that adds character to the garden.
5. Improved Soil Health
The gaps between the woven branches provide excellent airflow and drainage, preventing waterlogging and ensuring that plant roots don’t become too compacted. This is especially beneficial for plants that prefer well-drained soil. The natural material also gradually breaks down and adds organic matter to the soil over time, enriching the growing medium for your plants.
Step-by-Step Guide: How to Build a Wattle Raised Garden Bed
Now that you understand the benefits, let’s dive into how you can build your own wattle raised garden bed.
Materials Needed:
- Flexible branches such as willow, hazel, or dogwood (or any other pliable tree or shrub branches)
- Wooden posts (these will form the corners and structure of your garden bed)
- A hammer or mallet
- Nails or screws
- A saw (if needed, to cut posts to the desired height)
- Pruning shears (for cutting branches to size)
- Compost and soil (for filling the bed)
- A measuring tape (to determine the bed’s dimensions)
Step 1: Plan Your Garden Bed’s Location and Size
Before you begin building, choose the ideal location for your garden bed. Raised garden beds should be placed in an area that receives plenty of sunlight throughout the day (at least 6 hours for most plants). Make sure the soil is well-draining, and check the area for any underground roots or obstacles.
Decide on the size of your bed based on the space available in your garden. Wattle beds can be as small as a few feet wide or as large as you like. A good size to start with is about 4 feet wide, as this allows easy access to all areas of the bed without having to step on the soil.
Step 2: Prepare the Ground
Clear the area of any weeds, grass, or debris. If you have lawn or grass where the bed will sit, you can either dig it up or place a layer of cardboard or landscape fabric to suppress the growth of weeds.
You might also want to loosen the soil beneath the bed to promote healthy root growth. You can do this by using a garden fork or shovel to break up any compacted soil.
Step 3: Install the Corner Posts
Using your wooden posts, mark out the corners of your bed. The posts should be placed about 1 to 2 feet into the ground to ensure stability. You can either use a hammer to drive the posts into the ground or use a post hole digger to create holes for them.
The posts should stick up above the ground to the desired height of the bed—usually between 12 and 18 inches, though you can adjust this depending on the needs of your plants and aesthetic preference.
Step 4: Weave the Branches
Now the fun part begins: weaving the branches! Start by selecting the longest and straightest branches to weave between the corner posts. Insert one end of a branch into the ground at one post and weave the other end into the adjacent post, crossing the branches in and out as you go.
Work your way around the frame, adding branches until you’ve completed the first row of weaving. Continue this process, layering the branches to create a tightly woven wall around the garden bed. You may need to trim the branches to fit the height of the posts.
Step 5: Secure the Structure
Once the weaving is complete, you’ll want to secure the branches to the posts to prevent them from moving over time. You can do this by tying the branches to the posts with garden twine or using nails or screws.
If necessary, reinforce the structure with additional horizontal or diagonal crosspieces to provide more stability and support, especially for taller beds.
Step 6: Fill the Bed with Soil
Now that your wattle raised garden bed is complete, it’s time to fill it with soil. Begin by placing a layer of compost or organic matter at the bottom of the bed. This will improve the soil’s fertility and help with drainage.
Next, add a layer of rich garden soil. You can buy a mix designed specifically for raised beds or create your own mix of garden soil, compost, and other organic material. Be sure to level the soil so that it’s even across the entire bed.
Step 7: Plant Your Garden
With your wattle raised bed in place, it’s time to plant your vegetables, flowers, or herbs. Make sure to choose plants that are well-suited to your climate and sunlight conditions. Arrange your plants in rows or clusters, and water them well.
Maintenance Tips for Your Wattle Raised Garden Bed
- Prune the Weaving: As the seasons change, the branches may start to bend or break. You may need to trim and replace broken branches to keep the wattle structure strong and secure.
- Replenish the Soil: Over time, the soil in your raised bed may settle or deplete of nutrients. Regularly add compost, organic matter, and fresh soil to maintain the bed’s health and fertility.
- Mulch the Bed: Adding a layer of mulch on top of the soil will help retain moisture, suppress weeds, and regulate temperature fluctuations.
- Watering: Wattle beds offer excellent drainage, but they can also dry out quickly in hot weather. Be sure to water your plants regularly to keep them hydrated.
Conclusion
A wattle raised garden bed is a sustainable, affordable, and aesthetically pleasing way to grow plants while reducing your environmental impact. Not only does it provide a natural and rustic touch to your garden, but it also offers practical benefits such as improved drainage, better soil health, and better root systems for your plants. By following the simple steps outlined above, you can create your own wattle garden bed and begin growing your favorite flowers, vegetables, or herbs in an eco-friendly way. Happy gardening!