
Gardening is a wonderful hobby that brings joy and healthy produce, but for many, the physical strain it can cause—especially to the back—can be a major deterrent. Bending, kneeling, and reaching for long periods can lead to discomfort or injury. This is where a tiered garden bed comes to the rescue! It not only saves your back but also maximizes space in your garden. Whether you have a small yard or are working with sloped terrain, building a tiered garden bed can transform the way you garden, offering both convenience and beauty.
Why Choose a Tiered Garden Bed?
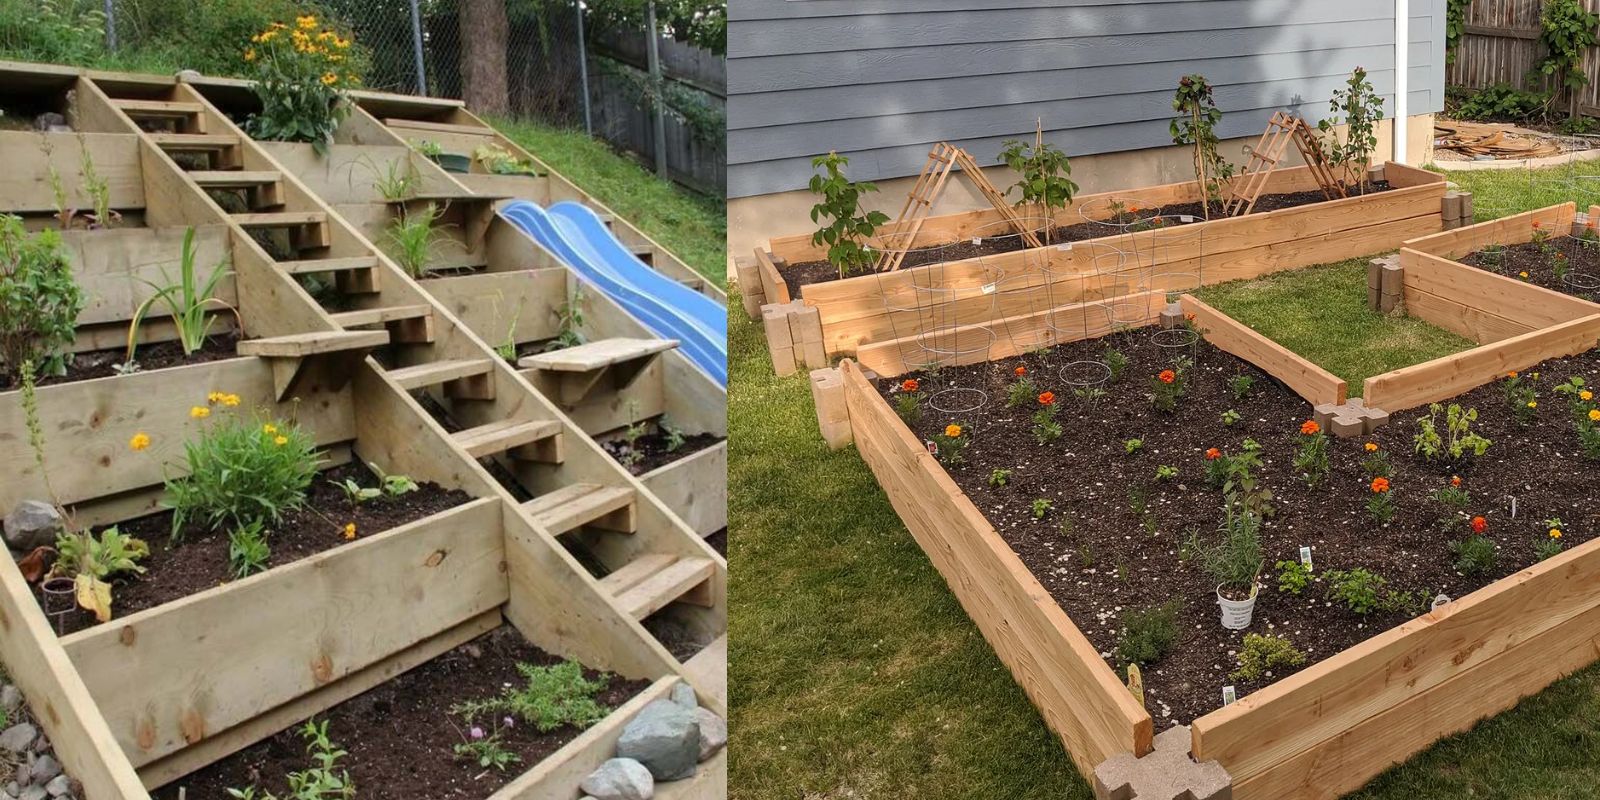
A tiered garden bed is designed with multiple layers, usually on a slope or in elevated levels, allowing for different plantings on each tier. This method makes gardening accessible and allows you to grow more plants in a smaller space, making it perfect for urban settings, slopes, and areas with limited yard space. The benefits include:
- Reduced back strain: By elevating the planting area, you can work without constant bending.
- Improved drainage: Tiered beds provide better water flow, preventing root rot and waterlogging.
- Aesthetic appeal: A tiered garden adds dimension and structure to your outdoor space.
- Optimal sunlight exposure: Different tiers allow you to place sun-loving plants higher up and shade-tolerant plants below.
In this guide, we’ll walk you through the step-by-step process of building a tiered garden bed that will not only make gardening easier but also enhance your yard’s visual appeal.
Materials You’ll Need:
Before getting started, gather the following materials:
- Wood: Use untreated wood such as cedar, redwood, or pine. These are durable and resist rot naturally.
- Screws: For securing the frame.
- Shovel: For leveling the ground and digging.
- Soil and compost: To fill the beds.
- Measuring tape and pencil: To ensure accuracy in size.
- Drill and saw: For cutting and assembling the wood.
Step 1: Choose and Prepare the Location
The first thing you’ll need to do is choose the best location for your tiered garden bed. Ideally, pick a spot that gets plenty of sunlight for most of the day. If you’re building on a slope, the natural incline will work in your favor, but if your yard is flat, you’ll need to manually create the different levels.
Once you’ve chosen the spot, clear the area of any weeds, rocks, or debris. It’s also a good idea to level out the base area where the lowest tier will sit. Use your shovel to dig and smooth the ground, ensuring the soil is stable for your structure.
Step 2: Plan and Design Your Garden Bed
Next, decide how many tiers you want in your garden bed. Three tiers are a common choice, as they provide enough space for diverse plantings without becoming too tall. Consider the types of plants you want to grow—root vegetables like carrots and beets will need deeper soil in the bottom tier, while herbs and leafy greens will thrive in the shallower top tier.
Sketch out your design on paper, keeping in mind the dimensions of each tier. A general rule of thumb is that each successive tier should be about 6 to 8 inches higher than the one below it. This ensures easy access to all levels while maximizing planting space.
Step 3: Build the Frames for the Tiers
Now that your design is ready, it’s time to build the frames. Measure and cut your wood to the appropriate lengths for each tier. For example, if your bottom tier is 4 feet by 4 feet, your middle tier could be 3 feet by 3 feet, and your top tier 2 feet by 2 feet.
- Assemble the bottom tier: Lay the wood pieces on the ground in a square or rectangular shape, then screw them together at the corners using your drill. This will serve as the foundation for the entire structure.
- Assemble the middle and top tiers: Follow the same process for the smaller, upper tiers.
Once your frames are complete, you should have three individual rectangular or square boxes.
Step 4: Stack and Secure the Tiers
Once you’ve built the frames, it’s time to stack them in place. Begin with the largest (bottom) tier and work your way up, placing the middle and top tiers on top of the base. Be sure to center each smaller tier on top of the one below it, creating a pyramid-like effect.
Secure the tiers to each other with screws at the corners. If you’re building on a slope, you may need to dig the bottom tier slightly into the ground to ensure stability.
Step 5: Fill the Tiers with Soil and Compost
Now that your tiered structure is assembled, it’s time to fill it with soil. Start by laying down a layer of organic compost to enrich the soil with nutrients. Then, add high-quality garden soil on top, mixing the two together as you fill each tier.
The bottom tier should have the most soil depth to accommodate deeper-rooted plants, while the upper tiers can be filled with slightly less soil for shallower-rooted herbs, flowers, or vegetables.
Step 6: Plant Your Garden
With the soil in place, it’s time for the fun part—planting your garden! Here are a few planting ideas for each tier:
- Top tier: Ideal for herbs like basil, thyme, or cilantro, and shallow-rooted plants like lettuce or spinach.
- Middle tier: Great for smaller vegetables like peppers, strawberries, or flowers that need moderate root depth.
- Bottom tier: Use this tier for root vegetables such as carrots, beets, or radishes, as well as larger plants like tomatoes or zucchini.
As you plant, be mindful of the sunlight and water needs of each type of plant. The top tier will generally receive more direct sunlight, while the bottom tier may have more shade.
Step 7: Water and Maintain Your Garden
Once your plants are in the ground, give your new garden a good watering. Since tiered beds have excellent drainage, you’ll want to ensure the soil stays moist but not waterlogged. As the season progresses, regularly check the moisture levels in each tier and adjust your watering schedule accordingly.
Tiered garden beds also benefit from regular mulching, which helps retain moisture, suppress weeds, and maintain soil temperature. Add a layer of organic mulch, such as straw or wood chips, around your plants to keep your garden looking healthy and well-maintained.
Conclusion
Building a tiered garden bed is a practical and visually appealing way to garden, especially if you’re dealing with space constraints or want to reduce the physical strain of traditional gardening. By following these simple steps, you can create a beautiful, productive garden that maximizes space, improves drainage, and saves your back from unnecessary strain.
With proper care, your tiered garden bed will not only help you grow a diverse range of plants but also provide a sustainable gardening solution that looks stunning in any yard. So why wait? Start building your own tiered garden bed today and take your gardening to the next level!
Engage with Us!
What will you plant in your tiered garden bed? Share your ideas and photos below! 🌱👇 #TieredGarden #BackFriendlyGardening #RaisedBeds #GardenInspiration #GardeningMadeEasy #GardeningTips #SaveYourBack #SustainableGardening #DIY