
Introduction
If you’re looking to bring the outdoors inside and add a bit of greenery to your home, there’s no better way than with a Mason jar herb garden. Not only is it a fun and easy DIY project, but it also offers a practical solution for having fresh herbs right at your fingertips, even in small spaces. Whether you live in an apartment with limited outdoor space or just want to enjoy the convenience of fresh, homegrown herbs year-round, a Mason jar herb garden is an ideal option.
In this guide, we’ll walk you through the simple process of creating your own Mason jar herb garden, perfect for beginners and seasoned gardeners alike. The best part? You don’t need to be an expert to succeed—just a few basic materials and a little love for your plants will do wonders. So, grab your jars and let’s dive into how to create this charming and useful project!
Benefits of Growing Herbs in Mason Jars
Before we get started on how to make your own Mason jar herb garden, let’s take a moment to consider why this gardening method is so appealing. Here are just a few reasons why it’s an excellent idea:
- Space-Saving
Mason jars are perfect for small spaces, making them ideal for apartment dwellers, small kitchens, or even office desks. You can set up a small herb garden on your windowsill, counter, or even hang them in a decorative display to maximize space. - Fresh, Homegrown Herbs
Having fresh herbs at your fingertips is a game-changer in cooking. Nothing beats the flavor of homegrown basil, parsley, or cilantro, and growing them in Mason jars makes it easy to harvest just what you need, whenever you need it. - Aesthetically Pleasing
Mason jar herb gardens add a rustic charm to any space. The clear glass jars allow you to see the plants grow, which can be a beautiful and relaxing process to watch. Additionally, the jars can be decorated to match your kitchen or decor style, creating a personal and unique touch. - Low Maintenance
Herbs in Mason jars don’t require a lot of attention, making them perfect for beginners or people with busy schedules. As long as you provide them with proper light, water, and the occasional trim, they’ll thrive.
Materials Needed
To create your own Mason jar herb garden, here’s a list of the basic materials you’ll need:
- Mason Jars
Depending on how many herbs you want to grow, pick up a few Mason jars (quart or pint size works best). The jars will serve as both the container and a decorative element in your home. - Small Pebbles or Stones
A layer of pebbles will provide drainage for the herbs. Mason jars do not have drainage holes, so this will prevent the roots from sitting in water and help to keep your herbs healthy. - Potting Soil
Choose a high-quality potting mix that’s well-draining and formulated for indoor plants. You can find potting mixes specifically designed for herbs, which can help ensure the best growth for your plants. - Herb Plants or Seeds
You can either start your herb garden from seed or purchase small plants from your local nursery. Some of the most popular herbs to grow in Mason jars include basil, parsley, cilantro, thyme, mint, and rosemary. - Watering Can or Spray Bottle
To water your plants, you’ll need something that allows you to gently moisten the soil. A small watering can or a spray bottle works best for Mason jar gardens, as they provide controlled water flow. - Optional: Labels or Ribbons
For a decorative touch, consider adding labels to the jars with the name of each herb. You can also tie ribbons or twine around the tops of the jars to give them a personal flair.
Step-by-Step Instructions
Now that you have your materials ready, let’s walk through the steps to create your Mason jar herb garden.
Step 1: Prepare the Jars
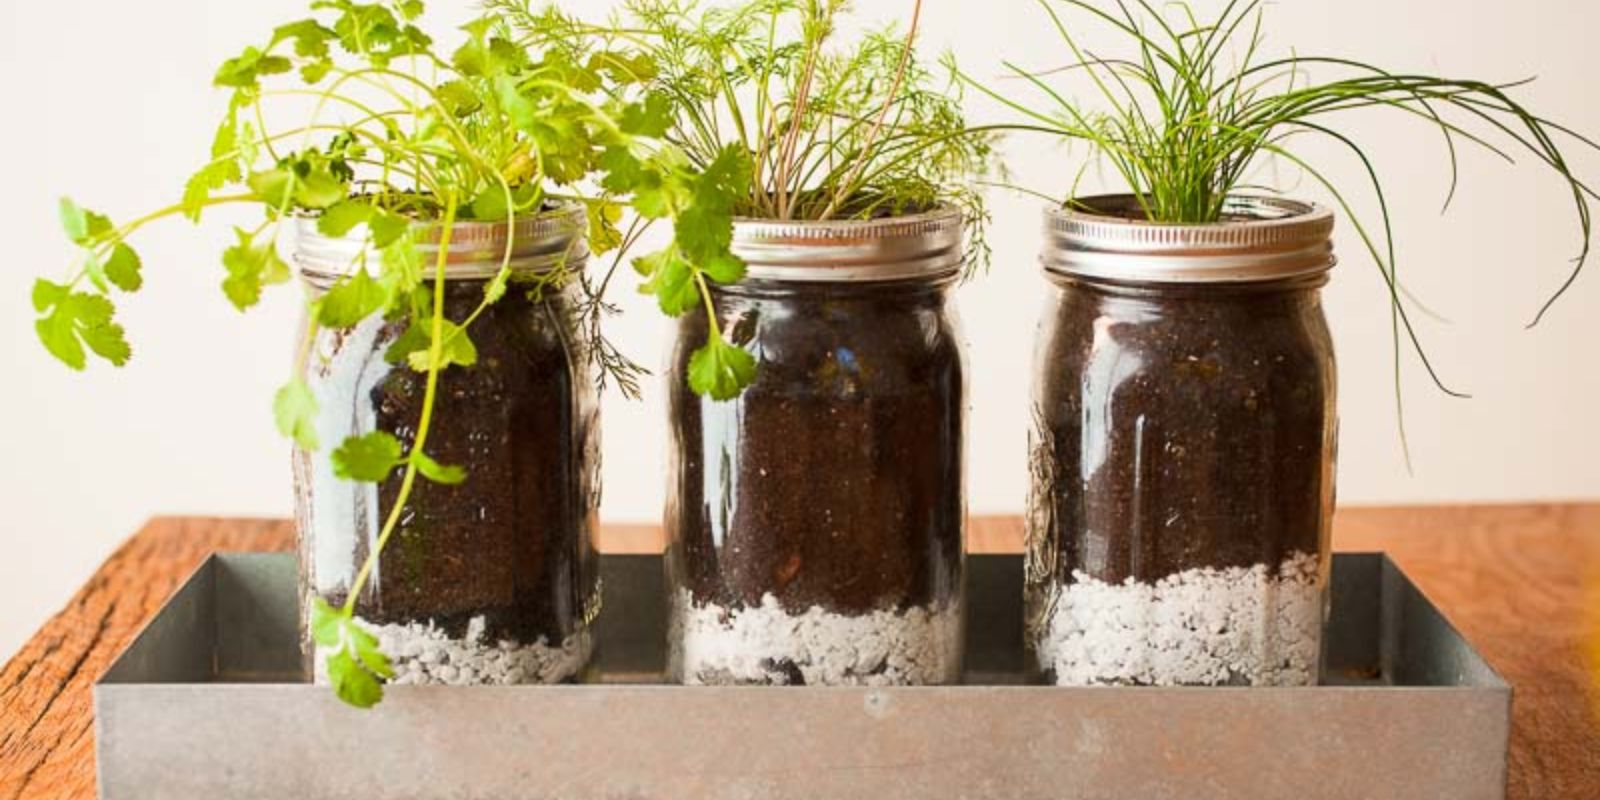
Start by cleaning the Mason jars to ensure they’re free from any dust or residues. Then, add a 1-2 inch layer of small pebbles or stones to the bottom of each jar. This layer will provide drainage and prevent water from accumulating at the bottom, which could lead to root rot. The pebbles also add a bit of texture and aesthetic appeal to your garden.
Step 2: Add the Soil
Next, fill each jar with potting soil, leaving about 1 inch of space at the top. Lightly pack the soil to make sure it’s firm but not compacted. You want to provide your herbs with a stable base to grow, but the soil should still be airy enough to allow the roots to spread and access oxygen.
If you’re using seeds, you can now plant them according to the package instructions. If you’re using small herb plants, gently remove them from their pots and place them into the jars, making sure the roots are well-covered with soil. Gently pack the soil around the base of the plant to secure it in place.
Step 3: Water the Herbs
After planting, water the herbs lightly. The key is to keep the soil moist but not soggy. Overwatering is a common mistake in indoor gardening, so be sure to check the moisture levels of the soil regularly. Use a watering can with a narrow spout or a spray bottle to control the amount of water you add.
Step 4: Place Your Jars in a Sunny Spot
Herbs thrive in sunlight, so place your Mason jar herb garden in a location that receives at least 4-6 hours of direct sunlight per day. A south-facing windowsill is an ideal spot for growing herbs, but any place with bright, indirect light will work as well. If you don’t have a suitable windowsill, you can also use a grow light to supplement natural sunlight.
Be sure to rotate the jars occasionally to ensure the plants grow evenly, and they all receive enough light on all sides.
Step 5: Maintain Your Herb Garden
Your Mason jar herb garden requires minimal maintenance. Here are a few tips to keep your plants healthy and productive:
- Water regularly, but be careful not to overwater. Check the soil moisture with your fingers, and water only when the soil feels dry to the touch.
- Trim the herbs regularly to encourage healthy growth and prevent them from becoming too leggy. Harvest leaves from the top to promote new shoots and ensure your herbs remain bushy.
- Fertilize every 4-6 weeks using a water-soluble fertilizer designed for indoor plants. This will provide your herbs with the nutrients they need to thrive.
- Watch for pests. While Mason jar herb gardens are less likely to attract pests, keep an eye out for aphids or spider mites, and treat them with natural remedies like neem oil if needed.
Tips for Success
- Choose the Right Herbs: Some herbs are better suited to growing in containers than others. Popular choices for Mason jar herb gardens include basil, parsley, cilantro, mint, thyme, and rosemary. Avoid herbs that require a lot of space, like dill or oregano.
- Use Good Soil: High-quality potting soil makes a big difference in the health of your plants. Opt for a well-draining soil mix, and avoid garden soil, which can be too heavy and compact for containers.
- Rotate the Jars: If you’re growing multiple herbs in jars, rotate them every few days to ensure that they all receive equal sunlight and grow evenly.
- Consider Growing from Seeds: Growing your herbs from seeds allows you to start with a clean slate and gives you more control over the growth process. It’s a bit more work, but it’s also a very rewarding experience.
Conclusion
Building a Mason jar herb garden is a fun, simple, and rewarding project that brings fresh herbs into your home, no matter how small your space may be. Whether you’re a beginner gardener or an experienced green thumb, this DIY project will help you enjoy the beauty and flavor of homegrown herbs all year long.
With just a few basic materials, some patience, and a love for plants, you can create your own charming and functional herb garden right in the comfort of your home. Happy gardening!
Share your Mason jar herb garden with us! What herbs are you growing? Tag us in your photos and use the hashtag #MasonJarHerbGarden to inspire others!