
Gardening enthusiasts know that the key to a flourishing garden lies in utilizing effective techniques and tools to enhance plant growth. One such tool that has gained popularity among gardeners is the cold frame. This simple yet innovative structure can extend your gardening season, protect delicate seedlings, and help you grow healthy plants throughout the year. In this article, we’ll explore what cold frames are, their benefits, how to build one, and best practices for using cold frames effectively.
What is a Cold Frame?
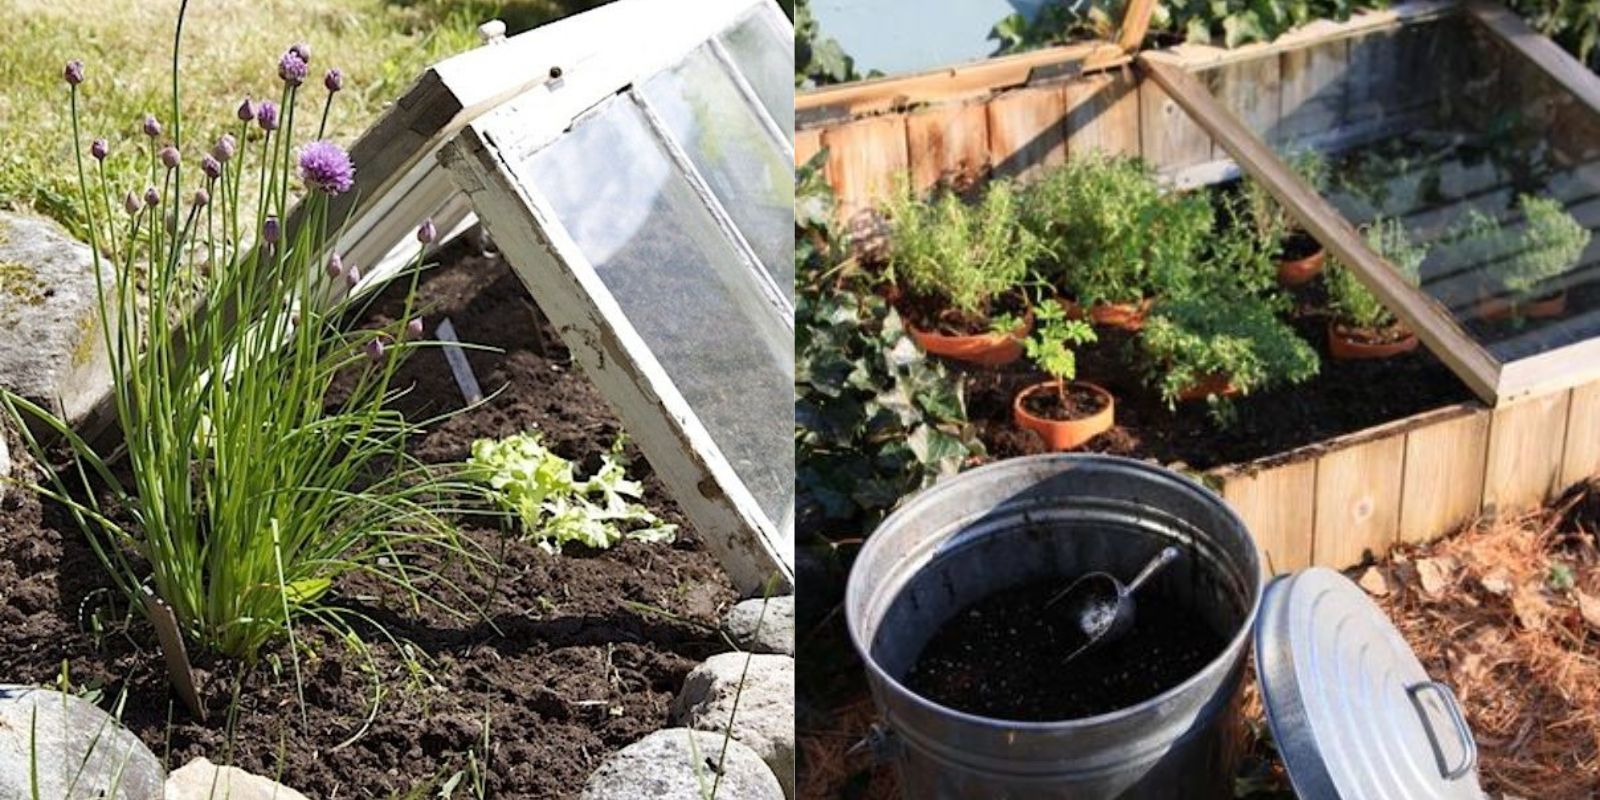
A cold frame is a simple, box-like structure that uses transparent material, such as glass or plastic, to create a greenhouse effect for plants. Cold frames can be constructed with various materials, such as wood, metal, or even recycled items, making them an accessible option for gardeners of all skill levels. They are typically used to protect plants from cold temperatures and harsh weather conditions while allowing sunlight to enter and warm the interior.
Benefits of Using Cold Frames
- Extended Growing Season: Cold frames allow gardeners to start planting earlier in the spring and extend the growing season well into the fall or even winter. This is particularly beneficial for regions with short growing seasons.
- Protection from Frost: Cold frames provide a protective barrier against frost, allowing tender seedlings to thrive. This is especially useful in early spring or late fall when frost can threaten young plants.
- Pest Control: The enclosed environment of a cold frame can help deter pests, providing a safe space for your plants. The transparent cover can also help keep out larger animals, such as rabbits and birds.
- Optimized Growing Conditions: Cold frames can create a microclimate for your plants, helping to regulate temperature and humidity. This controlled environment can lead to healthier plants and higher yields.
- Seed Starting: A cold frame is an ideal space for starting seeds, giving them a head start before they are transplanted into the garden. This can result in stronger, more resilient plants.
Building a Cold Frame: Step-by-Step Guide
Creating your own cold frame is a rewarding project that can be completed in just a few hours. Here’s a step-by-step guide to help you build a cold frame that suits your gardening needs.
Step 1: Choose a Location
Selecting the right location for your cold frame is crucial. Look for a spot in your garden that receives at least 6 hours of sunlight per day. Ideally, the cold frame should face south or southeast to maximize sunlight exposure. Avoid areas that are prone to strong winds, as this can damage your cold frame and the plants inside.
Step 2: Gather Materials
You’ll need the following materials to build your cold frame:
- Wood for the Frame: Choose rot-resistant wood, such as cedar or redwood, for durability.
- Transparent Cover: You can use glass panes, polycarbonate panels, or clear plastic sheeting. Glass provides excellent insulation, while plastic is lightweight and easy to work with.
- Hinges: To attach the lid to the frame for easy access.
- Screws: To secure the frame and hinges.
- Optional: A latch to keep the lid closed during windy conditions.
Step 3: Build the Frame
- Measure and Cut the Wood: Determine the size of your cold frame based on the space you have available and the plants you intend to grow. A common size is 4 feet by 6 feet, but you can adjust it to fit your needs. Cut the wood pieces accordingly.
- Assemble the Frame: Use screws to attach the wood pieces together, forming a rectangular box. Ensure that the back of the frame is taller than the front to allow for proper ventilation and sunlight exposure.
- Reinforce the Corners: To add stability to your cold frame, consider adding corner braces or additional support beams.
Step 4: Create the Lid
- Measure and Cut the Transparent Cover: Cut your transparent material to fit the top of the frame. Leave some overhang on the edges to secure it in place.
- Attach the Hinges: Secure the hinges to the back of the cold frame and attach the lid. Make sure the lid opens easily and can be propped open for ventilation.
- Install a Latch (Optional): If you’re in a windy area, consider adding a latch to keep the lid closed when needed.
Step 5: Position the Cold Frame
Once your cold frame is assembled, carefully position it in your chosen location. Make sure it is level and stable, as an unsteady frame can damage the plants inside.
Step 6: Add Soil and Plant
- Fill with Soil: Add high-quality potting soil or garden soil to the bottom of the cold frame, ensuring it is loose and well-draining.
- Plant Your Seeds or Seedlings: Sow seeds or transplant seedlings into the soil. You can grow a variety of crops, such as lettuce, spinach, herbs, and even tomatoes, depending on the season.
Step 7: Monitor Temperature and Ventilation
- Check Temperature: Regularly monitor the temperature inside your cold frame, especially on sunny days. The temperature can rise quickly, so it’s important to keep an eye on it.
- Ventilation: On warm days, prop the lid open to allow excess heat to escape. This helps prevent overheating and ensures your plants receive fresh air.
Step 8: Enjoy Your Harvest
Once your plants are established, you can look forward to enjoying fresh produce throughout the growing season. Be sure to regularly check on your plants and water them as needed.
Tips for Successful Cold Frame Gardening
- Seasonal Adjustments: As the weather changes, adjust the placement of your cold frame if necessary. In colder months, consider adding insulation materials like straw bales or bubble wrap to enhance warmth.
- Crop Rotation: To maintain soil health, practice crop rotation by changing the types of plants grown in your cold frame each season.
- Companion Planting: Consider planting companion plants that can benefit each other. For example, pairing tomatoes with basil can enhance growth and flavor.
- Keep It Clean: Regularly clean the interior and exterior of your cold frame to prevent pests and diseases from taking hold.
- Use Grow Lights: If you’re starting seeds indoors in a cold frame, consider using grow lights to provide additional light during the shorter days of winter.
Conclusion
Cold frames are a fantastic investment for any gardener looking to extend their growing season and create a more controlled environment for their plants. By following the steps outlined above, you can easily construct your own cold frame and start enjoying the benefits of year-round gardening. Whether you’re starting seeds, protecting tender plants from frost, or growing vegetables through the winter, a cold frame can be an invaluable addition to your gardening toolkit.
So roll up your sleeves and get started on this rewarding gardening project. Happy gardening! 🌱
Engage with Us!
Are you ready to try building your own cold frame? Share your experiences and results with us on social media using the hashtags #ColdFrames #GardeningHacks #YearRoundGardening #SustainableGardening! We can’t wait to see your creations!