
Asparagus is a delicious and nutritious vegetable that’s a favorite in many kitchens. Known for its tender spears and delicate flavor, asparagus is not only a culinary delight but also a long-term investment in your garden. Once established, an asparagus bed can yield a bountiful harvest for up to 20 years, making it a rewarding addition to any garden. However, starting an asparagus bed requires patience, proper planning, and a bit of effort. In this guide, we’ll take you through the steps to successfully establish your own asparagus bed and enjoy years of fresh, homegrown asparagus.
Why Grow Asparagus?
Before diving into the steps, it’s worth understanding why asparagus is a great choice for your garden. Asparagus is a perennial vegetable, meaning it will return year after year with minimal care. Once established, an asparagus bed can produce a reliable crop each spring, providing you with fresh spears that are far superior in flavor to store-bought varieties.
Asparagus is also rich in nutrients, including vitamins A, C, E, and K, as well as folate and fiber. It’s low in calories and packed with antioxidants, making it a healthy addition to your diet. By growing your own asparagus, you can ensure that you’re consuming fresh, chemical-free produce that’s grown sustainably in your own backyard.
Step 1: Choose the Right Location
The first step in establishing an asparagus bed is choosing the right location. Asparagus is a sun-loving plant, so select a spot in your garden that receives full sunlight for at least 6-8 hours a day. A well-drained area is essential, as asparagus does not tolerate waterlogged soil. If your garden has heavy clay soil, consider amending it with organic matter or creating a raised bed to improve drainage.
Asparagus prefers slightly acidic soil with a pH between 6.5 and 7.0. It’s a good idea to test your soil’s pH before planting and make any necessary adjustments using lime or sulfur. Additionally, asparagus is a long-lived plant, so choose a location where it can remain undisturbed for many years. Avoid planting asparagus in areas where other crops that are prone to soil-borne diseases, such as tomatoes or potatoes, have been grown recently.
Step 2: Prepare the Soil
Proper soil preparation is key to a successful asparagus bed. Start by clearing the area of weeds, rocks, and debris. Weeds can compete with young asparagus plants for nutrients and water, so it’s important to create a weed-free environment from the start.
Next, till the soil deeply to a depth of at least 12-18 inches. Asparagus roots grow deep, and well-loosened soil will allow them to establish more easily. Incorporate plenty of organic matter, such as compost or aged manure, into the soil to improve its fertility and structure. This will provide the nutrients asparagus needs to thrive over the long term.
If your soil is particularly heavy or clay-like, consider adding sand or fine gravel to improve drainage. Good drainage is crucial, as asparagus roots can rot in waterlogged soil.
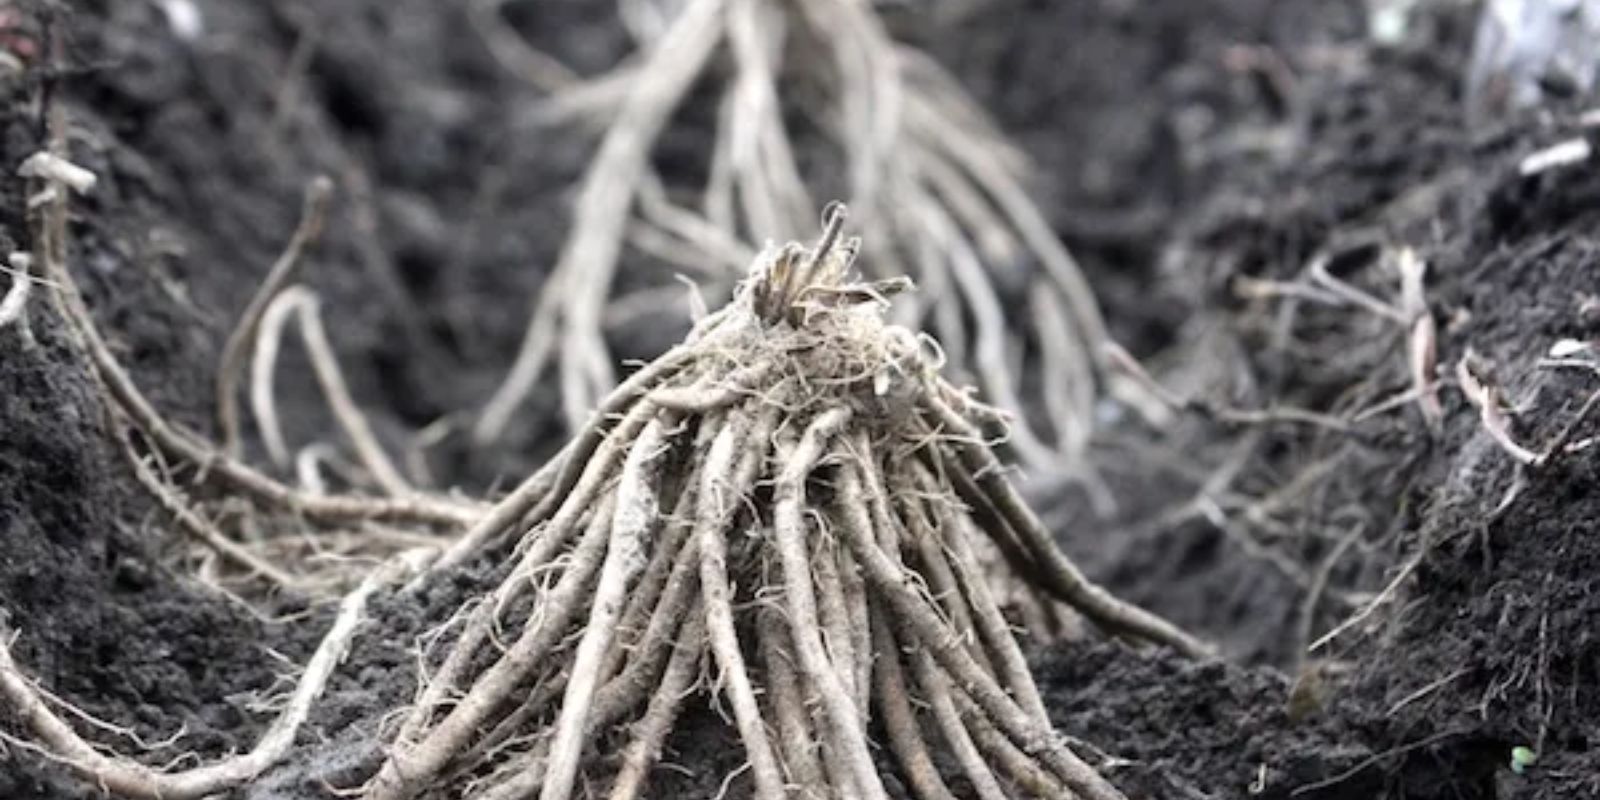
Step 3: Plant the Asparagus Crowns
Asparagus is typically grown from crowns, which are the dormant root systems of one-year-old asparagus plants. Crowns are readily available from garden centers or online suppliers during the spring planting season.
To plant the crowns, dig trenches that are 12-18 inches apart and about 6-8 inches deep. The distance between the trenches allows enough space for the plants to spread out and grow without crowding each other.
Place the asparagus crowns in the trenches, spacing them about 12-18 inches apart. Spread the roots out evenly in the trench, and make sure the crowns (the point where the roots meet the stem) are facing upwards. Cover the crowns with 2-3 inches of soil, leaving the tips of the crowns just below the soil surface.
As the asparagus plants begin to grow, gradually fill in the trench with soil, covering the emerging shoots as they appear. This method, known as “hilling,” helps to protect the young plants and encourages strong root development.
Step 4: Water and Mulch
After planting the asparagus crowns, water the bed thoroughly to help settle the soil around the roots. Consistent moisture is important during the first growing season, so be sure to keep the soil evenly moist but not waterlogged. Asparagus plants have deep roots, so watering deeply and less frequently is more effective than shallow, frequent watering.
Once the bed is watered, apply a layer of mulch to help retain moisture, suppress weeds, and keep the soil temperature stable. Straw, grass clippings, or shredded leaves make excellent mulch for asparagus beds. Be sure to keep the mulch away from the crowns to prevent rot.
Step 5: Care for the Asparagus Bed
The first year of your asparagus bed is all about establishing the plants, so resist the temptation to harvest any spears during this time. Allow the plants to grow freely and develop strong root systems. The fern-like foliage that grows after the spears is important for photosynthesis and helps the plants store energy for the following year’s growth.
Keep the bed weed-free by hand-pulling weeds or carefully hoeing around the plants. Weeds can quickly take over an asparagus bed, so it’s important to stay on top of them, especially during the first few years.
In the fall, after the foliage has turned yellow and died back, cut it down to ground level. This helps to prevent diseases and pests from overwintering in the bed. Add a layer of compost or well-rotted manure over the bed in late fall or early winter to replenish nutrients and prepare the bed for the next growing season.
Step 6: Harvesting Asparagus
Patience is key when growing asparagus. In the second year, you can begin to harvest a few spears, but only for a short period—usually about two weeks. This limited harvest allows the plants to continue building strength for future production.
By the third year, your asparagus bed should be well-established, and you can enjoy a full harvest. The harvest season typically lasts 4-6 weeks, depending on your climate. Cut the spears when they are 6-8 inches tall, just above the soil surface.
After the harvest period ends, allow the remaining spears to grow into ferns, which will again provide energy for the plants. Continue to water, weed, and mulch the bed as needed throughout the growing season.
Motivation: Start Your Asparagus Journey Today
Starting an asparagus bed requires patience and effort, but the rewards are well worth it. With proper care, your asparagus bed will provide you with delicious, homegrown spears year after year, making it a valuable addition to your garden. Whether you’re a seasoned gardener or a beginner, growing asparagus is a satisfying and long-term investment in your garden’s future.
Are you ready to start your own asparagus bed? Follow these steps, and soon you’ll be enjoying the fresh taste of homegrown asparagus straight from your garden. Share your progress and tips with us—we’d love to hear about your gardening journey!