
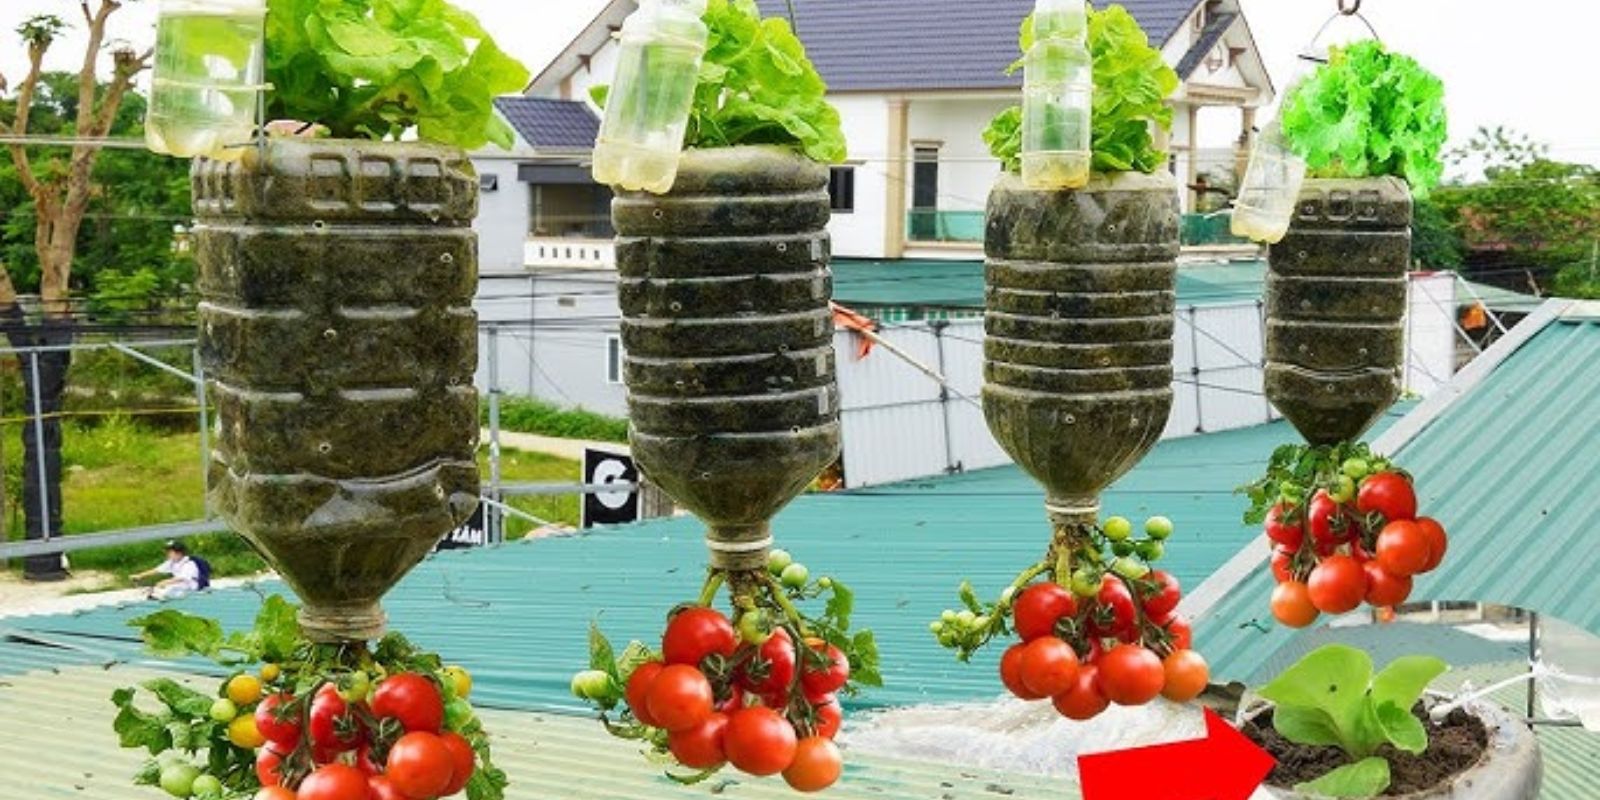
Tomatoes are one of the most popular and rewarding vegetables to grow at home. However, not everyone has access to a sprawling garden or the right conditions for planting them in traditional soil beds. This is where the innovative technique of growing tomatoes upside down in plastic bottles comes into play. This method not only optimizes space but also minimizes pest problems and maximizes sun exposure. In this comprehensive guide, we’ll delve into the why, how, and benefits of growing tomatoes upside down using recycled plastic bottles.
Why Grow Tomatoes Upside Down?
Growing tomatoes upside down offers several advantages:
- Space-Saving: If you have limited gardening space, such as a small balcony or patio, this technique allows you to utilize vertical space efficiently.
- Reduced Pest Issues: By keeping the tomatoes off the ground, you can reduce the risk of pests and soil-borne diseases. Ground-dwelling pests like slugs and snails are less likely to reach your plants.
- Improved Air Circulation: Hanging the plants encourages better airflow, which can help prevent fungal diseases that thrive in humid, stagnant conditions.
- Easier Maintenance: Upside-down gardening can make it easier to prune and harvest your tomatoes without bending over or crouching down.
- Aesthetically Pleasing: Hanging tomatoes can add a unique and attractive element to your gardening decor, creating a conversation piece for visitors.
What You’ll Need
To start growing tomatoes upside down in plastic bottles, you’ll need a few essential materials:
- Plastic Bottles: 2-liter soda bottles or similar-sized containers work best. You can use clear or opaque bottles, but clear ones allow you to monitor the roots’ health.
- Potting Soil: Use a high-quality potting mix that provides adequate drainage and nutrients.
- Tomato Seedlings or Seeds: Choose determinate varieties that are suitable for container growing, such as ‘Tiny Tim’ or ‘Patio Princess.’
- Scissors or a Sharp Knife: To cut the bottles and create drainage holes.
- String or Wire: For hanging the bottles securely.
- Fertilizer: A balanced fertilizer specifically designed for tomatoes to ensure healthy growth.
Step-by-Step Guide to Growing Tomatoes Upside Down
Step 1: Prepare the Plastic Bottles
- Clean the Bottles: Rinse out the plastic bottles thoroughly to remove any residue from previous contents. This helps prevent contamination of your tomato plants.
- Cut a Hole: Using scissors or a sharp knife, cut a hole about 2 inches wide on the side of the bottle, approximately one-third of the way up from the bottom. This hole will be the entry point for your tomato plant.
- Create Drainage: Puncture several small holes in the bottom of the bottle to allow excess water to drain. This is crucial to prevent waterlogging and root rot.
Step 2: Fill the Bottles with Soil
- Add Potting Mix: Fill the bottle with potting soil, leaving about 3 inches of space at the top. Make sure to pack the soil lightly to eliminate air pockets while ensuring it remains loose enough for root growth.
- Water Thoroughly: After filling, water the soil to help it settle and ensure the entire root ball of the plant is moist.
Step 3: Insert the Tomato Seedling
- Prepare the Seedling: If using seedlings, gently remove them from their nursery pots, taking care not to damage the roots. If starting from seeds, you can sprinkle a few seeds into the bottle.
- Insert the Seedling: Carefully push the seedling through the hole you cut in the side of the bottle, allowing the roots to go inside while keeping the leaves outside. If using seeds, cover them lightly with soil.
Step 4: Hang the Bottles
- Choose a Sunny Location: Find a spot that receives at least 6-8 hours of sunlight per day. This could be a balcony, patio, or even a garden trellis.
- Securely Hang the Bottle: Use string or wire to hang the bottle upside down. Ensure it is securely fastened to prevent it from falling.
Step 5: Care for Your Upside-Down Tomatoes
- Watering: Water the plants regularly, allowing the soil to dry out slightly between waterings. Be cautious not to overwater, as this can lead to root rot.
- Fertilizing: Every few weeks, apply a balanced tomato fertilizer to provide the necessary nutrients. Follow the package instructions for the correct dosage.
- Pruning: As the plants grow, prune any suckers (side shoots) to encourage better air circulation and direct energy to fruit production.
Step 6: Harvesting Your Tomatoes
- Watch for Ripeness: Monitor your tomatoes as they grow. When they start to change color, it’s a sign they are ripening.
- Harvesting: Once the tomatoes are fully ripe, gently twist them off the vine or cut them with scissors to avoid damaging the plant.
Common Issues and Solutions
- Yellowing Leaves: This can be a sign of nutrient deficiency or overwatering. Ensure you’re fertilizing appropriately and allowing the soil to dry out between waterings.
- Pest Problems: Keep an eye out for pests like aphids or whiteflies. You can treat these with insecticidal soap or neem oil.
- Slow Growth: If your plants are not growing as expected, check the sunlight exposure. Tomatoes require at least 6-8 hours of direct sunlight daily.
Conclusion
Growing tomatoes upside down in plastic bottles is not only a creative gardening solution but also a sustainable way to utilize recycled materials. This method offers numerous benefits, including space-saving, reduced pest issues, and easier maintenance. With just a few simple steps, you can enjoy a bountiful harvest of fresh, homegrown tomatoes right from your balcony or patio.
Ready to turn your gardening skills upside down? Embrace this fun and innovative method, and watch your tomato plants thrive! 🍅🌱💚
Hashtags: #UpsideDownGardening #TomatoGrowing #SustainableGardening #UrbanGardening #EcoFriendly #GrowYourOwnFood
Feel free to adjust any part of the article to better fit your needs or specific audience!