
Growing sweet potatoes in containers is an excellent gardening venture for those with limited outdoor space or poor soil conditions. Sweet potatoes are not only nutritious but also easy to grow and highly rewarding, especially when you can harvest your own tubers right from your balcony or patio. This article will provide a comprehensive guide on how to successfully grow sweet potatoes in containers, covering everything from selecting the right variety to harvesting and storage.
Why Grow Sweet Potatoes?
Sweet potatoes (Ipomoea batatas) are a fantastic addition to any home garden. They are rich in vitamins, minerals, and antioxidants, making them a healthy choice for meals. Additionally, sweet potatoes are incredibly versatile; they can be baked, mashed, roasted, or made into pies. Growing them in containers allows you to control their environment closely, ensuring optimal growth conditions.
Benefits of Growing Sweet Potatoes in Containers
- Space Efficiency: Container gardening is ideal for urban dwellers or those with limited space. You can grow sweet potatoes on patios, balconies, or even small yards.
- Controlled Environment: Containers allow for better control of soil quality, moisture, and temperature, essential for sweet potato growth.
- Reduced Pest Issues: Growing in containers can help minimize pest problems, as you can move the plants to different locations if needed.
- Extended Growing Season: Containers can be moved indoors or to sheltered areas during adverse weather, allowing for a longer growing season.
Selecting the Right Container
Container Size
Choosing the right container is crucial for the successful growth of sweet potatoes. A container with a capacity of at least 5 gallons is recommended. The more soil space you provide, the larger the sweet potatoes can grow. Here are a few options to consider:
- Plastic Containers: Lightweight and affordable, plastic containers come in various sizes. Make sure to choose those with drainage holes.
- Fabric Pots: These breathable pots encourage healthy root development and are easy to handle.
- Wooden Boxes: If you prefer a more rustic look, wooden boxes can be a beautiful option, provided they are treated to prevent rot.
Drainage
Ensure that your chosen container has adequate drainage holes at the bottom. Proper drainage is crucial to prevent waterlogging, which can lead to root rot.
Selecting the Right Variety of Sweet Potatoes
Popular Varieties
When selecting sweet potatoes, consider the varieties best suited for container gardening:
- Beauregard: Known for its high yields and disease resistance, this variety is popular among home gardeners.
- Japanese Purple: With its vibrant purple skin and white flesh, this variety is not only stunning but also has a sweet flavor.
- Centennial: This variety is known for its adaptability and produces large, sweet tubers.
Obtaining Sweet Potatoes
You can purchase healthy, organic sweet potatoes from garden centers, farmer’s markets, or grocery stores. Look for firm tubers free of blemishes or soft spots.
Starting the Sweet Potato
Sprouting
To encourage sweet potato slips (the shoots that will grow into new plants), follow these steps:
- Choose a Healthy Sweet Potato: Select a firm, organic sweet potato.
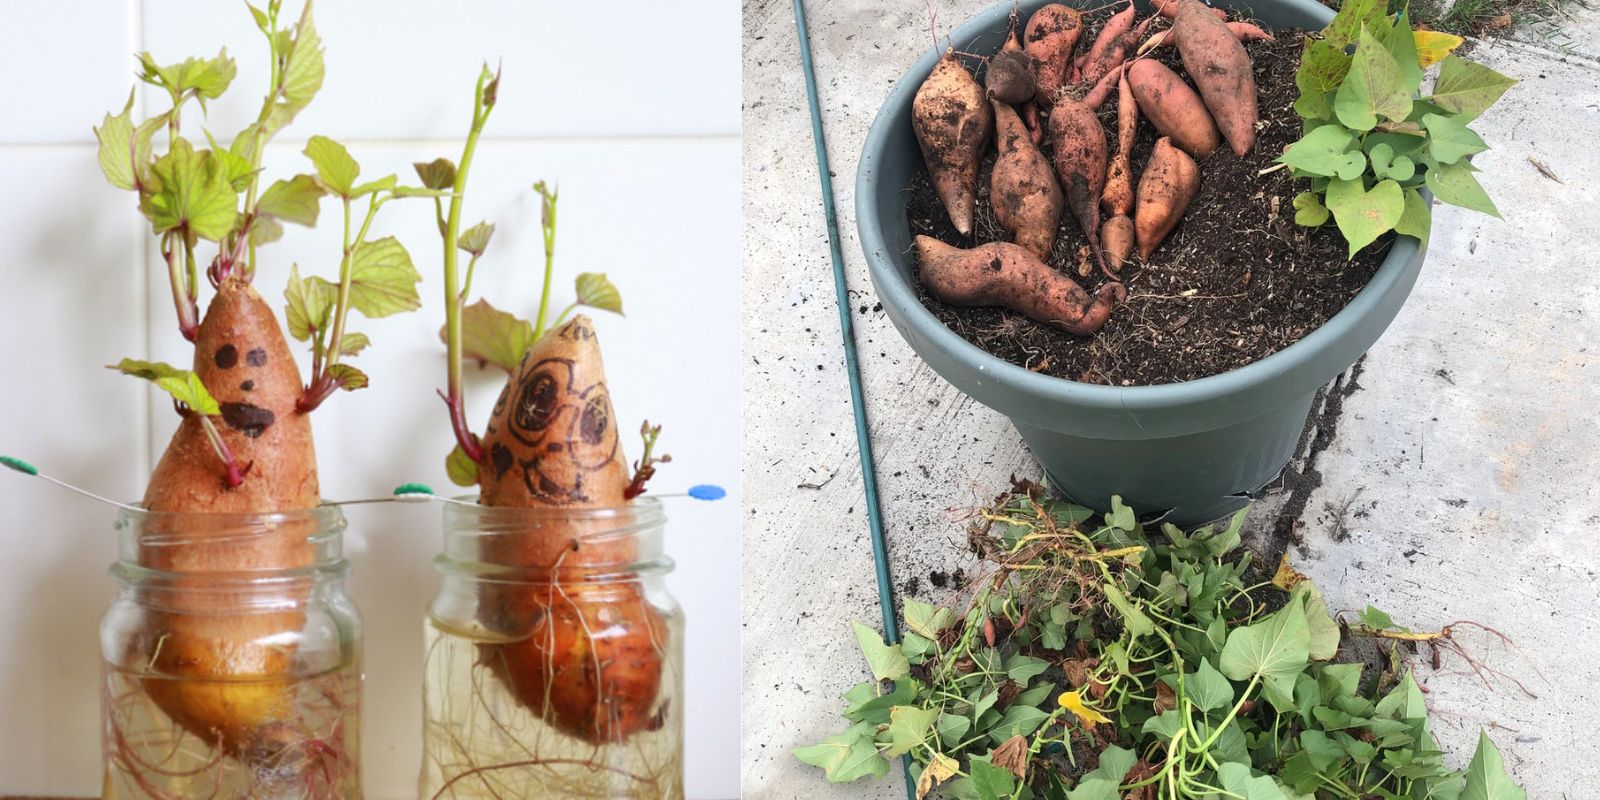
- Prepare for Sprouting: You can sprout sweet potatoes in water or soil. If using water, place the potato in a glass or jar with the top half exposed to air and the bottom half submerged in water. If using soil, bury the potato halfway in moist potting soil in a small container.
- Wait for Slips: After a few weeks, you will notice shoots (slips) forming on the sweet potato. These should be about 4-6 inches long before you remove them.
Removing the Slips
When the slips are ready, gently twist them off the sweet potato, taking care not to damage the main tuber. You can plant multiple slips from one sweet potato.
Preparing the Soil
Choosing the Right Soil Mix
Sweet potatoes thrive in well-draining, loose soil. You can create an ideal potting mix using the following ingredients:
- Potting Soil: Start with a high-quality potting mix as your base.
- Compost: Add compost to provide essential nutrients.
- Sand or Perlite: Mix in sand or perlite to improve drainage and aeration.
Soil pH
Sweet potatoes prefer slightly acidic soil, with a pH between 5.0 and 6.0. You can test your soil’s pH using a soil test kit and amend it if necessary.
Planting the Slips
Planting Process
Once you have prepared the container and soil, it’s time to plant the slips:
- Fill the Container: Fill your container with the prepared potting mix, leaving about 2 inches of space at the top.
- Plant the Slips: Create holes in the soil for each slip, spacing them about 12-18 inches apart. Insert the slips into the holes, burying them up to the first set of leaves.
- Water Thoroughly: After planting, water the soil thoroughly to help settle the slips and eliminate air pockets.
Caring for Your Sweet Potatoes
Watering
Sweet potatoes require consistent moisture, especially during their early growth stages. Water the plants regularly, ensuring the soil stays moist but not waterlogged. As the plants mature, you can reduce watering frequency.
Sunlight Requirements
Sweet potatoes love sunlight and need at least 6 hours of direct sunlight daily. Position your container in a sunny location, such as a south-facing patio or balcony.
Fertilization
To promote healthy growth, fertilize your sweet potatoes every 4-6 weeks. Use a balanced fertilizer or one high in phosphorus to support tuber development.
Weeding and Pest Control
While container gardening helps minimize weed problems, it’s still important to regularly check for unwanted plants and remove them. Keep an eye out for pests such as aphids and sweet potato weevils, and treat any infestations promptly using organic insecticides or neem oil.
Harvesting Sweet Potatoes
When to Harvest
Sweet potatoes are typically ready for harvest between 90 and 120 days after planting, depending on the variety and growing conditions. Look for the following signs to determine if your sweet potatoes are ready:
- Foliage Changes: The leaves may start to yellow and die back.
- Size: You can gently dig around the base of the plant to check the size of the tubers. If they are about the size of your fist, they are likely ready for harvest.
Harvesting Process
To harvest your sweet potatoes, follow these steps:
- Prepare the Area: Clear away any debris from around the container.
- Use a Garden Fork: Carefully insert a garden fork or shovel into the soil around the base of the plant, taking care not to damage the tubers.
- Gently Lift the Plant: Lift the plant from the container, shaking off excess soil.
- Separate the Tubers: Gently remove the sweet potatoes from the roots.
Curing and Storing
After harvesting, cure the sweet potatoes to enhance their flavor and shelf life:
- Curing: Place the harvested sweet potatoes in a warm, dark, and well-ventilated area for 7-10 days to allow them to cure. This process helps convert starches to sugars.
- Storage: After curing, store your sweet potatoes in a cool, dark place with good ventilation. They can last for several months under the right conditions.
Conclusion
Growing sweet potatoes in containers is an easy and rewarding experience that allows you to enjoy fresh, nutritious produce right at home. By following the steps outlined in this article, you can cultivate an abundant harvest and savor the delightful flavors of homegrown sweet potatoes. Whether you are a seasoned gardener or a beginner, growing sweet potatoes is a fun project that will yield delicious results.
Start your sweet potato journey today, and experience the joy of growing your own food!
Happy gardening!
#SweetPotatoes #ContainerGardening #HomeGardening #GrowYourOwnFood #UrbanGardening #GardeningTips #HealthyEating