
Roses are beloved for their timeless beauty and exquisite fragrance, making them a favorite choice for gardeners around the world. While many gardeners are familiar with various propagation methods for roses, growing them from cuttings in plastic bottles is an innovative and practical technique that combines sustainability with effective plant care. This method is not only environmentally friendly but also provides an excellent way to nurture and expand your rose garden using everyday materials. In this article, we’ll guide you through the process of growing roses from cuttings using plastic bottles, offering a step-by-step approach to help you achieve beautiful results.
Introduction
The art of propagating roses has long been a treasured skill among gardeners. From traditional methods like using soil or water to more advanced techniques, the goal remains the same: to create healthy, thriving rose plants. One of the lesser-known yet highly effective methods is using plastic bottles as mini greenhouses. This approach leverages the simplicity and versatility of plastic bottles to provide an ideal environment for rose cuttings to root and grow. By using this method, you can efficiently propagate roses and reduce plastic waste, making it a win-win for both your garden and the environment.
Why Use Plastic Bottles for Rose Cuttings?
**1. *Eco-Friendly:* Repurposing plastic bottles helps reduce waste and promotes recycling, making this method environmentally conscious.
**2. *Cost-Effective:* Plastic bottles are inexpensive and readily available, making them a budget-friendly option for gardeners.
**3. *Controlled Environment:* The plastic bottle creates a mini greenhouse effect, maintaining humidity and warmth, which are crucial for successful rooting.
**4. *Easy to Implement:* This method is simple and requires minimal equipment, making it accessible to gardeners of all skill levels.
Materials Needed
Before you start, gather the following materials:
- Healthy rose cuttings (from a mature rose plant)
- Clean plastic bottles (such as soda or water bottles)
- Potting mix (preferably a well-draining mix like peat moss and perlite)
- Scissors or a utility knife
- A watering can or spray bottle
- A sunny location or grow lights
Step-by-Step Guide
1. Prepare the Cuttings
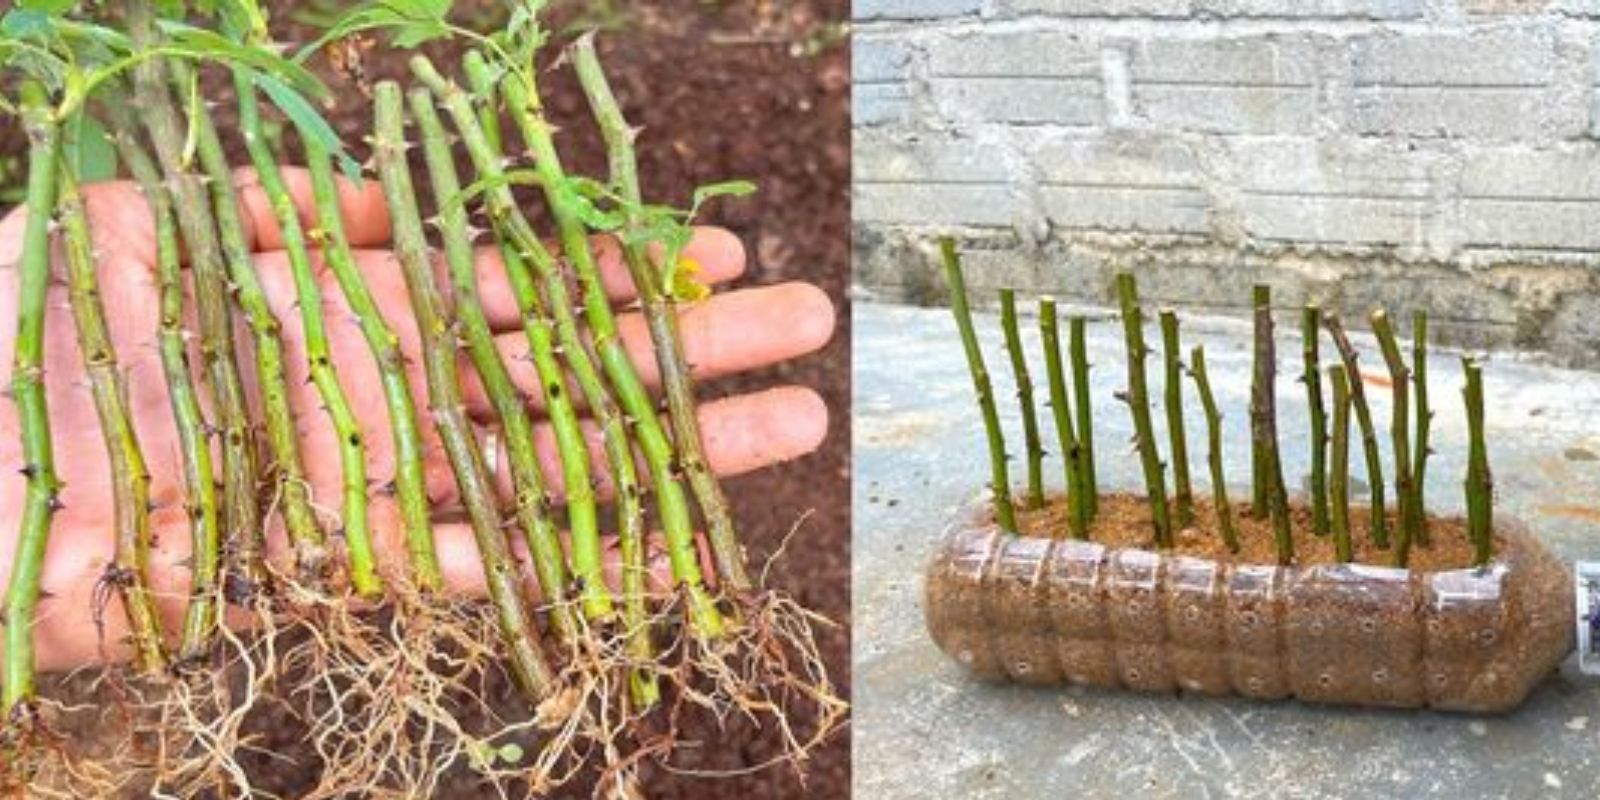
- Select and Cut: Choose healthy rose stems from a mature plant. Each cutting should be about 6-8 inches long, with at least one or two sets of leaves and nodes (the small bumps where leaves or branches grow).
- Trim and Prepare: Remove any flowers or buds from the cutting, as these can drain energy from the plant. Trim the cutting just below a node, and make a diagonal cut to increase the surface area for rooting.
- Optional Treatment: Some gardeners choose to dip the cut end of the cutting in rooting hormone to encourage faster root development, but this step is optional.
2. Prepare the Plastic Bottles
- Clean the Bottles: Wash the plastic bottles thoroughly to remove any residue or labels. Let them dry completely before use.
- Cut the Bottles: Use scissors or a utility knife to cut the bottles in half. The top half will act as a cover, while the bottom half will hold the potting mix. You can also make drainage holes in the bottom of the bottle if you prefer.
- Create the Greenhouse Effect: The top half of the bottle will serve as a mini greenhouse. You can leave the cap on or off depending on the level of humidity you need to maintain.
3. Plant the Cuttings
- Fill with Potting Mix: Add a well-draining potting mix to the bottom half of the plastic bottle. A mix of peat moss and perlite is ideal for providing good aeration and drainage.
- Insert the Cuttings: Make a small hole in the soil with a stick or pencil, then gently insert the rose cuttings. Firm the soil around the cuttings to ensure they are stable.
- Water Lightly: Water the potting mix lightly to moisten it. Avoid overwatering, as this can lead to root rot. Use a watering can with a fine spout or a spray bottle to apply water gently.
4. Create Humidity
- Cover with Plastic: Place the top half of the plastic bottle over the cuttings to create a greenhouse effect. This will help retain moisture and create a humid environment that promotes rooting.
- Monitor and Adjust: Check the cuttings regularly to ensure they are not too moist or too dry. Adjust the bottle cover as needed to maintain the right level of humidity.
5. Provide Light and Temperature
- Positioning: Place the bottles in a sunny location with indirect light. Direct sunlight can be too intense and may overheat the cuttings inside the bottle.
- Temperature: Maintain a warm temperature, ideally between 65°F and 75°F (18°C to 24°C). If necessary, use grow lights to provide consistent light and warmth.
6. Monitor Growth and Transplant
- Check for Roots: After a few weeks, gently check the cuttings for root development. You can do this by carefully lifting a cutting out of the soil. If you see roots, the cutting is ready to be transplanted.
- Transplanting: Once the cuttings have developed a healthy root system, carefully remove them from the plastic bottles and transplant them into larger pots or directly into your garden. Ensure that the new location has well-draining soil and adequate sunlight.
Tips for Success
- Use Clean Tools: Always use clean and sharp tools to prevent introducing diseases or pathogens.
- Be Patient: Rooting can take several weeks, so be patient and continue to care for the cuttings as they develop.
- Maintain Humidity: Ensure that the mini greenhouse effect is effective by keeping an eye on humidity levels. Adjust the bottle cover if needed.
- Keep Records: Keep track of the different rose varieties you are propagating and any specific care instructions for each type.
Conclusion
Growing roses from cuttings in plastic bottles is an innovative and practical method that combines sustainability with effective plant care. By repurposing plastic bottles into mini greenhouses, you can create an ideal environment for rose cuttings to root and thrive. This approach not only helps reduce plastic waste but also provides a cost-effective and accessible way to expand your rose garden.
With the simple steps outlined in this article, you can successfully propagate roses and enjoy the satisfaction of growing beautiful plants from scratch. So, gather your materials, get creative with your plastic bottles, and start your rose propagation journey today. Happy gardening and happy recycling! 🌹🌿