
Peanuts are not just a delicious snack; they are also a fun and rewarding crop to grow at home, even in limited spaces. Imagine biting into a handful of fresh peanuts you’ve nurtured from seed to harvest. Plus, growing peanuts in recycled plastic containers is an eco-friendly way to garden while minimizing waste. This article will guide you through the process of growing peanuts at home, offering step-by-step instructions, tips for success, and insights into the benefits of this gardening technique.
Understanding Peanuts
Before we dive into the specifics of growing peanuts, it’s essential to understand a bit about the plant itself. Peanuts (Arachis hypogaea) are legumes, not true nuts. They thrive in warm climates and require a long growing season, typically about 4 to 5 months. While most people think of peanuts as a staple in southern cooking, they can be grown successfully in various regions, especially when planted in containers.
Benefits of Growing Peanuts in Containers
- Space Efficiency: Container gardening is ideal for those with limited space, such as apartments or small backyards. Peanuts can thrive in containers, allowing you to enjoy gardening even without a traditional garden bed.
- Waste Reduction: Using recycled plastic containers helps reduce environmental waste. Instead of discarding old containers, you can repurpose them for gardening, contributing to a more sustainable lifestyle.
- Control Over Soil Quality: Growing peanuts in containers gives you control over the soil conditions. You can create the perfect soil mix for your peanuts, ensuring they have the nutrients they need to thrive.
- Pest Management: Container gardening can help reduce pest problems. It’s easier to monitor plants for pests and diseases when they are in containers, and you can move them if necessary.
- Mobility: If you need to relocate your plants for more sunlight or shelter from bad weather, it’s much easier to move a container than to dig up plants in the ground.
Step-by-Step Guide to Growing Peanuts in Recycled Plastic Containers
Step 1: Gather Your Materials
Before starting your peanut garden, gather the necessary materials:
- Recycled Plastic Containers: Look for containers that are at least 12 inches deep and have drainage holes. Containers such as old buckets, large yogurt tubs, or plastic storage bins work well.
- Peanut Seeds: Purchase raw, unsalted peanuts, preferably those labeled for planting, as they are untreated and will germinate effectively.
- Soil Mix: Create a well-draining soil mix using equal parts potting soil, compost, and sand to ensure good aeration and drainage.
- Watering Can: A can or hose for watering your plants.
- Fertilizer: An organic fertilizer high in potassium, which is beneficial for peanuts.
Step 2: Prepare the Containers
- Clean Your Containers: Ensure that your recycled plastic containers are clean to prevent any diseases that might affect your peanuts. Rinse them thoroughly and let them dry.
- Add Drainage Holes: If your containers don’t have drainage holes, use a drill or sharp tool to create several holes at the bottom. Proper drainage is crucial to prevent root rot.
Step 3: Create the Soil Mix
Mix together equal parts of potting soil, compost, and sand in a wheelbarrow or large bucket. This blend will provide the necessary nutrients while ensuring proper drainage for your peanuts.
Step 4: Plant the Peanuts
- Sow the Seeds: Plant the peanut seeds about 2 inches deep in the soil. Space them 6-8 inches apart. You can plant multiple seeds in one container, depending on its size, but avoid overcrowding to ensure adequate growth.
- Water the Seeds: After planting, water the soil gently to settle it around the seeds. Be careful not to saturate the soil; it should be moist but not soggy.
Step 5: Sunlight and Temperature
- Ideal Conditions: Peanuts require full sunlight, so place your containers in a location that receives at least 6-8 hours of direct sunlight daily. If you live in a cooler climate, consider starting your peanuts indoors and transferring them outside when the weather warms up.
- Temperature: Peanuts thrive in warm temperatures, ideally between 70°F and 90°F (21°C to 32°C). Ensure your containers are in a warm spot to promote healthy growth.
Step 6: Watering and Care
- Watering Routine: Keep the soil consistently moist but not waterlogged. Water the plants regularly, especially during dry spells. A good rule of thumb is to water when the top inch of soil feels dry.
- Mulching: Consider adding a layer of mulch around the plants to retain moisture, suppress weeds, and regulate soil temperature.
Step 7: Fertilization
- Feed Your Plants: Use an organic fertilizer high in potassium about 4-6 weeks after planting. Follow the package instructions for application rates. This will promote healthy growth and robust peanut production.
Step 8: Watch for Growth
- Germination: Peanuts typically germinate within 7-10 days. You’ll see green sprouts emerge from the soil.
- Supporting Growth: As the plants grow, they may need some support, especially in windy conditions. You can stake them or gently tie them to a support structure.
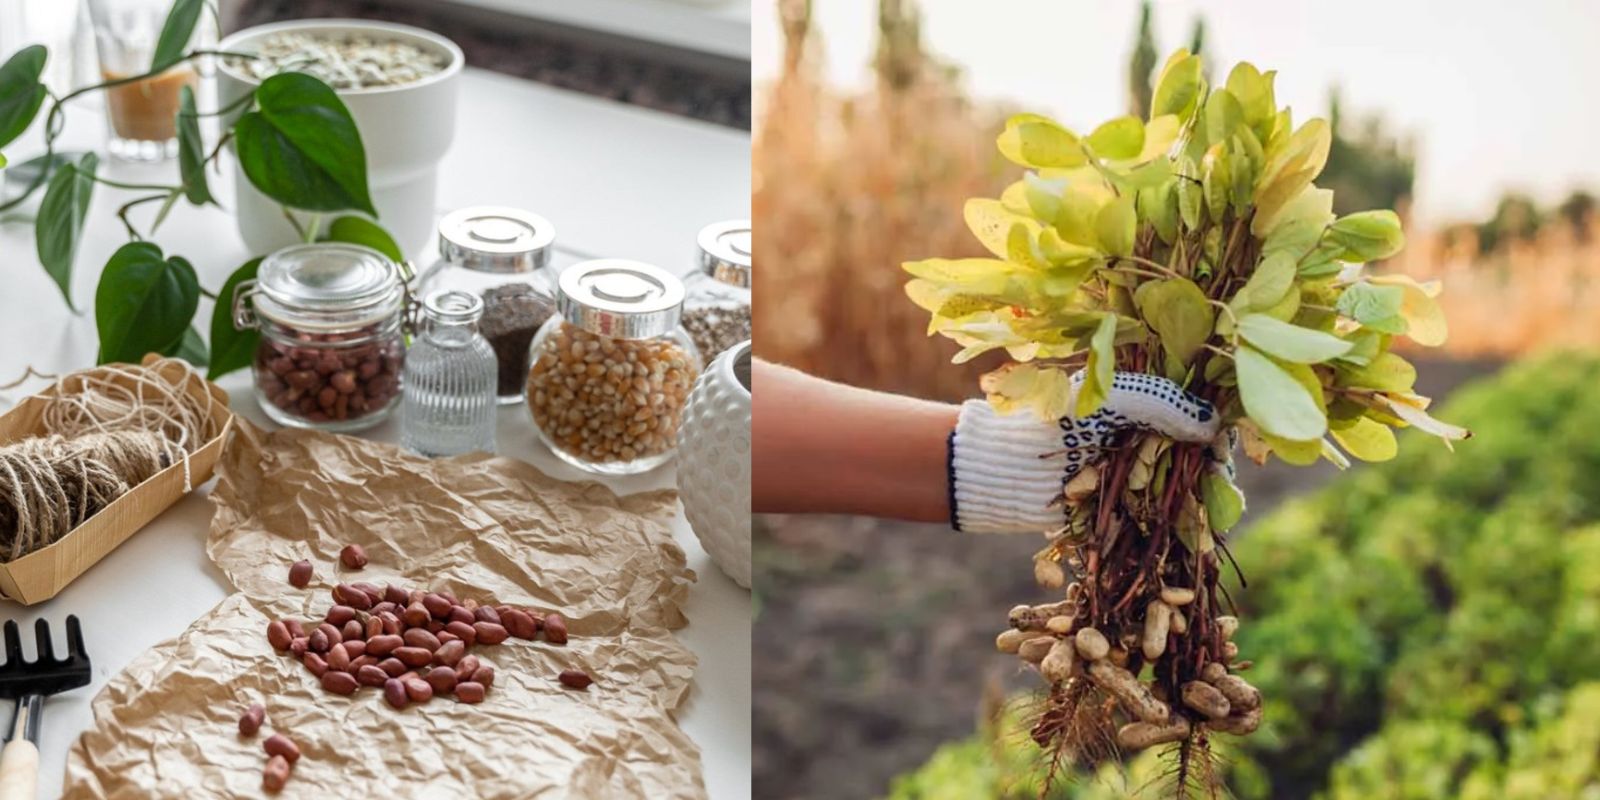
Step 9: Harvesting Peanuts
- Timing: After about 4-5 months, your peanuts will be ready to harvest. Look for yellowing leaves and a wilting appearance as indicators that it’s time to dig them up.
- Harvesting Process: Carefully dig around the base of the plant with a garden fork or spade, being cautious not to damage the peanut pods. Gently lift the plant out of the soil.
- Cleaning: Shake off excess soil and hang the plants upside down in a cool, dry place to cure for a couple of weeks.
Step 10: Storing and Enjoying Your Peanuts
- Once the peanuts are fully dried, you can store them in an airtight container in a cool, dark place. Enjoy your homegrown peanuts as a snack, in recipes, or as a tasty addition to various dishes!
Common Challenges and Solutions
- Pest Management: Keep an eye out for pests such as aphids and spider mites. If you notice any issues, treat them with insecticidal soap or neem oil.
- Disease Prevention: Avoid overwatering, as this can lead to root rot. Ensure good drainage and avoid planting peanuts in the same container year after year to reduce disease risks.
- Nutrient Deficiency: If your plants show yellowing leaves, it may indicate a nutrient deficiency. Supplement with a balanced fertilizer as needed.
Conclusion
Growing peanuts in recycled plastic containers is a sustainable, rewarding endeavor that allows you to enjoy fresh, homegrown peanuts right from your garden. By following the steps outlined in this guide, you can cultivate healthy plants, contribute to waste reduction, and enjoy the satisfaction of harvesting your own peanuts. So, grab your recycled containers and start your peanut-growing journey today! Remember to share your success using hashtags like #PeanutGrowing #ContainerGardening #SustainableLiving #GardenGoals. Happy gardening!