
Introduction:
Ginger, known for its distinctive flavor and numerous health benefits, is a staple in kitchens worldwide. While it is commonly available in stores, growing your own ginger at home can be a gratifying and sustainable endeavor. Whether you have a spacious garden or just a small balcony, cultivating ginger in pots or containers is an accessible project that can yield fresh, aromatic ginger rhizomes. This guide will provide you with detailed steps and tips to grow ginger successfully in pots or containers.
Why Grow Ginger at Home?
Growing ginger at home has several advantages:
- Freshness: Homegrown ginger is fresher and more flavorful than store-bought varieties.
- Health Benefits: Ginger is known for its anti-inflammatory, digestive, and immune-boosting properties.
- Sustainability: Growing your own ginger reduces the need for packaging and transportation, making it an eco-friendly choice.
- Convenience: Having fresh ginger at your fingertips can enhance your culinary creations and natural remedies.
Selecting the Right Container:
Ginger grows best in wide, shallow containers that provide ample space for the rhizomes to spread horizontally. Here’s what to consider when choosing a container:
- Size: A pot that is at least 12 inches wide and 12 inches deep is ideal. This size allows the ginger roots to expand and develop.
- Material: Choose containers made of plastic, clay, or ceramic. Ensure that the pot has adequate drainage holes to prevent waterlogging.
- Placement: Opt for a container that can be easily moved to take advantage of seasonal changes in light and temperature.
Preparing the Soil:
Ginger thrives in rich, well-draining soil. To prepare the ideal growing medium, follow these steps:
- Potting Mix: Use a high-quality potting mix that contains organic matter. You can make your own mix by combining equal parts of garden soil, compost, and sand or perlite to improve drainage.
- Fertilizer: Incorporate a slow-release, balanced fertilizer into the potting mix to provide essential nutrients. Ginger benefits from regular feeding throughout the growing season.
- Soil pH: Ensure the soil pH is slightly acidic to neutral (between 5.5 and 6.5). You can test the soil pH and adjust it if necessary by adding lime to raise the pH or sulfur to lower it.
Planting the Ginger Rhizome:
Planting ginger is simple and involves using a piece of ginger root, known as a rhizome. Here’s how to plant it:
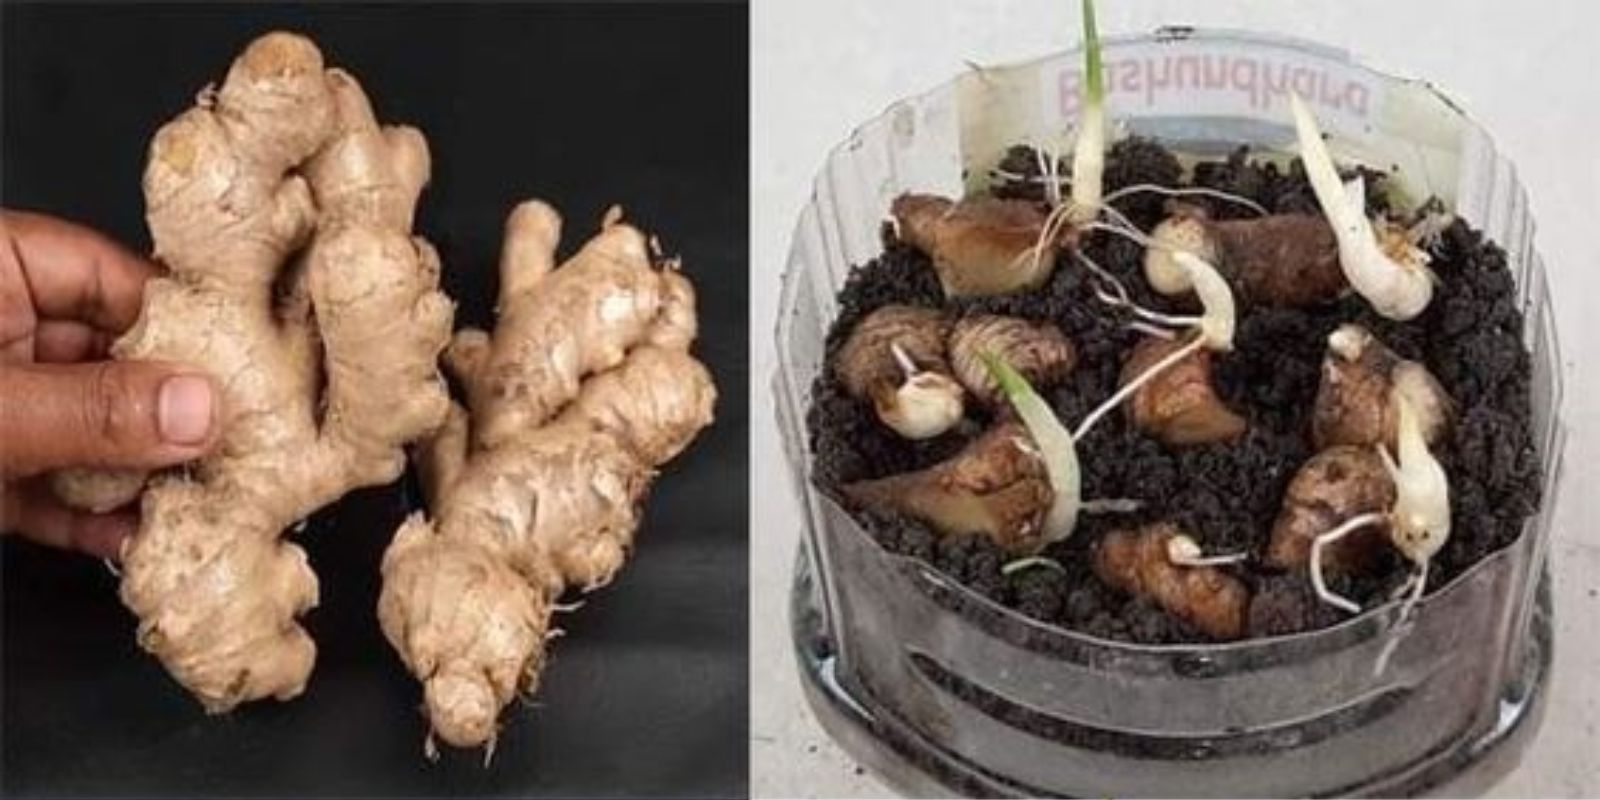
- Select a Healthy Rhizome: Choose a fresh, plump ginger rhizome with visible buds or “eyes.” The rhizome should be free of mold or signs of decay.
- Soak the Rhizome: Soak the ginger rhizome in water overnight to encourage sprouting.
- Cut and Prepare: If the rhizome is large, cut it into smaller pieces, ensuring each piece has at least one bud.
- Planting Depth: Place the rhizome pieces horizontally in the potting mix, with the buds facing up. Cover them with 1-2 inches of soil.
- Spacing: Leave at least 6 inches of space between each rhizome piece to allow for growth.
Watering and Care:
Proper watering and care are crucial for healthy ginger growth. Follow these guidelines:
- Watering: Keep the soil consistently moist but not waterlogged. Water the ginger whenever the top inch of soil feels dry. Be careful not to overwater, as ginger is susceptible to root rot.
- Humidity: Ginger thrives in humid conditions. If you live in a dry climate, increase humidity by misting the plants regularly or placing a humidity tray nearby.
- Temperature: Ginger prefers warm temperatures between 70°F and 90°F (21°C to 32°C). Avoid exposing the plant to temperatures below 50°F (10°C), as cold weather can stunt its growth.
Light Requirements:
Ginger grows best in partial shade, making it suitable for indoor cultivation or shaded outdoor areas. Here’s how to provide the right light conditions:
- Indirect Light: Place the pot in a location that receives bright, indirect light. Avoid direct sunlight, which can scorch the leaves.
- Indoor Growing: If growing ginger indoors, place the pot near a sunny window with filtered light. You can also use grow lights to supplement natural light during the winter months or in low-light conditions.
Fertilizing Ginger:
Regular feeding helps ginger plants thrive. Here’s how to fertilize your ginger:
- Initial Fertilization: Mix a balanced, slow-release fertilizer into the potting mix at planting time.
- Monthly Feeding: During the growing season, feed the ginger every 4-6 weeks with a liquid fertilizer high in potassium. This encourages robust root development and healthy growth.
- Organic Options: Consider using organic fertilizers such as compost tea or fish emulsion to provide nutrients in a natural form.
Pest and Disease Management:
Ginger is relatively pest-resistant, but it can still be affected by some common pests and diseases. Here’s how to manage them:
- Pests: Watch out for aphids, spider mites, and fungal gnats. Use organic insecticides or natural predators to control pest populations. Regularly inspect your plants and remove any affected leaves or stems.
- Diseases: Ginger can be susceptible to fungal diseases such as root rot and leaf spot. To prevent these, ensure proper drainage and avoid overwatering. Remove any diseased plant parts promptly to prevent the spread of infection.
Harvesting Ginger:
Ginger is typically ready to harvest 8-10 months after planting, although you can harvest small pieces of the rhizome earlier if needed. Here’s how to harvest ginger:
- Signs of Maturity: The leaves will start to yellow and die back when the ginger is mature. This usually happens in late summer or early fall.
- Harvesting: Gently dig around the base of the plant to expose the rhizomes. Carefully lift the rhizomes out of the soil, being mindful not to damage them.
- Cleaning and Storing: Rinse the harvested ginger to remove soil. Allow it to air dry before storing it in a cool, dry place. Fresh ginger can be stored in the refrigerator for up to several weeks, or you can freeze it for longer storage.
Propagating Ginger:
After harvesting, you can propagate new ginger plants from the rhizomes. Here’s how:
- Select Healthy Rhizomes: Choose rhizomes with visible buds for propagation.
- Prepare and Plant: Follow the same planting steps as described earlier to start new ginger plants from the harvested rhizomes.
Conclusion:
Growing ginger in pots or containers is a rewarding project that allows you to enjoy fresh, aromatic ginger year-round. By following these steps and providing proper care, you can successfully cultivate ginger at home, whether you have a large garden or a small balcony. Ready to elevate your culinary and medicinal creations with homegrown ginger? Start planting today and experience the satisfaction of harvesting your own ginger! 🌿🍽️