
Garlic, a culinary staple known for its robust flavor and health benefits, has captivated the taste buds of cultures worldwide. But did you know that you can easily grow garlic in water using simple plastic bottles? This eco-friendly method not only allows you to enjoy fresh garlic at your fingertips but also offers a rewarding gardening experience. In this comprehensive guide, we’ll delve into the step-by-step process of growing garlic in water using 0.5 plastic bottles, the benefits of this method, and tips for ensuring a successful harvest.
Why Grow Garlic in Water?
Growing garlic in water has several advantages:
- Space-Saving: Ideal for those with limited outdoor gardening space.
- Visual Appeal: Watching the growth process can be an intriguing experience, making it a fun project for kids and adults alike.
- Minimal Investment: You don’t need expensive gardening tools or equipment—just a plastic bottle and some garlic.
- Quick Results: Garlic cloves sprout quickly, providing a sense of accomplishment in just a few weeks.
- Health Benefits: Freshly grown garlic is packed with antioxidants and health-promoting compounds, making it a nutritious addition to your meals.
What You’ll Need
Before you get started, gather the following materials:
- Garlic Bulbs: Opt for organic, fresh garlic for the best results.
- Plastic Bottles: 0.5-liter plastic bottles are perfect for this project. You can recycle used bottles to make it more eco-friendly.
- Water: Clean, preferably distilled water is ideal for promoting healthy growth.
- Scissors or a Knife: To cut the plastic bottles.
- Sunny Spot: A windowsill or a location that receives at least 6 hours of sunlight daily.
Step-by-Step Guide to Growing Garlic in Water
Step 1: Choose Your Garlic
Start with fresh garlic bulbs. You can either use garlic cloves from the grocery store or buy organic garlic from a garden center. Choose bulbs that are firm, without any mold or soft spots.
Step 2: Prepare the Bottles
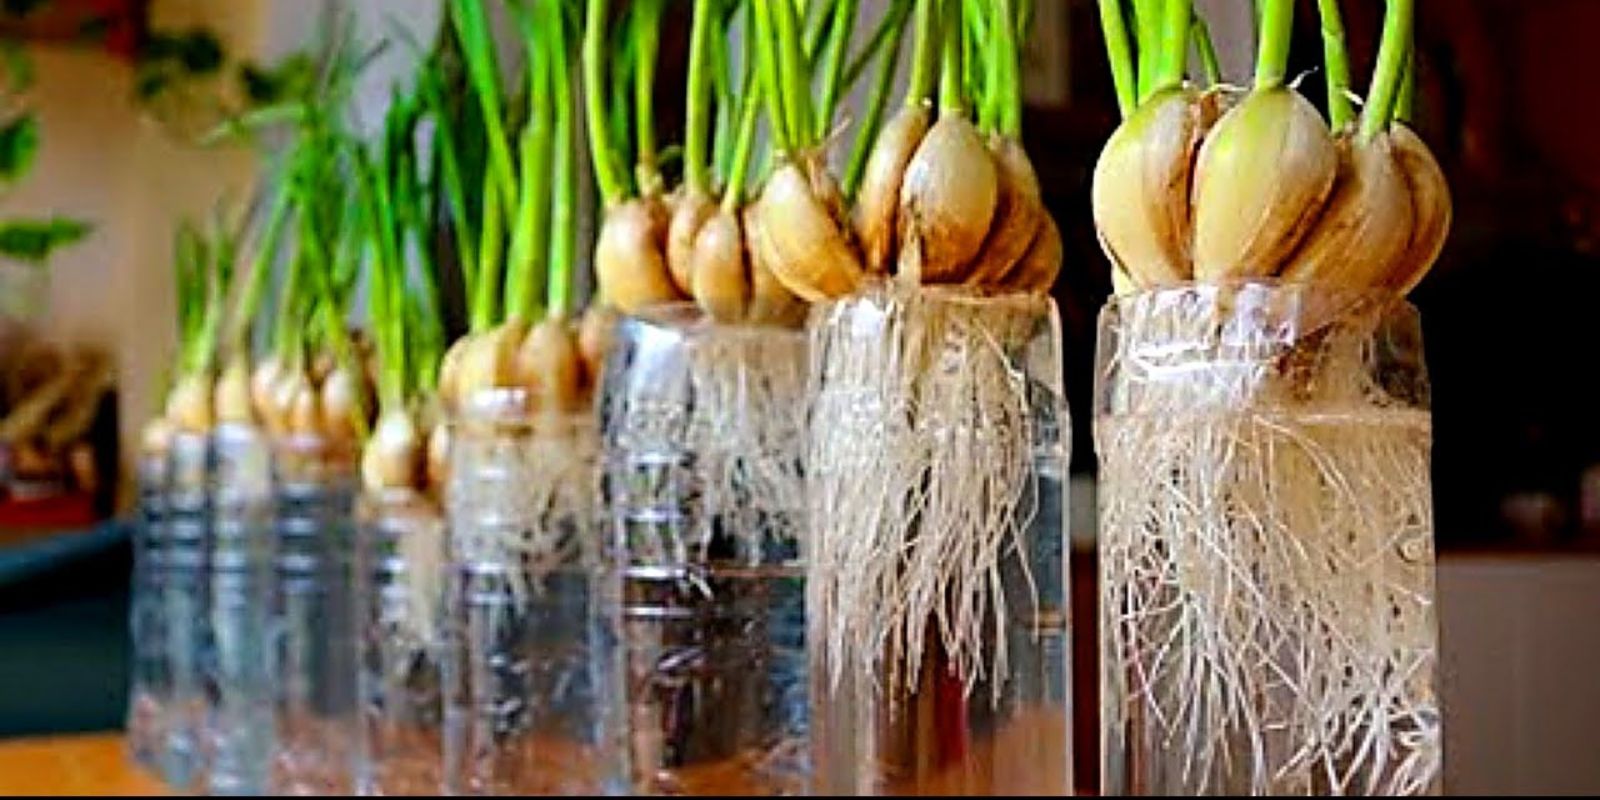
- Cut the Bottle: Using scissors or a knife, carefully cut the plastic bottle in half. The top half will serve as the holder for the garlic, while the bottom half will act as a reservoir for water.
- Shape the Bottles: Ensure the cut is smooth to avoid sharp edges. If desired, you can use sandpaper to smooth any rough areas.
Step 3: Add Water
- Fill the Bottom Half: Pour water into the bottom half of the bottle until it reaches about one inch in height.
- Ensure Stability: Place the bottom half on a stable surface, as it will hold the weight of the top half and garlic.
Step 4: Insert Garlic Cloves
- Prepare the Cloves: Separate the garlic bulb into individual cloves. Choose healthy cloves that are firm and plump.
- Position the Cloves: Take the top half of the bottle and place one or two garlic cloves inside, cut side down. Ensure the cloves do not touch the water; they should be suspended above it.
Step 5: Provide Sunlight
- Choose a Sunny Location: Place your garlic bottle in a bright spot, such as a windowsill or a countertop that receives ample sunlight.
- Monitor Light Exposure: Garlic needs at least 6 hours of sunlight daily to thrive. If the light is insufficient, consider using grow lights.
Step 6: Change Water Regularly
- Refresh Water: Every few days, replace the water in the bottom half of the bottle to keep it clean and oxygenated. Stale water can lead to mold and root rot.
- Check for Growth: As you change the water, keep an eye on the garlic cloves. You’ll start to see roots and shoots emerging in about 1 to 2 weeks.
Step 7: Watch Them Grow
- Growth Progress: Within a week or two, you’ll notice green shoots sprouting from the garlic cloves. This is an exciting stage, as it signifies that your garlic is thriving!
- Care for the Shoots: You can allow the shoots to grow longer or snip them off to use in cooking. The green shoots have a mild garlic flavor and can be used in salads, soups, and garnishes.
Step 8: Harvest Time
- Decide When to Harvest: If you’re growing the garlic for the shoots, they can be snipped off when they reach a height of about 6-8 inches.
- Using the Garlic: The garlic cloves can also be harvested when they have sprouted roots and shoots. If you want to plant them in soil, carefully remove the cloves and transplant them into a pot with soil, watering them lightly.
- Enjoy Fresh Garlic: Whether you choose to harvest the shoots or plant them in soil for future garlic bulbs, you can enjoy the benefits of fresh garlic in your cooking.
Tips for Success
- Use High-Quality Garlic: The success of your garlic-growing adventure largely depends on the quality of the cloves you choose. Organic garlic tends to produce better results.
- Don’t Overwater: Ensure that the cloves do not sit in water, as excess moisture can lead to rot. Maintaining the right water level is key.
- Be Patient: While garlic can grow quickly in water, it may take a few weeks for visible growth. Patience is essential!
- Experiment with Varieties: Different types of garlic, such as hardneck or softneck varieties, can yield different results. Try various types to see which you prefer.
- Involve Others: Gardening can be a fun and educational activity for children and friends. Involve them in the process and share the joy of growing garlic together!
Conclusion
Growing garlic in water using plastic bottles is a simple and rewarding process that allows you to enjoy fresh garlic right at home. This eco-friendly method requires minimal space and investment, making it accessible to everyone, from seasoned gardeners to beginners. With just a few steps, you can witness the fascinating growth of garlic cloves and enjoy the benefits of homegrown produce.
So why wait? Start your garlic-growing journey today, and embrace the joy of nurturing plants in your own home. Not only will you enhance your culinary creations, but you’ll also contribute to a more sustainable lifestyle. Happy gardening! 🧄🌱
Engage with the Community
Have you tried growing garlic in water? Share your experiences, tips, and photos with us! Join the conversation using hashtags like #GarlicInWater, #HomeGardening, #SustainableLiving, and #PlantLove. Let’s inspire each other to grow and thrive together!