
Introduction
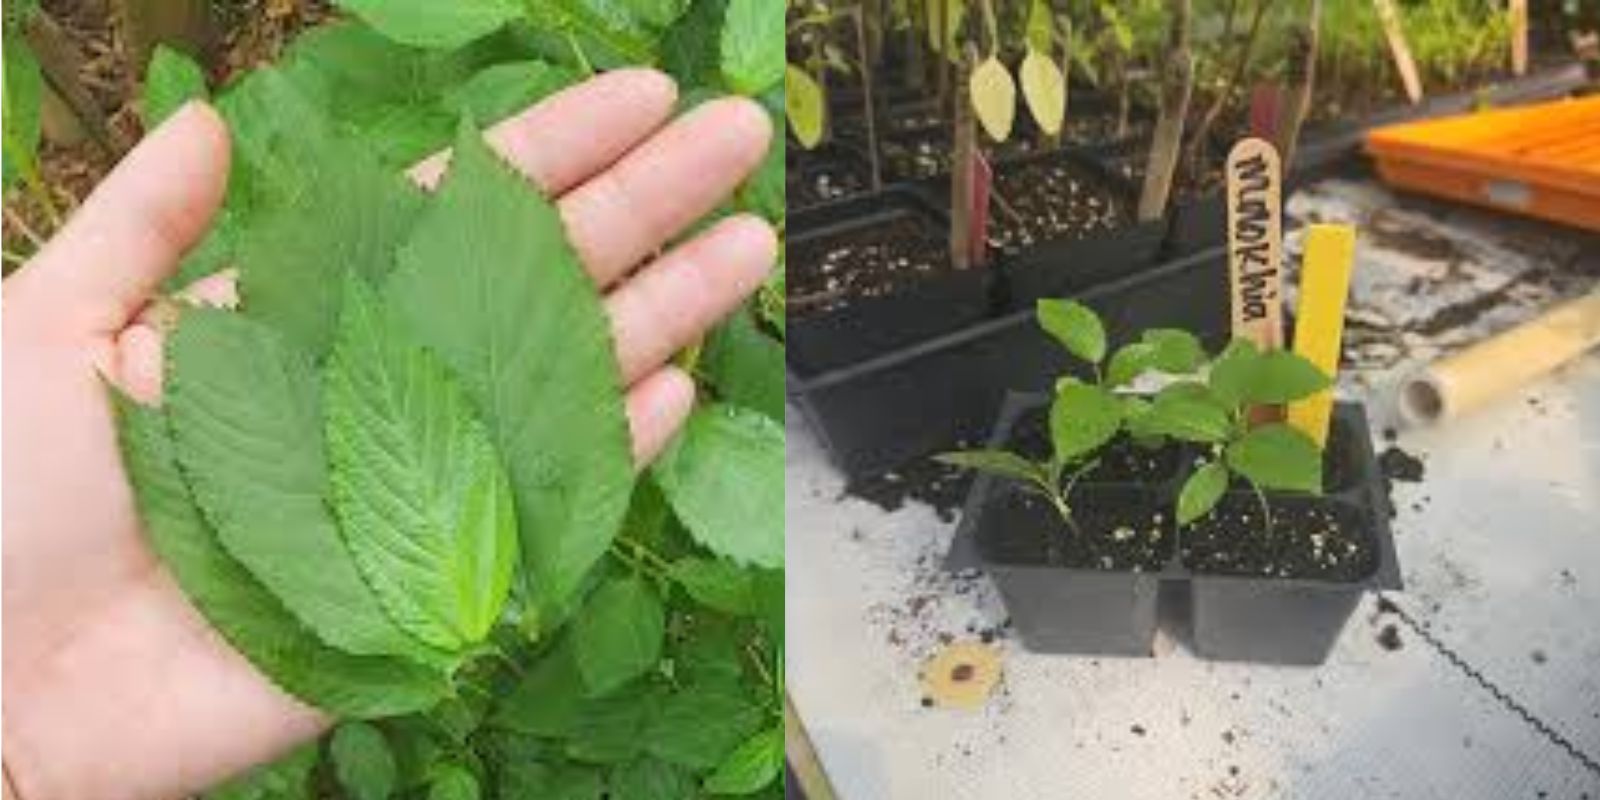
Egyptian spinach, known as molokhia or jute mallow, is a leafy green plant packed with nutrients, including vitamins A, C, and K, as well as calcium and fiber. This popular ingredient in Middle Eastern and North African cuisine is used in soups, stews, and other traditional dishes for its unique flavor and health benefits. In addition to being nutritious, molokhia is relatively easy to grow, making it a wonderful addition to any home garden.
This guide will take you through everything you need to know to grow, care for, and use molokhia, so you can enjoy fresh, homegrown Egyptian spinach in your cooking.
Why Grow Molokhia?
Before we dive into the steps, here’s a quick look at why molokhia is worth the effort:
- Nutrient-Dense: Rich in vitamins and minerals, especially vitamins A, C, and K.
- Heat Tolerant: Thrives in warm and sunny conditions, perfect for summer gardens.
- High Yield: A small planting area can yield a generous amount of leaves over time.
- Versatile Ingredient: Used in a variety of dishes, from soups to stews and even salads.
Steps to Growing Molokhia
Step 1: Selecting Seeds
Start by obtaining molokhia seeds from a reliable source, either online or from local garden centers specializing in exotic vegetables. Molokhia has two main types—jute and corchorus—and both varieties are used in similar ways. Choose the type that best suits your garden’s conditions.
Step 2: Preparing the Soil
Molokhia grows best in fertile, well-draining soil with a neutral pH (around 6-7). Prepare your planting bed by loosening the soil to a depth of about 12 inches, removing rocks and weeds, and mixing in compost or well-rotted manure to enrich the soil.
- Tip: Adding organic matter like compost will improve soil structure, making it easier for molokhia roots to grow and access nutrients.
Step 3: Sowing Seeds
Egyptian spinach seeds are best planted directly outdoors after the last frost, as the plant thrives in warm temperatures.
- Sow seeds about ¼ inch deep and space them around 6-8 inches apart to allow for good airflow as they grow.
- Water the seeds immediately after planting to encourage germination.
- If planting in rows, space each row at least 12 inches apart.
Pro Tip: Soak the seeds in warm water for 24 hours before planting. This helps speed up germination and ensures more consistent sprouting.
Step 4: Watering and Sunlight
Molokhia requires full sunlight, ideally six to eight hours a day, to grow well. Water the plants consistently to keep the soil moist but avoid waterlogging, as this can lead to root rot.
- Watering Tip: Water the plants in the morning to reduce the risk of fungal diseases, and adjust your watering schedule based on weather conditions—molokhia can tolerate short dry spells, but the best growth occurs with consistent moisture.
Step 5: Thinning and Weeding
As the seedlings grow, thin them out to ensure each plant has room to reach its full potential. Remove the weaker seedlings, leaving the strongest ones spaced about 6-8 inches apart.
- Weeding Tip: Keep the area around the plants free from weeds, as they compete with molokhia for nutrients and water. Regularly removing weeds helps maintain soil health and reduces pest risks.
Step 6: Fertilizing
While molokhia isn’t a heavy feeder, applying a balanced fertilizer (like a 10-10-10 formula) every few weeks can support healthy growth. However, avoid over-fertilizing, as too much nitrogen can encourage leafy growth at the expense of flavor and texture.
- Organic Option: Use compost tea or fish emulsion as a natural alternative to chemical fertilizers.
Caring for Molokhia Plants
Pest and Disease Management
Molokhia is relatively resilient to most garden pests and diseases, but it can still encounter a few issues, especially in humid climates. Here are some of the most common challenges and how to tackle them:
- Aphids: These tiny insects can be managed by spraying the plants with a solution of water and mild soap. Neem oil is another effective, natural solution.
- Leaf Spots and Mildew: Prevent these fungal diseases by ensuring good air circulation around plants and watering at the base rather than overhead.
Pruning and Harvesting
Molokhia is a high-yielding plant, and regular harvesting can promote bushier growth:
- Prune regularly by cutting the top few inches of the plant, encouraging it to branch out and produce more leaves.
- Harvesting: Begin harvesting when the plants reach about 12-18 inches tall. Use scissors or garden shears to cut the leaves, leaving enough of the plant so it can continue growing.
Harvesting Tip: Harvest molokhia leaves in the morning for the best flavor and tenderness.
Growing Molokhia in Containers
If you don’t have space in the garden, molokhia can also be grown in containers:
- Use a pot at least 12 inches deep with good drainage.
- Fill with quality potting mix, enriched with organic matter.
- Place the container in a sunny spot and water consistently, as container plants dry out faster than garden plants.
Using and Storing Molokhia
Once harvested, molokhia can be used fresh, dried, or frozen. Here are some ideas for incorporating it into your meals and preserving it for later:
In the Kitchen
- Molokhia Soup: One of the most popular ways to prepare molokhia is in a hearty, flavorful soup with garlic, coriander, and chicken or meat stock.
- Stews: Add fresh or dried molokhia leaves to stews and sauces for added flavor and nutrition.
- Salads: Young molokhia leaves can be eaten raw, adding a mild, slightly spinach-like flavor to salads.
Preserving Molokhia
- Freezing: Blanch the leaves briefly in boiling water, then transfer them to an ice bath. Once cooled, pat them dry, place in airtight containers, and freeze.
- Drying: Molokhia leaves can also be dried by air-drying or using a food dehydrator. Store dried leaves in an airtight container and use as needed.
Health Benefits of Molokhia
In addition to its culinary uses, molokhia offers several health benefits:
- Rich in Antioxidants: Molokhia is high in antioxidants, which help combat oxidative stress and may reduce the risk of chronic diseases.
- Supports Digestive Health: The fiber in molokhia aids digestion and can promote regularity.
- Promotes Bone Health: Its high calcium content supports strong bones and teeth.
- Boosts Immunity: With a generous amount of vitamin C, molokhia can support immune function and overall wellness.
Conclusion
Growing Egyptian spinach, or molokhia, in your garden is a rewarding experience that offers a continuous supply of nutritious greens. By following the simple steps outlined in this guide—from preparing the soil and sowing seeds to regular care and harvesting—you can cultivate this unique plant with ease. Whether you’re an experienced gardener or a beginner, molokhia is a wonderful addition to your garden that brings variety, nutrition, and a touch of exotic flavor to your kitchen.
Get started with growing molokhia and enjoy the bounty of fresh, healthy greens right at home! Have questions or tips of your own? Share your molokhia-growing experiences with us!
#MolokhiaMagic #GrowYourOwn #GardenGreens #HealthyEating #EgyptianSpinach