
Introduction
Chayote (Sechium edule), also known as vegetable pear or mirliton, is a unique, versatile fruit that belongs to the gourd family. Native to Central America, this delightful plant is cherished for its crisp texture and mild flavor, making it an excellent addition to a variety of dishes. Whether stir-fried, steamed, or eaten raw in salads, chayote can elevate your culinary creations.
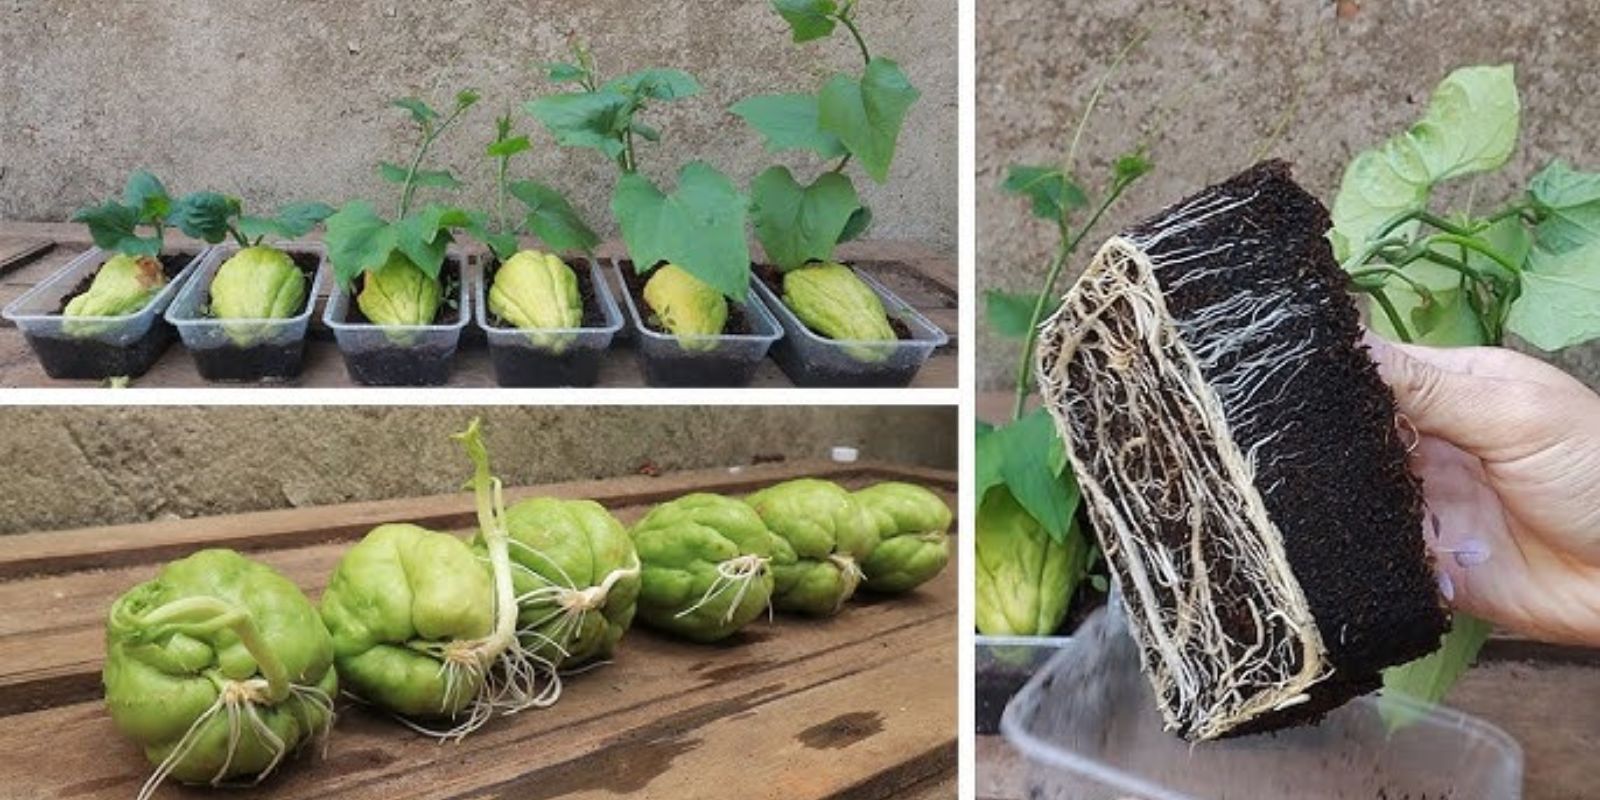
If you’re looking to expand your gardening repertoire, growing chayote in containers offers a practical and rewarding experience, especially for those with limited garden space. This guide will take you through the essential steps to successfully cultivate chayote in containers, ensuring a bountiful and flavorful harvest.
Why Grow Chayote in Containers?
- Space-Saving: Container gardening is perfect for urban settings or small yards where traditional gardening may not be feasible.
- Mobility: Containers can be moved to optimize sunlight exposure, making it easier to manage growing conditions.
- Easier Pest Control: It’s simpler to monitor and manage pests in a container environment.
- Soil Management: You have full control over the soil quality and nutrients, which can lead to healthier plants.
Getting Started: Supplies You’ll Need
Before diving into the growing process, gather the necessary materials:
- Containers: Opt for large pots or containers (at least 5 gallons) made of plastic, ceramic, or wood.
- Potting Mix: A high-quality, well-draining potting mix.
- Chayote Seeds or Fruits: Purchase healthy chayote from a garden center or grocery store.
- Support Structure: A trellis or stakes to support the climbing vines.
- Watering Can or Hose: For maintaining moisture levels.
- Organic Fertilizer: A balanced fertilizer for nurturing plant growth.
Step-by-Step Guide to Growing Chayote in Containers
Step 1: Selecting the Right Container
Choosing the right container is crucial for successful chayote growth. A container with a capacity of at least 5 gallons provides ample space for root development. Ensure the container has adequate drainage holes to prevent water from accumulating, which can lead to root rot.
Step 2: Choosing Healthy Chayote
When selecting chayote, look for firm, unblemished fruits. If you’re using seeds, you can propagate chayote from the fruit itself. Ensure you choose organic chayote if possible, as it often yields better results.
Step 3: Preparing the Soil
Fill the container with a well-draining potting mix. You can create your own mix by combining equal parts of compost, peat moss, and perlite or vermiculite. This mixture will provide the necessary nutrients while ensuring proper drainage.
Step 4: Planting the Chayote
Plant the chayote in the prepared container by burying it about 3 inches deep, ensuring the growth point (the sprout) is facing upwards. If you’re planting multiple chayote, space them about 18 to 24 inches apart to allow for their expansive growth.
Step 5: Providing Support
Chayote is a vigorous climbing plant that will need support as it grows. Install a trellis or cage next to the container for the vines to climb. This not only helps in managing space but also promotes better air circulation, reducing the risk of disease.
Step 6: Watering Your Chayote
Chayote plants thrive in consistently moist soil. Water them regularly, especially during hot weather, ensuring the soil does not dry out completely. However, be cautious not to overwater, as this can lead to root rot. A good rule of thumb is to check the top inch of soil; if it feels dry, it’s time to water.
Step 7: Fertilization
Chayote benefits from regular feeding. Use a balanced organic fertilizer every four to six weeks throughout the growing season. Look for fertilizers that are higher in potassium and phosphorus, which promote flower and fruit development.
Step 8: Sunlight Requirements
Chayote requires full sun to thrive. Position your containers where they can receive at least 6 to 8 hours of direct sunlight each day. If you live in a region with extremely high temperatures, consider providing partial shade during the hottest parts of the day.
Step 9: Pest Management
Keep an eye out for common pests such as aphids, spider mites, and whiteflies. Regularly inspect your plants for any signs of infestations. Use organic pest control methods, such as insecticidal soap or neem oil, to manage any outbreaks effectively.
Step 10: Harvesting Your Chayote
Chayote typically takes between 100 to 150 days to mature. You can harvest the fruits when they are still firm and tender, usually around 3 to 6 inches in size. Use scissors or a sharp knife to cut them from the vine to avoid damaging the plant.
Step 11: Enjoying Your Harvest
Once harvested, store chayote in a cool, dry place. It can be enjoyed raw, sautéed, steamed, or added to soups and casseroles. Chayote is low in calories and rich in vitamins and minerals, making it a nutritious addition to your diet.
Troubleshooting Common Issues
- Yellowing Leaves: This may indicate overwatering or nutrient deficiencies. Check your watering schedule and consider applying fertilizer.
- Poor Fruit Development: Ensure your plants receive enough sunlight and nutrients. If the plants are too crowded, consider thinning them out.
- Pest Infestations: If you notice pests, act quickly using organic pest control solutions to minimize damage.
Conclusion
Growing chayote in containers is a fulfilling and enjoyable gardening experience that can yield delicious results. With proper care and attention, you can easily cultivate this unique vegetable at home, enjoying fresh and flavorful harvests throughout the season. Whether you are a seasoned gardener or a beginner, chayote offers an exciting opportunity to expand your gardening skills and enjoy the fruits of your labor. So grab your containers, seeds, and a little sunshine, and embark on your chayote-growing adventure today!
Feel free to let me know if you need any changes or additional sections!