
Cardamom, often referred to as the “queen of spices,” is a prized culinary herb known for its unique flavor and aroma. Originating from the lush rainforests of India and Southeast Asia, this versatile spice is used in a variety of dishes, from savory curries to sweet desserts. Beyond its culinary uses, cardamom plants are beautiful additions to home gardens, featuring lush green leaves and fragrant flowers. Growing cardamom from seed can be a rewarding endeavor for both novice and experienced gardeners. This guide will take you through the steps of growing cardamom at home, from seed selection to harvesting.
Understanding Cardamom
Before diving into the growing process, it’s essential to understand the two main types of cardamom:
- Green Cardamom (Elettaria cardamomum): This is the most commonly used form, prized for its sweet, aromatic pods.
- Black Cardamom (Amomum subulatum): Often used in savory dishes, it has a smoky flavor and a robust aroma.
For home gardening, green cardamom is the preferred choice due to its culinary versatility and easier cultivation.
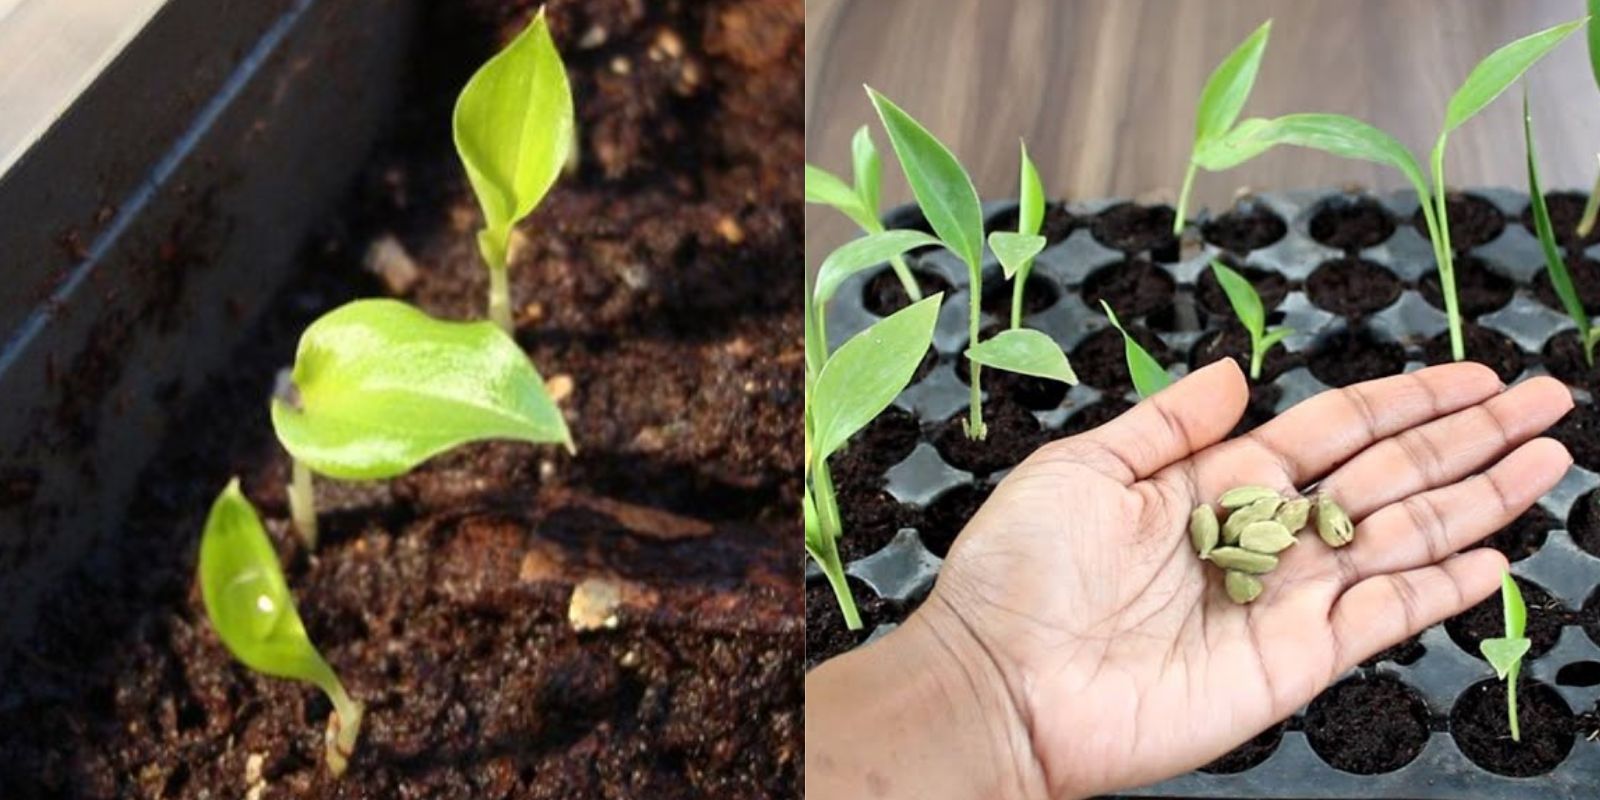
Choosing the Right Seeds
The first step in growing cardamom is selecting high-quality seeds. Here are some tips:
- Source: Look for fresh cardamom seeds from local garden centers, nurseries, or reputable online stores. Avoid older seeds, as they may have a lower germination rate.
- Quality: Choose organic seeds whenever possible to ensure they are free from pesticides and chemicals.
Preparing for Planting
- Soil Requirements: Cardamom thrives in rich, loamy soil that is well-draining yet retains some moisture. A pH level between 6.0 and 6.5 is ideal. You can create a suitable mix by combining:
- 50% potting soil
- 30% compost
- 20% perlite or sand (for drainage)
- Containers: If you’re growing cardamom in pots, choose containers that are at least 12 inches deep and wide to accommodate the root system. Ensure that they have drainage holes to prevent waterlogging.
Germination Process
- Soaking Seeds: Soak the cardamom seeds in warm water for 24 hours before planting. This helps to soften the seed coat, improving germination rates.
- Planting Seeds: Fill your pots with the prepared soil mixture. Plant the soaked seeds about ½ inch deep and cover them lightly with soil.
- Watering: Water the soil gently but thoroughly after planting. Keep the soil consistently moist but not soggy, as excess water can lead to rot.
- Creating the Right Environment: Cardamom prefers warm and humid conditions. Here are some tips to maintain the ideal environment:
- Temperature: Aim for temperatures between 70-85°F (21-29°C).
- Humidity: To increase humidity, you can cover the pots with a clear plastic wrap or place them in a greenhouse. Alternatively, you can mist the plants daily.
Caring for Cardamom Plants
As your cardamom seeds germinate and grow, proper care is crucial for their development. Here are some essential care tips:
- Light Requirements: Cardamom prefers indirect sunlight. If you are growing indoors, place your pots near a window with filtered light. If growing outdoors, provide partial shade to protect the plants from harsh sunlight.
- Watering: Continue to water your plants regularly, keeping the soil moist but not waterlogged. Cardamom plants benefit from consistent moisture, especially during their growing season.
- Fertilizing: Fertilize your cardamom plants every four to six weeks using a balanced, organic fertilizer. This helps to provide the necessary nutrients for healthy growth.
- Pruning: As your cardamom plants grow, occasional pruning may be necessary to remove any dead or damaged leaves. This promotes better airflow and overall plant health.
Transplanting Seedlings
Once your cardamom seedlings are about 4-6 inches tall and have several leaves, it’s time to transplant them. Follow these steps:
- Timing: Transplant when the seedlings are strong enough to handle the stress of being moved. This typically occurs around 8-12 weeks after planting.
- Spacing: If planting in a garden bed, ensure there is enough space between each plant. Ideally, space them about 3 feet apart to allow for their mature size.
- Planting: Dig holes in the garden or larger pots that are at least 12 inches deep. Carefully remove the seedlings from their pots, keeping the root ball intact, and place them in the holes. Cover with soil and water thoroughly.
Harvesting Cardamom
After approximately 2-3 years of growth, you may start seeing cardamom pods forming. Here’s how to know when to harvest:
- Maturity: Harvest the pods when they are green and plump. They should be firm to the touch and have a sweet aroma.
- Cutting: Use scissors or pruning shears to cut the entire stem with the pods attached.
- Drying: Spread the harvested pods in a single layer on a tray and allow them to dry in a cool, shaded area for about a week. This will enhance their flavor and aroma.
- Storing: Once fully dried, store the pods in an airtight container away from light to preserve their freshness.
Troubleshooting Common Issues
While growing cardamom is relatively straightforward, you may encounter a few challenges. Here are some common issues and their solutions:
- Pests: Watch for pests such as aphids and spider mites. Use insecticidal soap or neem oil to treat infestations.
- Diseases: Overwatering can lead to root rot. Ensure good drainage and allow the topsoil to dry out slightly between waterings.
- Poor Growth: If your plants are not thriving, check for insufficient light, nutrient deficiencies, or pest infestations.
Final Thoughts
Growing cardamom at home can be a fulfilling and enriching experience. Not only will you have access to fresh cardamom pods for your culinary creations, but you’ll also enjoy the beauty and fragrance of the plants in your garden or home. With patience and care, you can cultivate a thriving cardamom plant that will reward you for years to come.
Get Started Today!
Don’t wait any longer to embark on your cardamom-growing journey. With the right seeds, soil, and care, you’ll be well on your way to enjoying the delicious rewards of your labor.
Join the conversation with these hashtags: