
In an era where sustainability is more critical than ever, finding ways to grow food at home not only promotes a healthier lifestyle but also helps the environment. One of the most rewarding and economical ways to cultivate your own food is by growing apple saplings from scraps. This method not only minimizes waste but also allows you to experience the joy of nurturing a plant from seed to fruit-bearing tree. In this article, we will guide you through the entire process of growing apple saplings from scraps, turning your kitchen waste into thriving apple trees in just 10 days.
The Beauty of Growing Apple Trees
Apple trees (Malus domestica) are beloved for their delicious fruits, vibrant blossoms, and ability to thrive in various climates. With thousands of apple varieties available, you can grow trees that produce sweet, tart, crisp, or juicy apples tailored to your taste. Additionally, apple trees are relatively easy to grow, making them an excellent choice for beginner gardeners.
Growing apple trees not only benefits you as a gardener but also the environment. Apple trees provide habitats for birds and insects, improve air quality, and contribute to soil health. Furthermore, home-grown apples are fresher and more flavorful than store-bought ones, and you can enjoy the satisfaction of eating fruit from a tree you’ve nurtured yourself.
Understanding the Process
Before diving into the step-by-step guide, it’s essential to understand the basics of seed germination and the importance of starting from scraps. Apples contain seeds that, under the right conditions, can sprout into new apple trees. By collecting seeds from organic apples, you ensure that your saplings will be healthy and robust. This article will focus on utilizing seeds, not only for economic reasons but also to promote sustainable gardening practices.
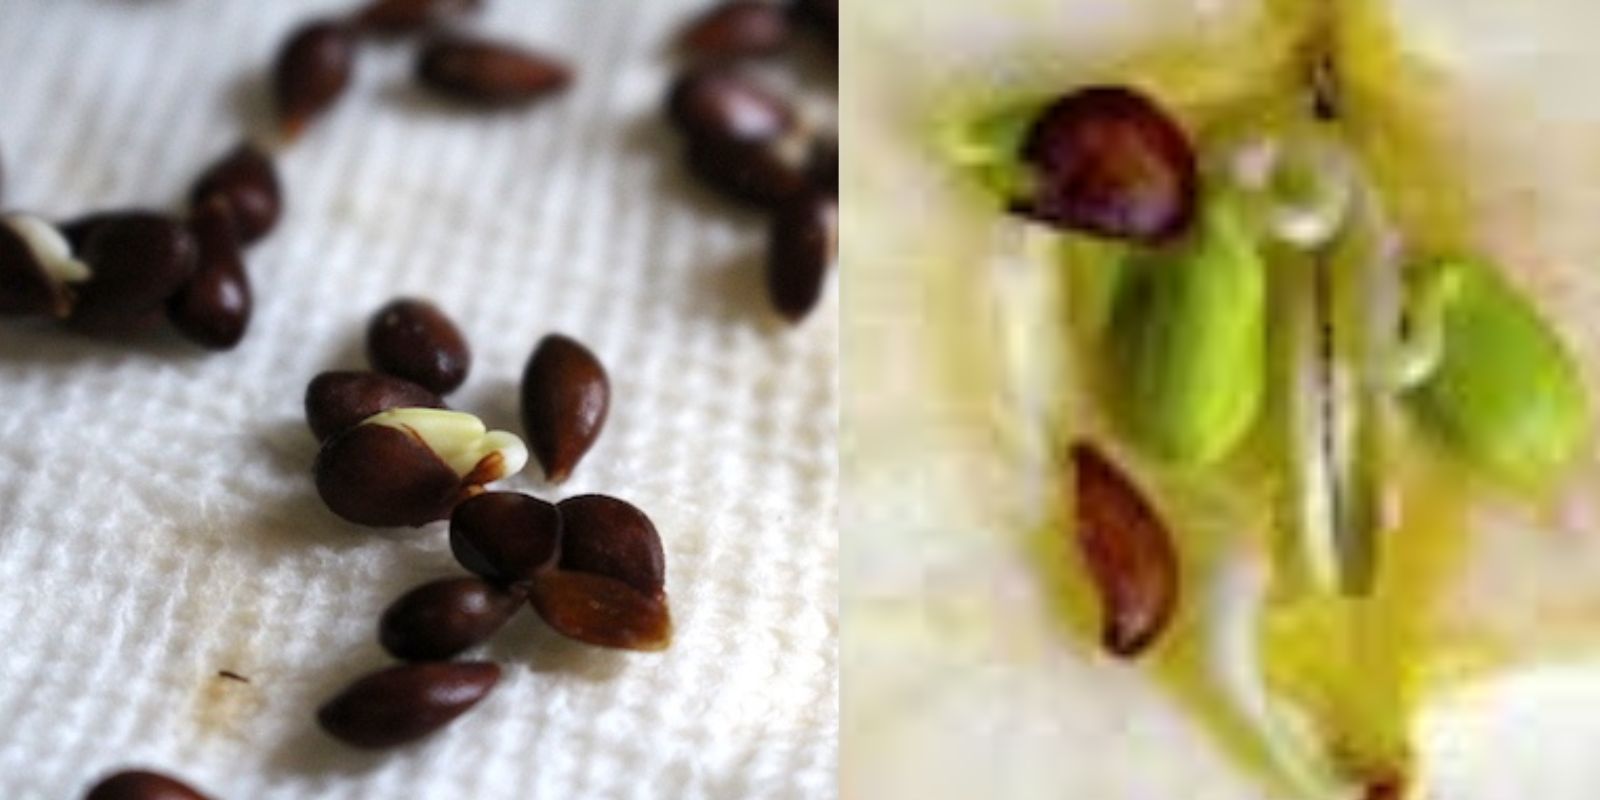
Step 1: Collecting Apple Seeds
The first step in your journey to grow apple saplings is to gather seeds. Start by selecting organic apples from your local grocery store or farmer’s market. Choose a variety that you enjoy, as the type of apple will determine the flavor and quality of the fruit produced by your tree.
Once you’ve selected your apples, slice them open and extract the seeds. Be careful not to damage the seeds during this process. You can collect seeds from multiple apples to increase your chances of success.
Step 2: Cleaning and Drying the Seeds
After extracting the seeds, it’s crucial to clean them thoroughly to remove any fruit residue. Rinse the seeds under running water to wash away any sticky pulp, which can harbor mold and bacteria.
Once cleaned, lay the seeds on a paper towel and pat them dry. Allow the seeds to air dry for a few hours, ensuring they are completely moisture-free before proceeding to the next step.
Step 3: Cold Stratification
Apple seeds require a period of cold stratification to break dormancy and prepare for germination. This simulates winter conditions, prompting the seeds to sprout when exposed to warmth.
To cold stratify your seeds, place the dried seeds in a damp paper towel and wrap them tightly. Then, put the wrapped seeds in a plastic bag and store them in the refrigerator for about seven days. This simple step can significantly increase your germination rates.
Step 4: Preparing the Soil
While the seeds undergo cold stratification, you can prepare the soil for planting. Choose a pot with drainage holes, which will prevent waterlogging and promote healthy root development.
Fill the pot with nutrient-rich potting mix. Look for a blend that includes organic materials like compost or peat moss, as these will provide essential nutrients to your saplings. Ensure the soil is loose and well-aerated to encourage strong root growth.
Step 5: Planting the Seeds
After a week of cold stratification, it’s time to plant the seeds. Remove the seeds from the refrigerator and take them out of the paper towel.
Plant the seeds about half an inch deep in the prepared soil, spacing them at least an inch apart to allow for proper growth. Gently cover the seeds with soil and lightly press down to ensure good contact between the seeds and the soil.
Step 6: Watering Gently
Once the seeds are planted, it’s essential to water them gently. Use a spray bottle or a watering can with a fine nozzle to mist the soil lightly. The goal is to keep the soil moist but not soggy, as overwatering can lead to seed rot.
Monitor the moisture level daily and adjust your watering routine as necessary. Keeping the soil consistently damp is crucial for successful germination.
Step 7: Providing Warmth and Light
For optimal germination, place the pot in a warm location with indirect sunlight. Apple seeds thrive in temperatures between 70°F and 80°F (21°C to 27°C).
If you don’t have a suitable spot in your home, consider using a heat mat or placing the pot near a sunny window. Be mindful of direct sunlight, as it can dry out the soil too quickly.
Step 8: Monitoring Growth
Within 10 days, you should start to see sprouts emerging from the soil. As the seedlings grow, it’s essential to continue monitoring their development.
Ensure they receive adequate light and adjust their position if they begin to lean towards the light source. Rotate the pot occasionally to promote even growth.
Step 9: Transplanting the Saplings
Once your saplings have grown a few inches tall and developed several leaves, it’s time to transplant them into larger pots or directly into your garden.
If you’re transplanting to a garden, choose a sunny location with well-draining soil. If moving to larger pots, select containers that are at least 6 to 8 inches deep to accommodate their growing roots. Gently remove the saplings from their original pot, taking care not to damage the roots, and place them in their new home.
Step 10: Caring for Your Saplings
After transplanting, continue to care for your apple saplings as they grow. Water them regularly, ensuring the soil remains moist but not waterlogged.
As the trees mature, consider applying organic fertilizer to provide additional nutrients. You can also prune the saplings to promote strong branching and healthy growth.
Conclusion
Growing apple saplings from scraps is a rewarding and eco-friendly gardening practice that allows you to cultivate your own fruit trees at home. In just 10 days, you can transform apple seeds into thriving saplings, providing you with the satisfaction of nurturing a plant from start to finish.
Not only do you save money by using scraps, but you also contribute to sustainability by reducing waste and promoting self-sufficiency. So gather your organic apples, follow the steps outlined in this guide, and embark on your journey to grow delicious home-grown apples!
Get Started Today!
Now that you know how to grow apple saplings from scraps, why not give it a try? With a little patience and care, you’ll be rewarded with your very own apple trees, bringing sweetness and beauty to your garden for years to come. 🍏🌱
#AppleSaplings #SustainableGardening #HomeGrown #EcoFriendly #GardeningTips #GrowYourOwnFood #UrbanGardening #FruitTrees